
I got married last week in a small family-only civil ceremony on Jones Island in the San Juan Islands off the coast of Washington. It was perfect! It was really important to both of us to have the things we wanted without breaking the bank. For me, that meant a couple small DIY projects. One of these was the flowers.
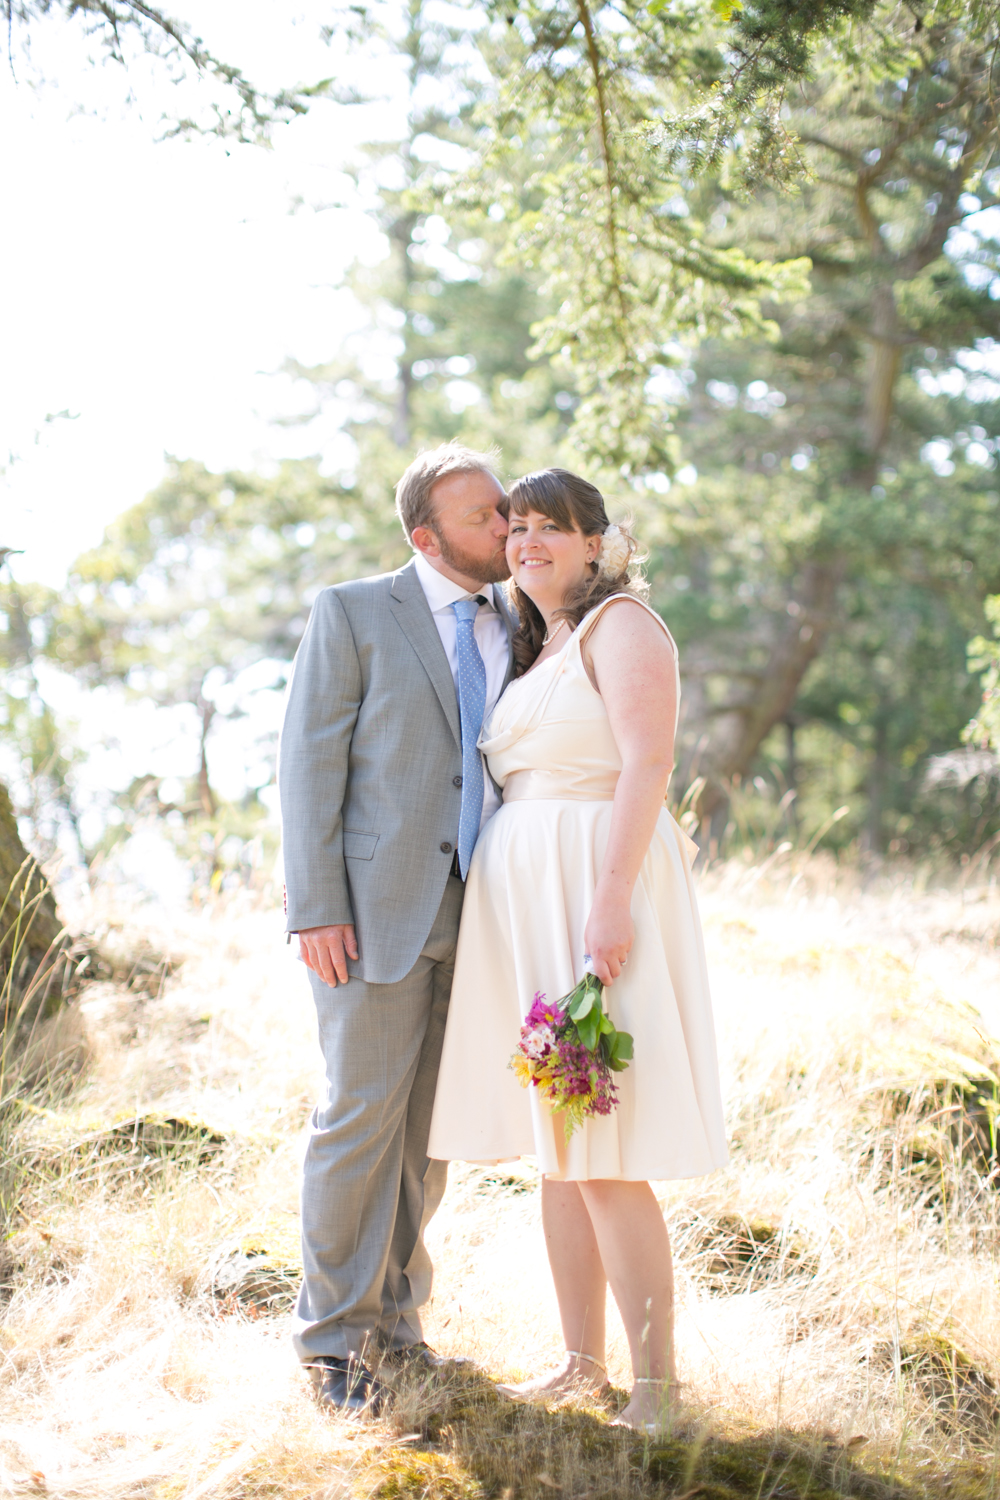
Photo credit: Matthew Land
http://matthewland.com/
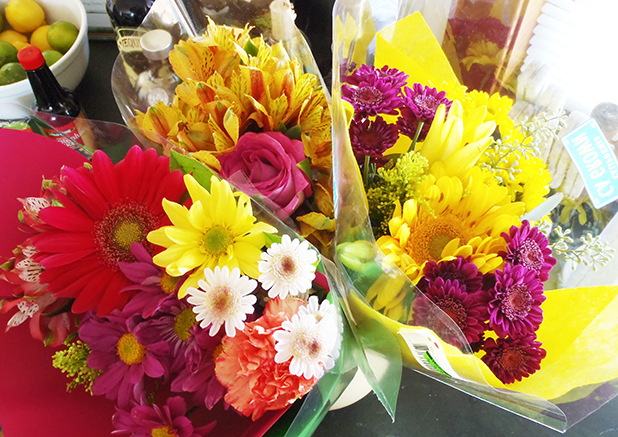
Getting married in such an isolated location puts some limitations on vendor availability. I really just had two florists in town to choose from and at a starting price of $125 for a bridal bouquet, I chose neither! Instead, I bought my wedding flowers from the grocery store!!
I popped into the grocer a couple days before the wedding to scout the flower situation and found out when their shipments of flowers come in so I could buy the freshest flowers with the largest selection. I chose three mixed flower bouquets in a purple and yellow color scheme for a total cost of $28 (that’s $97 savings!).
 Materials list:
2-3 bouquets of flowers
Green florist tape
Straight pins
Elastic bands
Shears/scissors
Ribbon/hankie
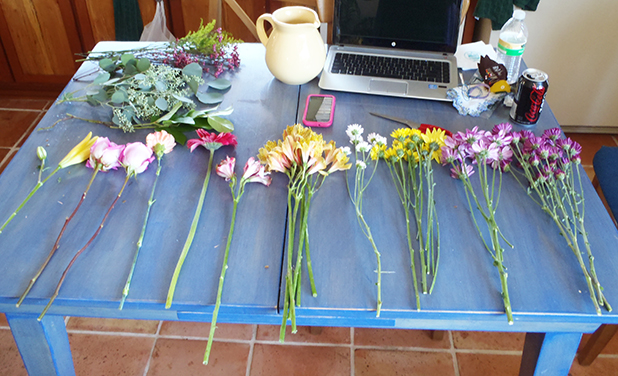
Step 1: Strip your flowers.
While all those leaves and filler bits look great in a bouquet in a vase, they get in the way when trying to construct a bridal bouquet. So before getting started with any arranging, you want to strip your flowers of ALL leaves and organize them by flower type.
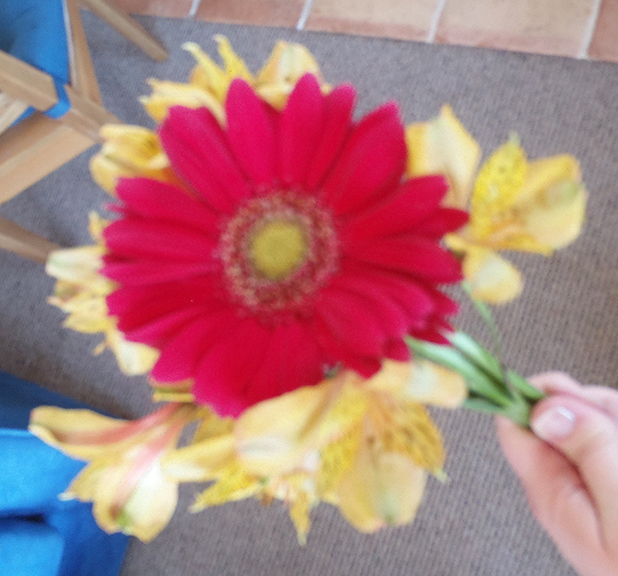
Step 2: Pick your “Show Off” flower.
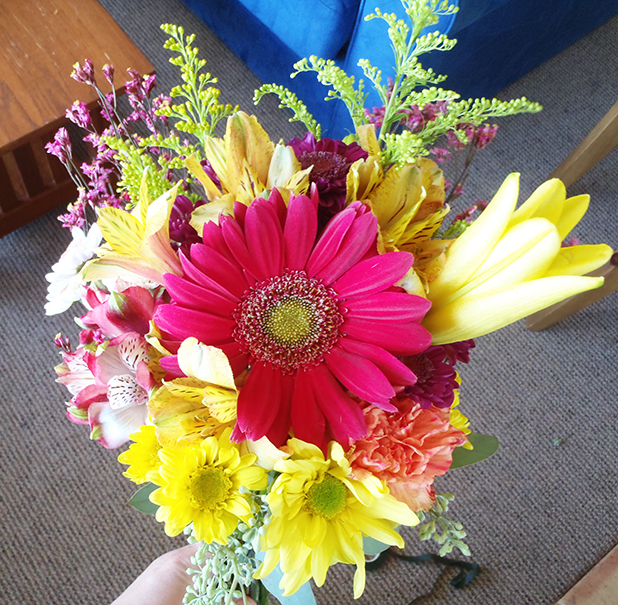
Once you’ve got all your flowers laid out, you’ll want to choose one or two flowers that will be the center of your bouquet. This should be a larger flower and should be your favorite. I chose the Gerbera daisy as the focal point for my bouquet.
Next you want to select a few flowers to surround your center flower. When adding these it’s nice to work in odd numbers and to keep things even. I add three stalks of flowers around the daisy (pardon the blurry photo!).
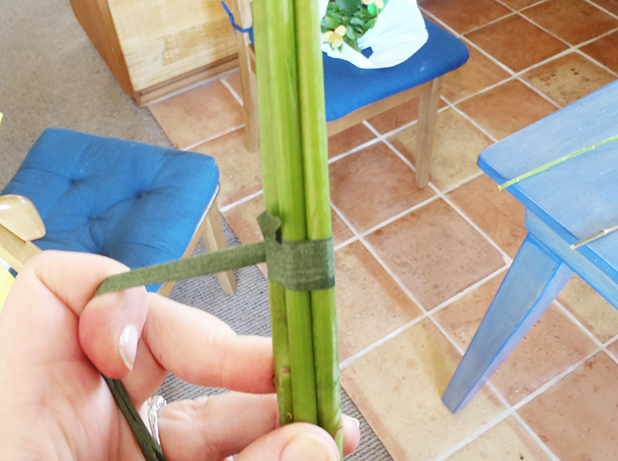
 Step 3: Florist tape.
Take the time to arrange these few center stalks. When you’re satisfied, use florist tape to hold them in place. Florist tape is a stretchy green tape that’s a bit tacky, so when you wrap it around itself it will self-adhere. It’s what boutonnieres are often wrapped in.
Step 4: Add more flowers.
Next you’ll want to add a few more flowers, in the same even manner as above. If you’re going to add odd flowers, try to balance them with an odd flower on either side of the bouquet. Here, I’ve added clusters of purple flowers evenly spaced around the yellow. Secure the stems with more florist tape every four or five stalks.
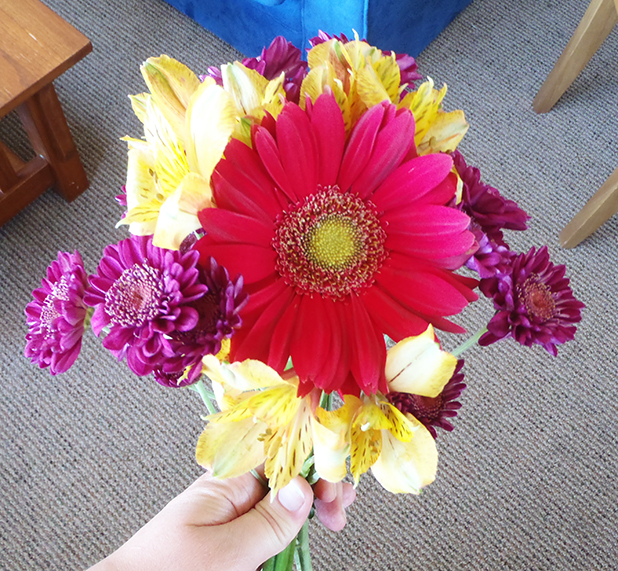 If you’re going to add flowers unevenly, try to balance them. For example, in my bouquet I added a yellow lily and orange carnation to one side, then some white daisies to the other (see finished pictures).
Step 5: Add your “filler” and greenery.
Once you’ve got your bouquet built up a little, but not quite finished, it’s time to add your filler and greenery. I added stalks that stood up straight to the back of the bouquet and added looser more droopy stalks to the front of the bouquet.

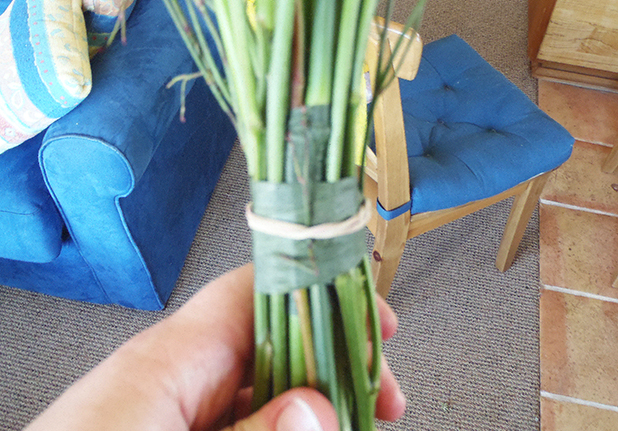
As the bouquet gets larger it gets more difficult to secure the stems with florist tape alone. I wrapped the florist tape with an elastic band when I found it was getting a little unwieldy, just to make sure everything would stay nice and secure.
Step 6: Add finishing flowers.
The final step is adding a few flowers to the outside to fill in the bouquet and to surround the filler and greenery. I just added flowers until I was happy with the size of the bouquet, making sure the central showcase Gerbera daisy was always visible.
For the final step to keep things nice and tight, I secured the florist tape with straight pins.
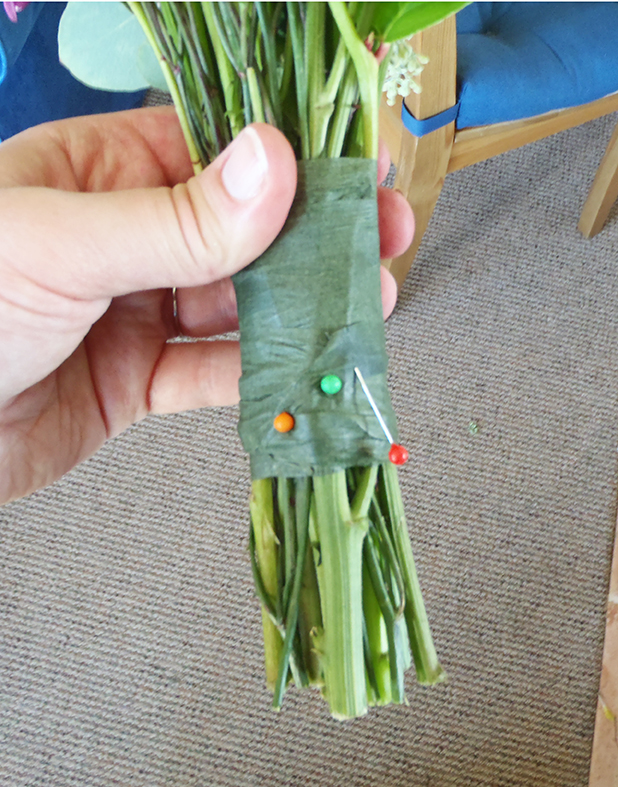
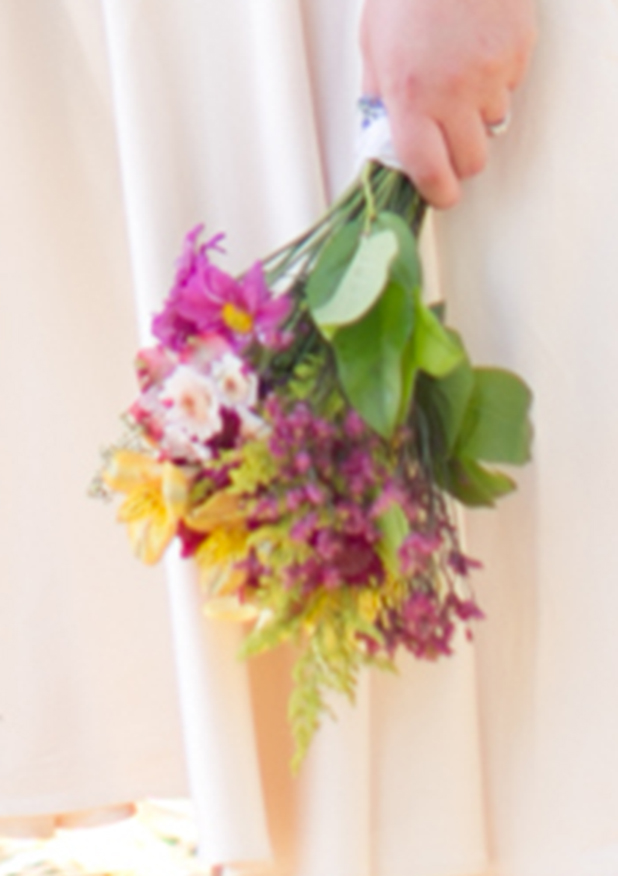
Since the bottom of the bouquet would be visible, I also took the time to give the stems a nice even blunt cut at the bottom. I don’t have any pictures of it, but as a final step I wrapped the bottom of the bouquet in my granny’s handkerchief to cover the florist tape.
And voila! My finished bouquet! (I’m hoping there might be a better picture when we get our photos from the photographer. I’ll update the post if I find a better shot).


Very beautiful, loved the arrangement of colors, thank for the lovely post.
Thank you!!