Category Archives: Patterns and Tutorials

DIY Grill Apron: Tutorial

Crafty Little Secret Tutorial: DIY Grill Apron - www.craftylittlesecret.comWow. Kudos to all you out there who post detailed tutorials regularly. I always forget how long I take to edit all the photos and get the posts up! This one has been in the making for a month….which I guess isn’t so bad.

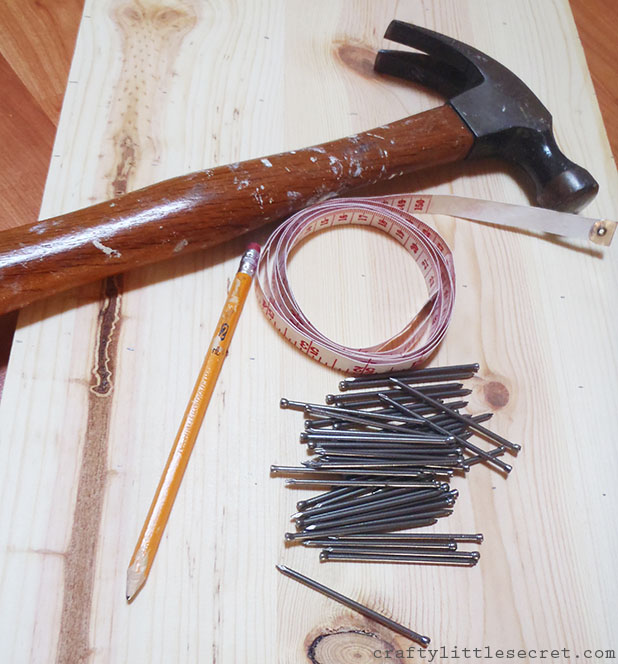
What you’ll need for this project…..
– 1 yard of fun fabric (quilting cotton)***
– 1 yard of backing fabric (like a duck or light denim weight)
– 16/100 denim needle
– matching thread
– chalk
– ruler/measuring tape
– scissors

**** You could actually get away with less depending on which way the pattern runs, but for most patterned quilting cottons, you’ll need the full yard.

Crafty Little Secret - DIY Apron Tutorial - www.craftylittlesecret.com
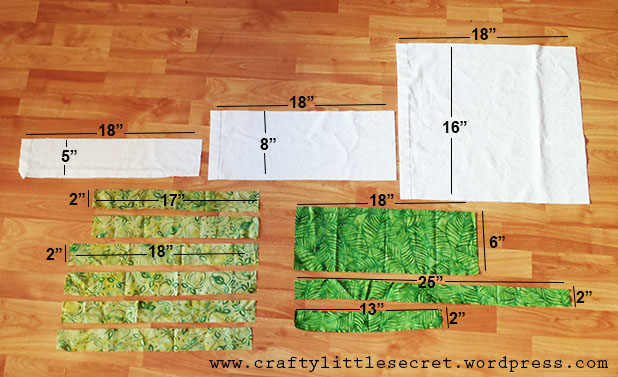
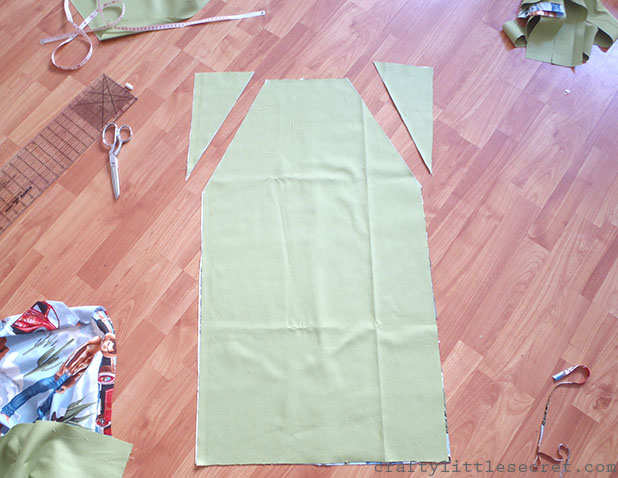
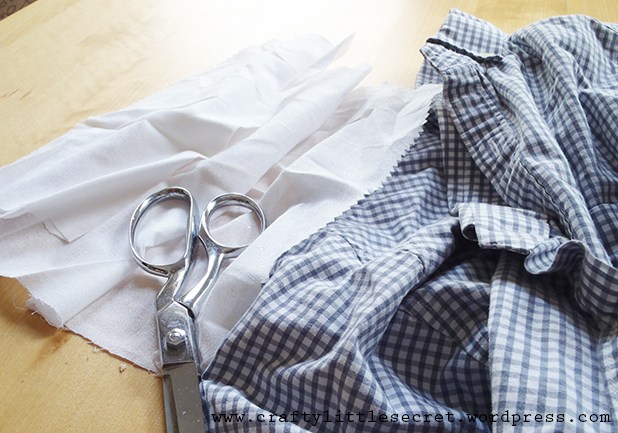
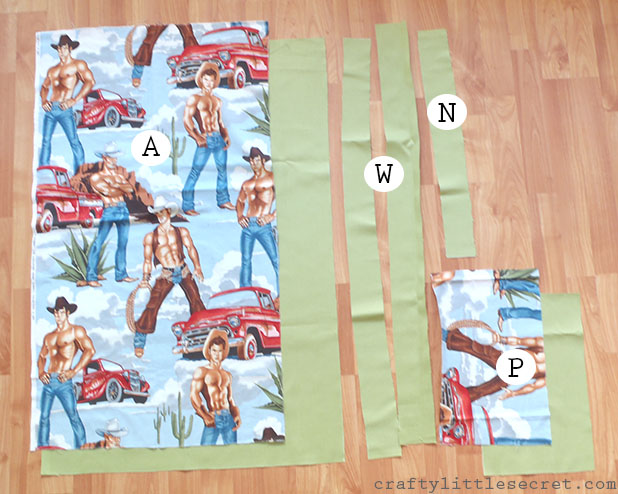
Cut the following pattern pieces:

A (Apron) – 20″x36″
– Cut one of fashion fabric, cut one of backing fabric

P (Pocket) – 14″ x 9″
– Cut one of fashion fabric, cut one of backing fabric (or two backing fabrics if you want a solid pocket)

W (Waist Tie) – 36″ x 3.5″
– Cut two of backing OR fashion fabric

N (Neck Tie) – 24″ x 3.5″
– Cut one of backing OR fashionfabric

Crafty Little Secret - DIY Apron Tutorial - www.craftylittlesecret.com
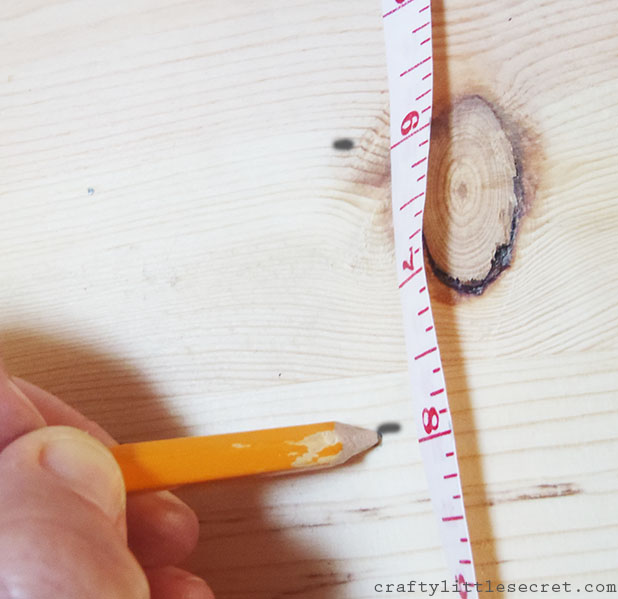
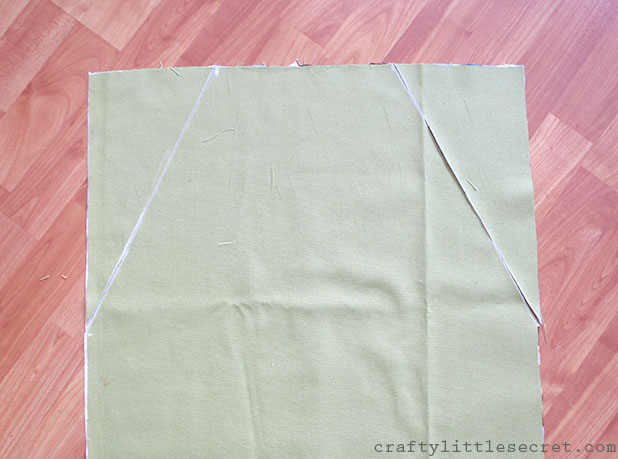
Using chalk, make a tick mark on the apron pattern pieces 15″ down from the corner on the long side, and 6″ from the corner on the short side. Draw a line connecting the two pieces and cut the corners off.

Crafty Little Secret - DIY Apron Tutorial - www.craftylittlesecret.com

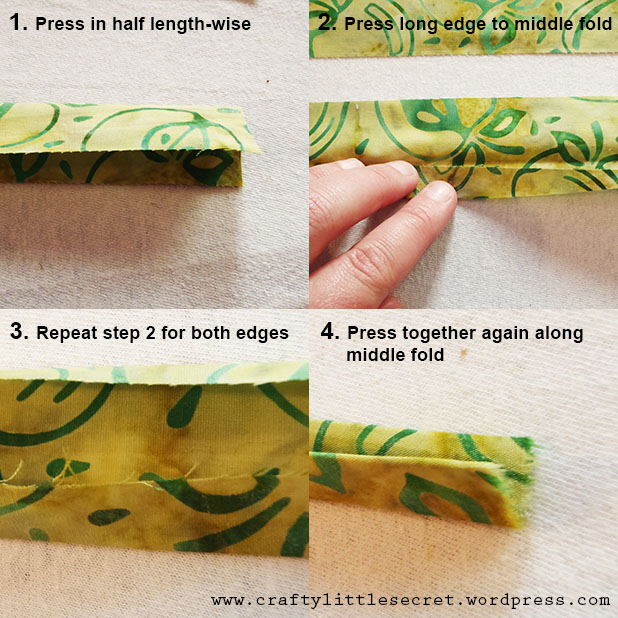
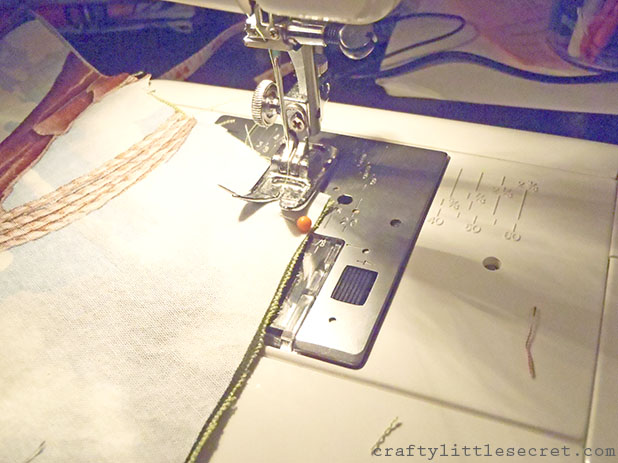
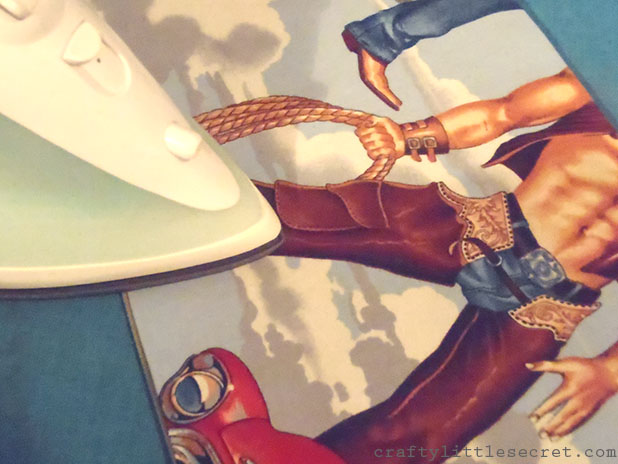
To make the waist and neck ties, fold and iron fabric as when making bias tape. Fold the tape in half lengthwise and sew it up as close as you can to the open edge (I kept my seam allowance about 1/8″).

Crafty Little Secret - DIY Apron Tutorial - www.craftylittlesecret.comCrafty Little Secret - DIY Apron Tutorial - www.craftylittlesecret.com
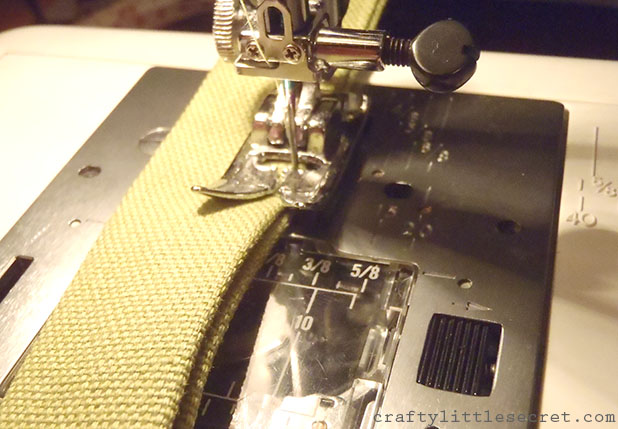
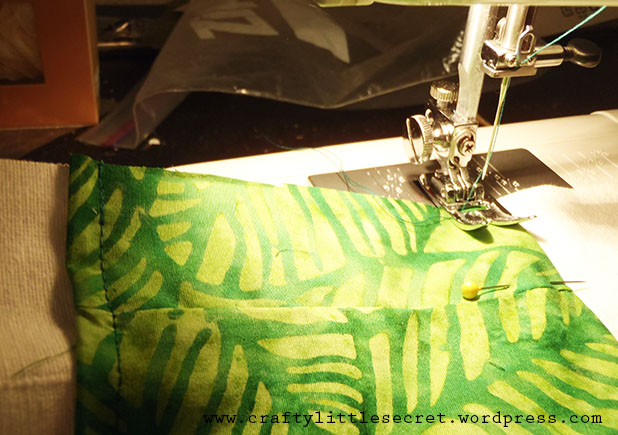
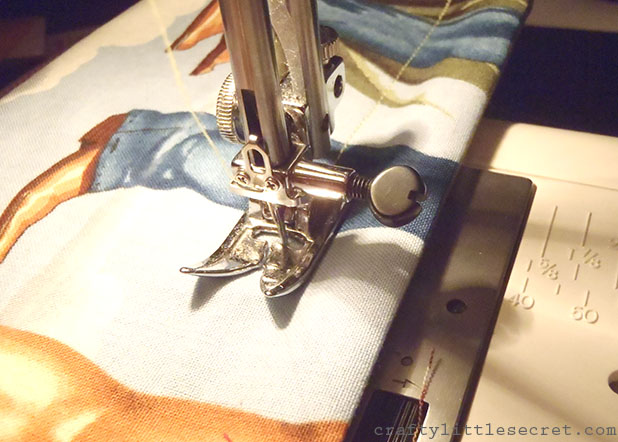
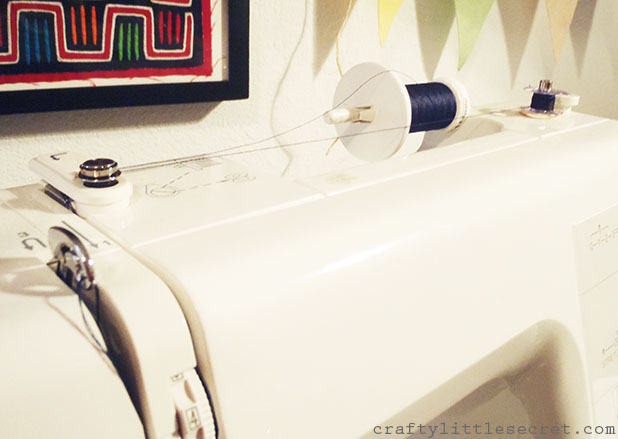
This is where it’s very important to have that 16/100 denim needle. Once you start sewing through multiple layers of the heavy duck (or similar weight) fabric, needle shards go flyin’ if you’re not using the right size.

Crafty Little Secret - DIY Apron Tutorial - www.craftylittlesecret.comTo finish the ties I just double overed the ends a couple times and sewed through the bulk of it….carefully. Watch for breaking needles and take it slow. No one likes a needle shard in their eyeball.

[ASIDE: The alternative method for making the waist ties is to fold the fabric in half lengthwise with right sides together, sew all the way up the open edge then turn the tie inside out. I find this technique annoying enough on lighter weight fabrics that I didn’t even entertain the though on these heavy ones. But if you opted for a quilting cotton for your ties, it could be an option if you don’t like the futzing with folding and ironing.]

Crafty Little Secret - DIY Apron Tutorial - www.craftylittlesecret.com
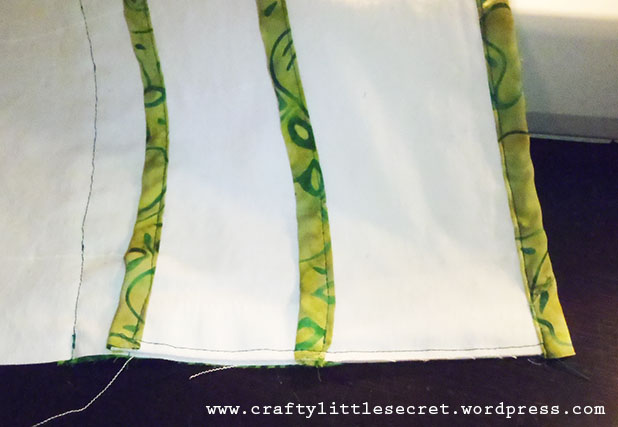
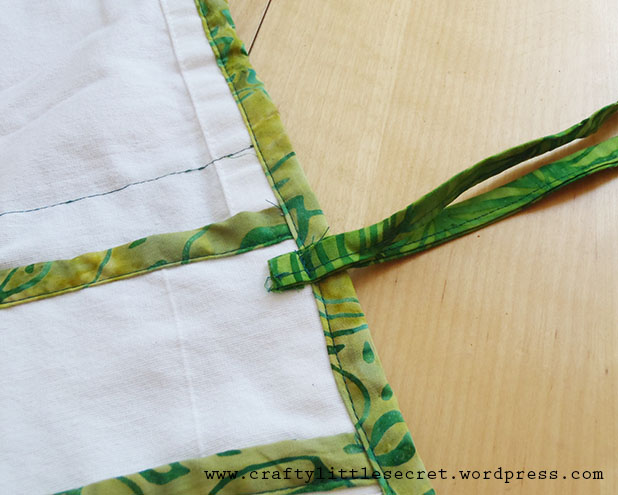
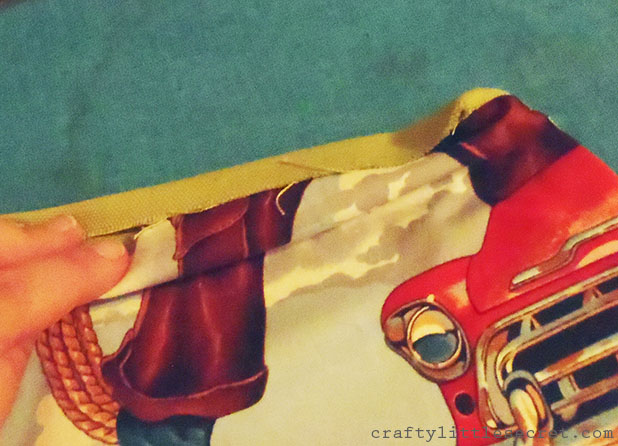
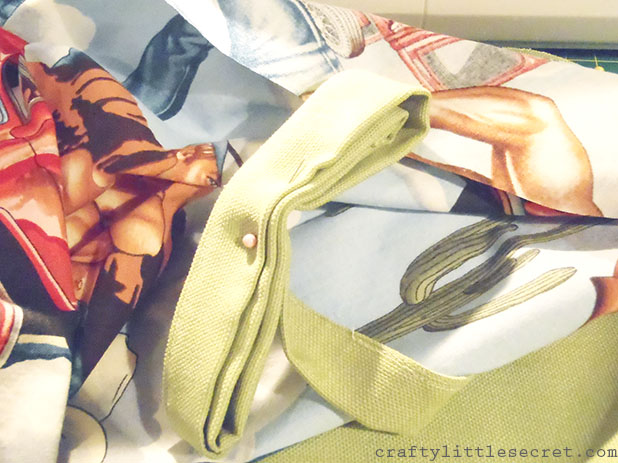
Attach the ties by sewing them into the side seams (I attached them at the point where the angled front of the apron meets the straight sides). Since the ties are so long I found it helpful to keep them contained by pinning them into a coil to keep myself from sewing them into the seams at wonky places.

Crafty Little Secret - DIY Apron Tutorial - www.craftylittlesecret.com
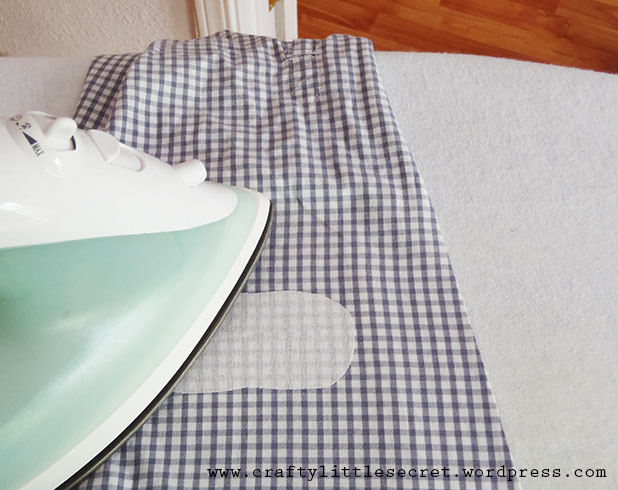
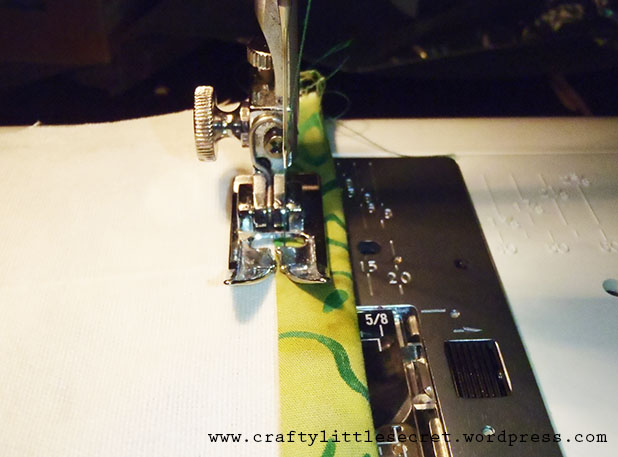
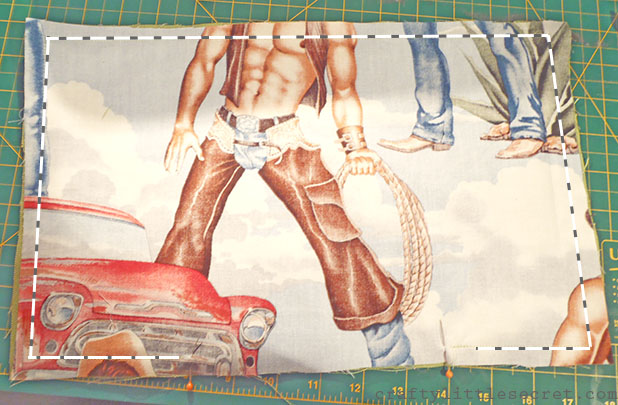
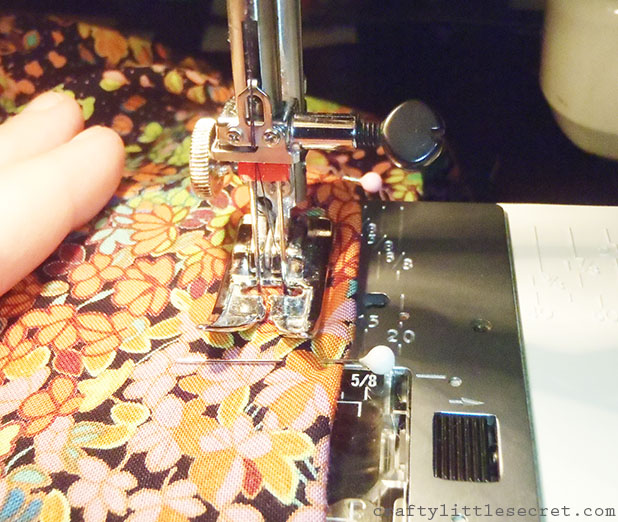
To attach the apron front to the apron backing, place right sides together and sew with a 5/8″ seam allowance. Sew all five bottom edges together (I went back and forth over the spot where the waist tie joined to add a little extra strength) but leave the top open. This allows you to turn the apron right-side-out again. Which you should do now. Flatten the apron and adjust the seams so that the corners are nice and neat (you can use a pencil to help turn them) then iron all the seams so they’re nice and crisp.

Crafty Little Secret - DIY Apron Tutorial - www.craftylittlesecret.com

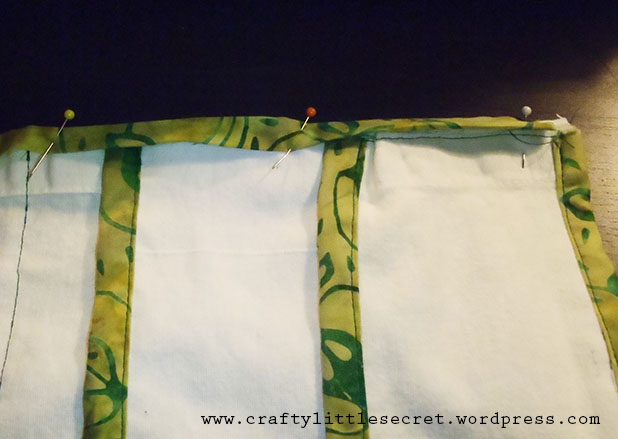
Sew the neck tie the same as the waist ties, but leave the ends open and unfinished. Fold the top edges of the apron pieces toward the inside about a half inch.

Crafty Little Secret - DIY Apron Tutorial - www.craftylittlesecret.com
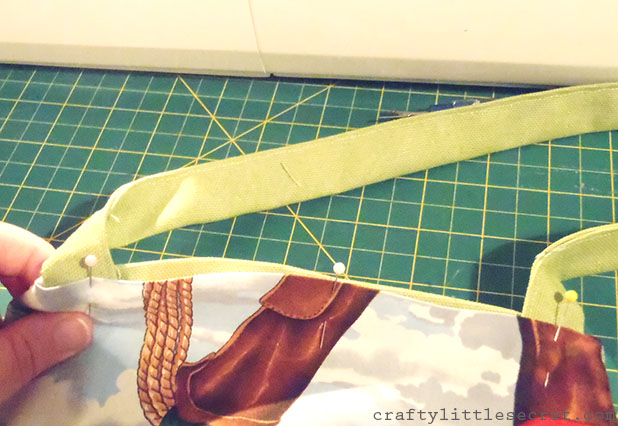
Pin the neck tie in place with about an inch of each end tucked between the apron layers. Top stitch the neck closed and all the way around the apron with a 1/4-1/8″ seam allowance. The top stitch adds a little extra strength and gives a nice finished look to the apron.

You can stop here now if you want to….but we’re having so much fun! Let’s keep going and add some pockets.

Crafty Little Secret - DIY Apron Tutorial - www.craftylittlesecret.comWith right sides facing, sew the two pocket pieces together with a 5/8″ seam allowance and leaving a 6″ opening at the bottom.

Crafty Little Secret - DIY Apron Tutorial - www.craftylittlesecret.com
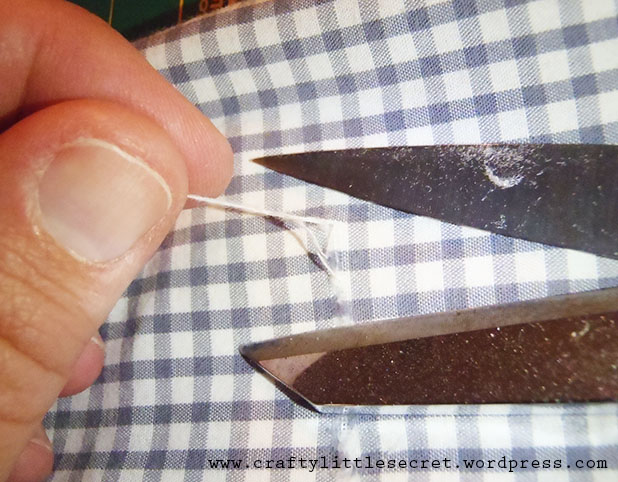
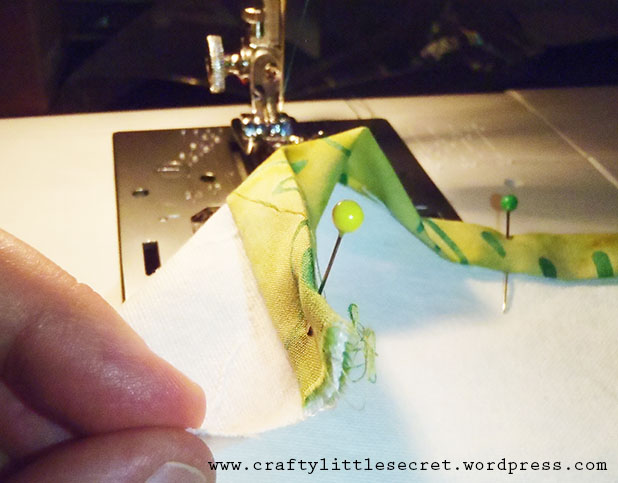
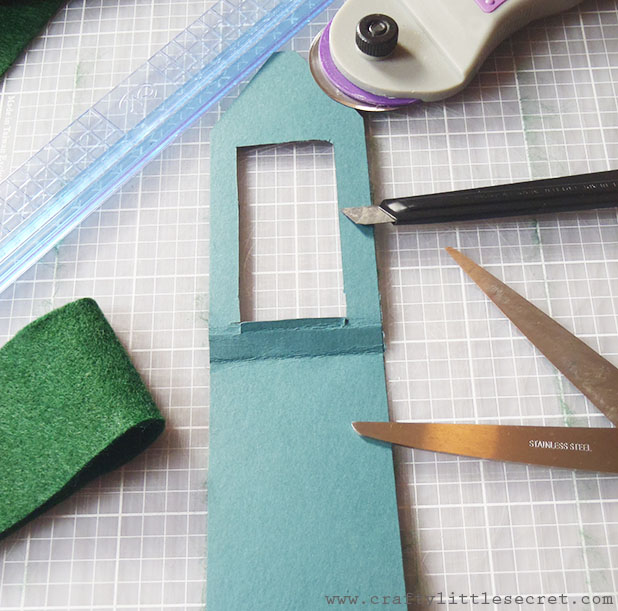
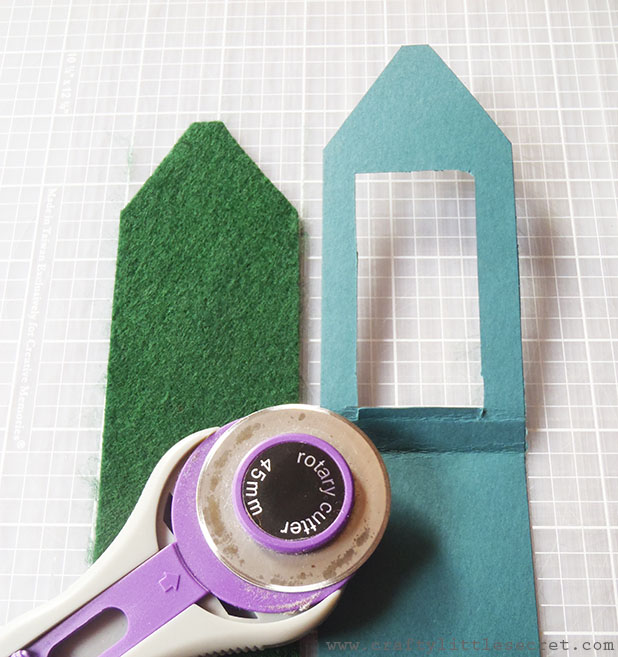
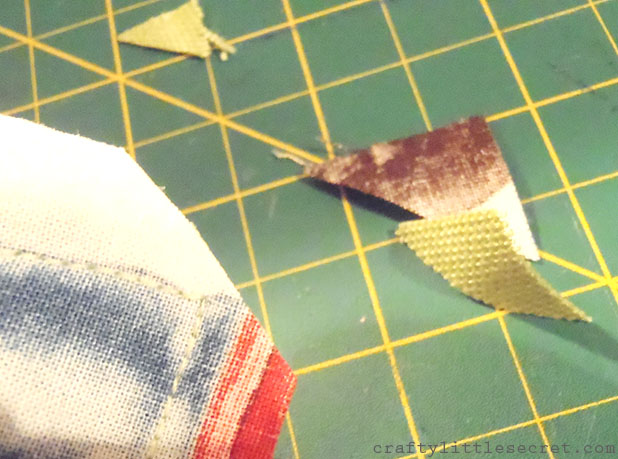
To help get nice crisp corners on the pockets, or any time you’re sewing right angles, it helps to trim some of the seam allowance off the corner. But be careful not to snip your stitches!

Crafty Little Secret - DIY Apron Tutorial - www.craftylittlesecret.com
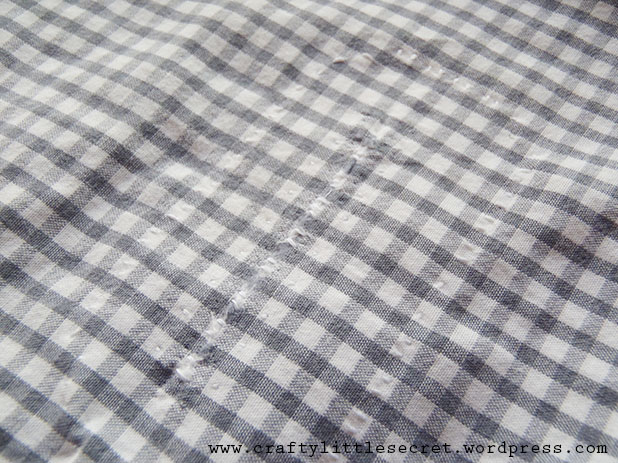
Fold the edges of the opening that you left inward and iron in place.

Crafty Little Secret - DIY Apron Tutorial - www.craftylittlesecret.com
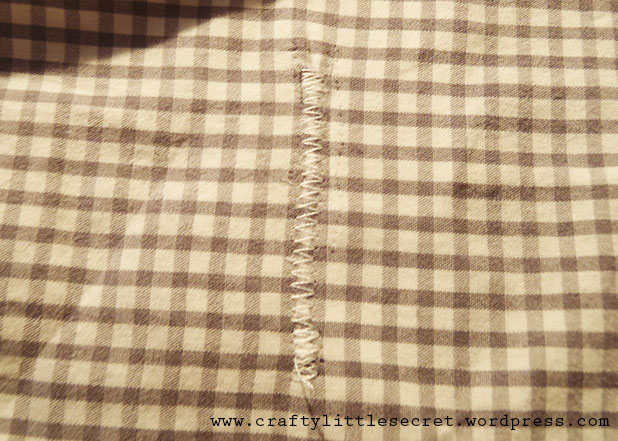
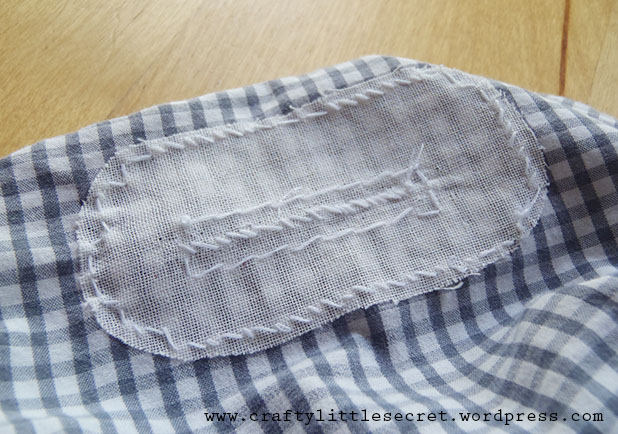
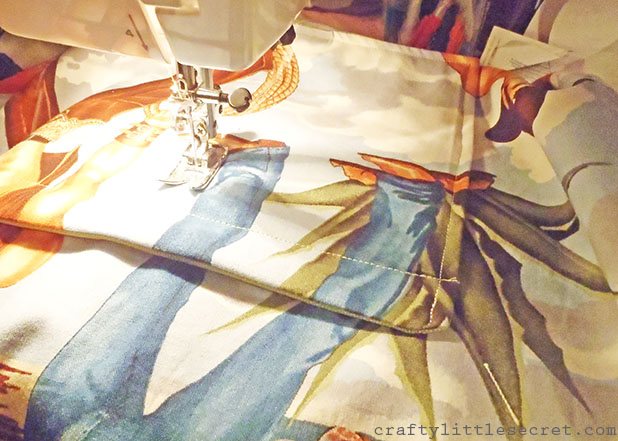
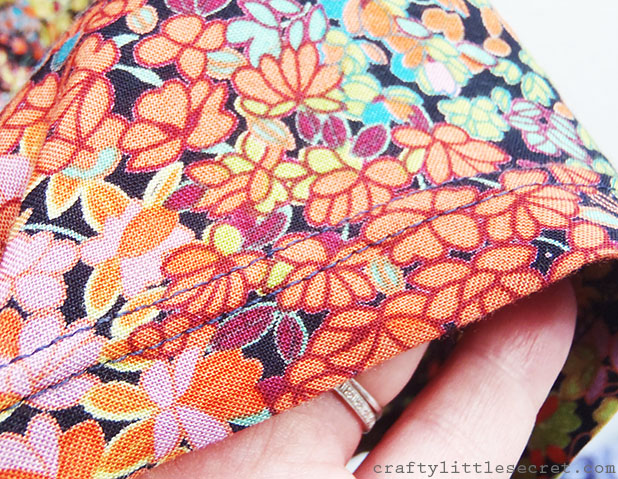
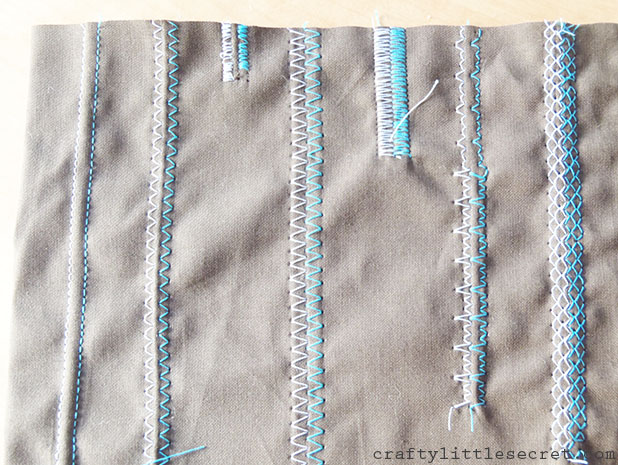
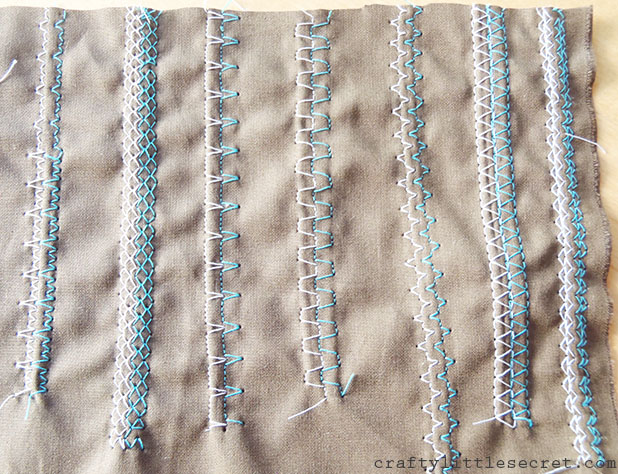
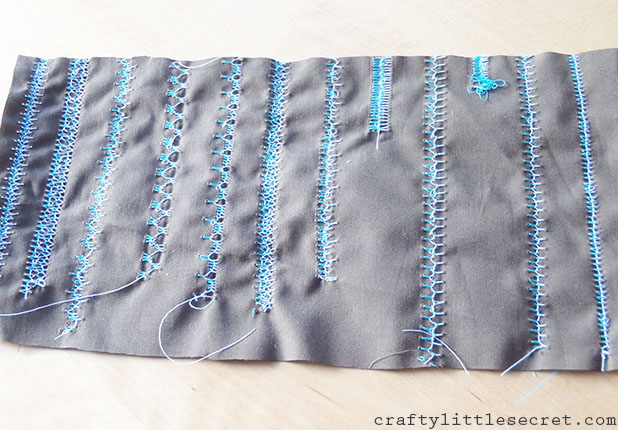
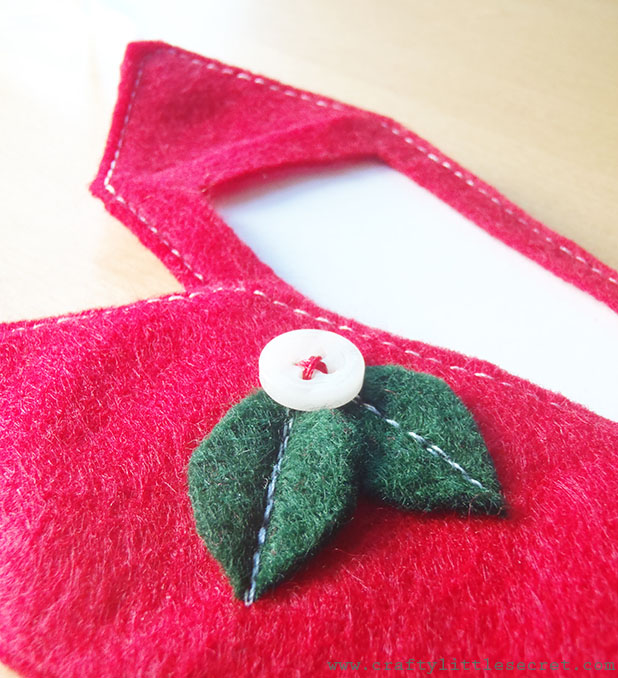
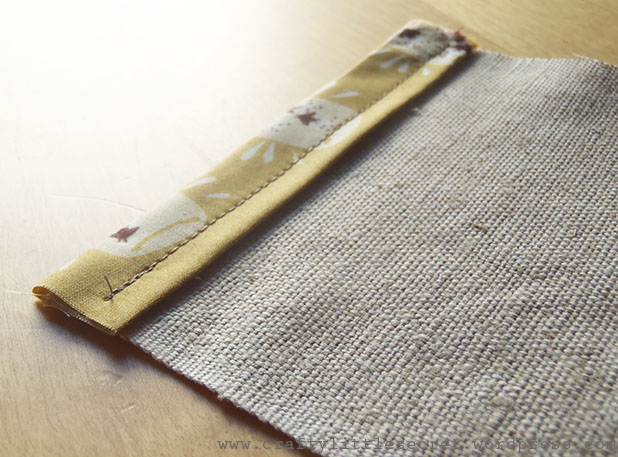
Top-stitch a decorative border along the top edge of the pocket piece. Again, this is just adding another of those little finishing touches that will help make your apron look a little more pro.

Crafty Little Secret - DIY Apron Tutorial - www.craftylittlesecret.com
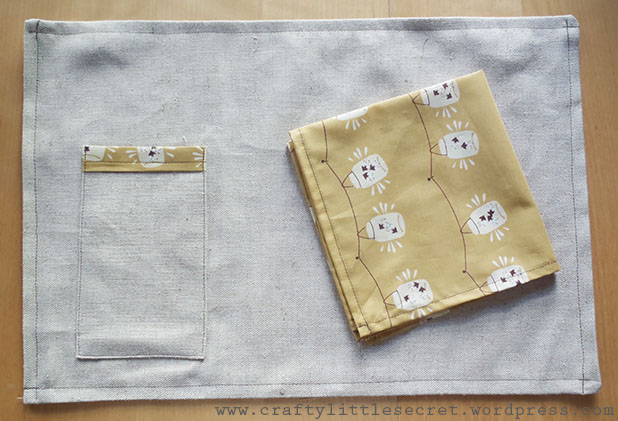
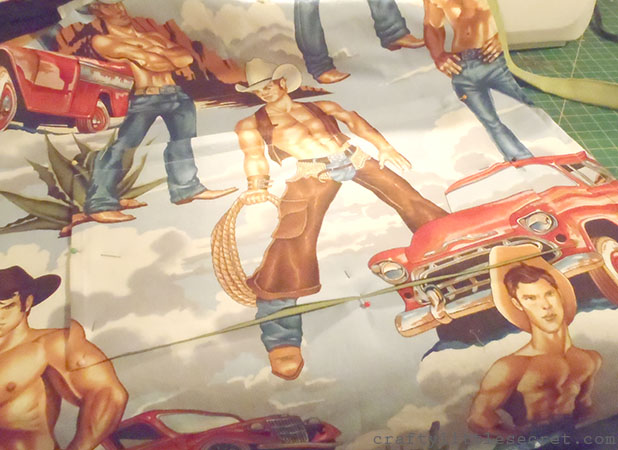
[ASIDE: This was a great project to practice my print matching skills. When I was cutting the pattern pieces I realized I didn’t want to cover this awesome print with a big solid colored pocket and it would look odd if the pocket print didn’t line up perfectly with the apron print underneath. So I took care to cut the pocket piece so that the prints on the two pieces would align.]

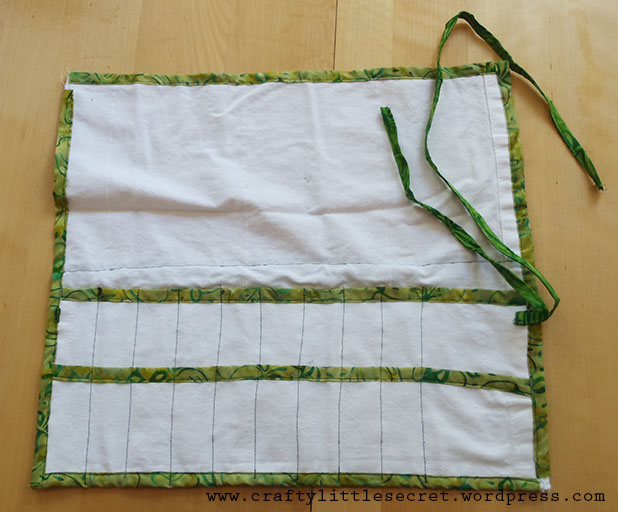
Center the pocket piece in the apron about 8″ from the bottom of the apron, or at whatever height feels comfortable for you. Top stitch around the bottom and two side edges leaving the top of the pocket open.

Crafty Little Secret - DIY Apron Tutorial - www.craftylittlesecret.com

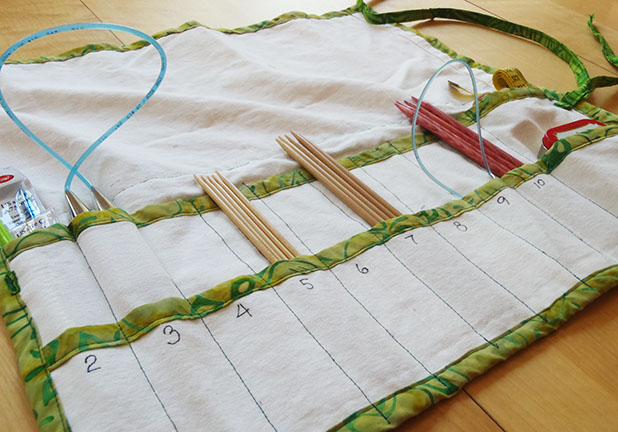
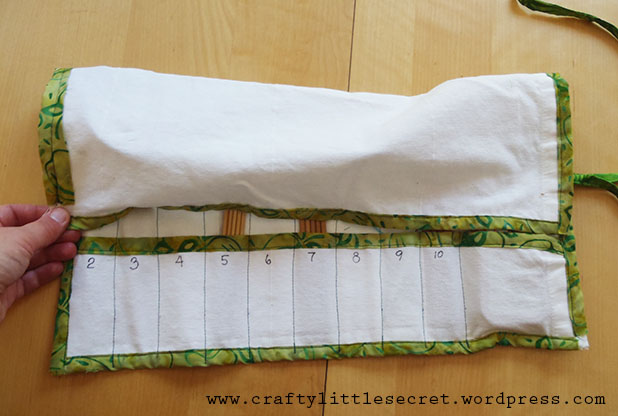
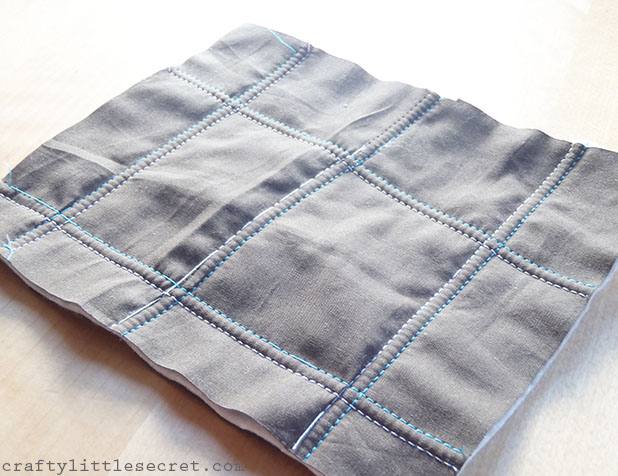
The final step is to divide the pocket into small sub-pockets if you want. I found it easiest to draw a chalk line first as a guide to follow since my stitching has a tendency to get pretty wonky if I don’t have an edge to use as a guide.
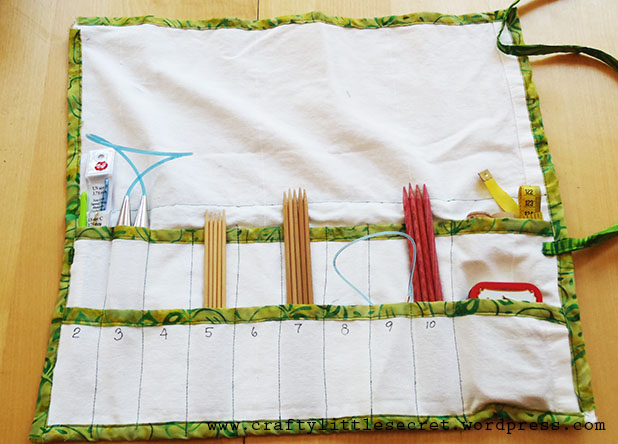
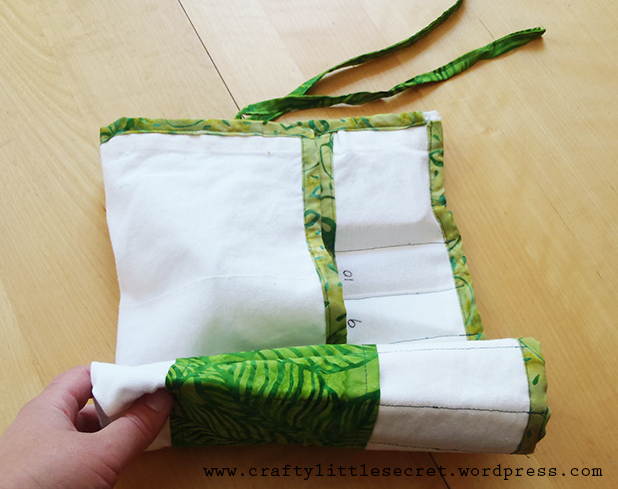
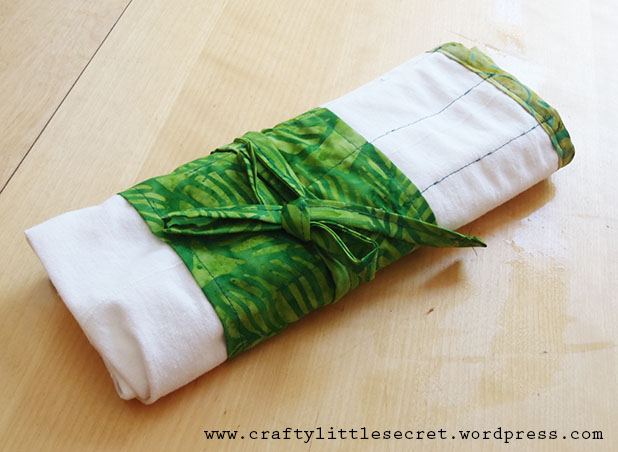
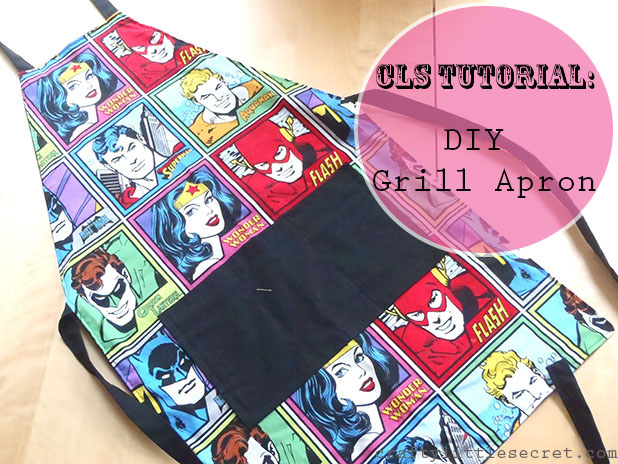
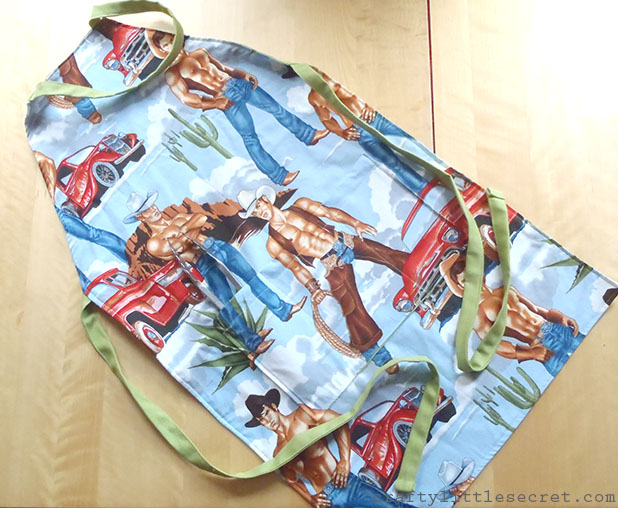
Crafty Little Secret - DIY Apron Tutorial - www.craftylittlesecret.comAnd……………..done!!!


Advertisement

Tutorial: Twin Needle Sewing

Tutorial: Twin Needle SewingEver wonder how that perfect double row of stitching at the bottom of t-shirts is achieved? Well….it’s probably done with some automated industrial machine. But you can achieve that look yourself with just one special tool……a twin needle!

I was a little bit intimidated to try sewing with a twin needle but with a grand total investment of $3.49, I figured it was worth giving it a go. The first time I tried it out was on the hem for the Vogue shirt in my last post and, uh-oh folks, I’m addicted!

Twin needles can fit pretty much any machine and are threaded up exactly how you’d thread a single needle. Some machines actually have a second spool holder and I suspect that fancy machines with tons of embroidery and decorative stitch options are designed to accommodate them. My machine is neither of these things. 

twin needle thread setupIf, like me, your machine isn’t setup with two spool holders, just make a bobbin and thread your machine from the spool holder and the bobbin holder. 

twin needle threadingRun the thread from your main spool and your bobbin together, exactly the same as you would for a single needle just with two threads instead of one!

twin needle sewing

It’s a little hard to see the two threads here, but if you look at the red at the top of the needle, you can see the two threads coming through the machine together then diverging and each threading a separate needle.

Separate the threads when you get to the needle and thread each needle with a single thread. The bobbin will pick up both threads, just sew as you normally would!!

And just that simply, friends, you too can have a pro-looking hem on your garments!

Twin needle hem

Look at those two perfectly parallel stitched lines! Ooooooh! Aaaaaaaah!

But as I said at the beginning, I’m addicted! So of course I didn’t stop with a hem. I played around with different thread colors and made a little quilt sampler.

Twin needle quiltingHow cute would this quilting be on a pillow sham? One little side note here. See the white thread in the middle row of stitches? How it breaks off and skips stitches all over the place? Yeah. That’s what happens when you use really cheap thread, so buy nice thread people! I also found with my machine, maybe because it’s not meant for the twin needle, that it would occasionally skip stitches when I sewed too quickly (that’s what happened to the blue stitches in the foreground). Slow and steady wins the race folks…..or at least sews the neater line.

The straight stitches looked so cute I was inspired to play around with all my machine’s decorative stitch options (which are pretty limited, I have a very basic machine) and sewed up a sampler.

Twin needle sampler 1

Twin needle sampler 2You can play around with stitch widths and lengths to get the pattern and spacing you want!

One thing I want to point out here is to watch your width when sewing with a twin needle. Your machine’s width settings are designed for a single needle, if you’re using a double you won’t be able to stitch as wide as when you use a single. For instance, my machine normally goes to a width of 6.5, but with the twin needle the highest I could go on the zigzag stitches was 5. 

The twin needles also come in different widths; 2, 4 or 6. The numbers correspond to how far apart the needles are from each other. Keep in mind when choosing needles that the widest needle size you can choose corresponds to the widest width setting on your machine. Since my machine goes up to 6.5 I can go up to a 6 in the twin needles, but if your machine doesn’t go up to a width of 6 you’d better stick with a 4 in the twin needles. Also bear in mind that the more separation you go with in your twin needles, the less you’ll be able to play with zigzag and decorative stitches. The needles need space to go side-to-side with a zigzag stitch so if you max out on your needle size, you won’t have any space left to move side-to-side.

And lastly, the backside. This is the one place where the twin needle is a little less than spectacular on my machine. 

Twin needle backTry as I might, I could not find a tension adjustment that made a nice neat back. Maybe this is as good as it gets for everyone? I dunno. I read that sometimes making a minor adjustment to the bobbin tension can help a lot but I’m not about to starting messing around with that. Especially on my old machine that hasn’t been tuned up in….oh…..ever.

So there you have it. Twin needle sewing. Try it! You’ll like it.


Tutorial: DIY Baked Clay “Person Planter”!

Sculpey Clay People PlanterIt’s a much needed rainy day today in San Francisco and it gave me a hankerin’ for a rainy day craft. I’ve propagating some of my succulents and am in need of somewhere to put them so I’ve been imagining all varieties of little clay pots that I could make with the clay leftover from my garden markers. Of course, when I finally decided on a design I also decided it would be absolutely perfect for a little flowering cactus I have that didn’t need a pot!

Cactus FlowerOh well, no worries. I’ll just make some mini pots for my propagated succulents later…

The design for this adorable little person planter is based off one that I saw on Etsy but I didn’t pin it straight away or favorite the shop, and try as I might I can’t find it again! Sorry!

So instead, here is a little tutorial on how I put mine together.

For materials, all you need is an adorable little cactus or succulent in a plastic pot, some Sculpey clay (or other baking clay brand) and a butter knife you don’t mind mucking up a bit.

My cactus was bound in the soil well enough that I was able to gently tug on it and pull the soil out of the pot without making too much mess.

cactus red flowerThen I could use the pot to cut a circle out of some clay that I had rolled to about 1/8″ thickness.

DIY Sculpey clay person planterIt takes a little working the clay in your hands to get it soft enough to roll out. I found it easiest to work little 1-2″ balls of clay at a time then amalgamate them when I’d warmed each up.

DIY backed clay person planterThis circle that you’ve cut out will form the base of your pot and the surrounded ring can be combined back with the rest of your clay.

I next rolled out a ball of Sculpy that was….oh….I’d say a little smaller than a tennis ball, to a 1/8-1/4″ thickness. You really can’t go thinner than that or the clay won’t have enough strength to hold it’s shape. Even at the thickness I used, it was pretty delicate and warped a little with the cooking (but the plastic pot still fit in easily at the end).

Roll this piece out to be a long oval shape because it will be trimmed down to a rectangle to form the sides of your pot.

DIY backed clay person planterOf course you could easily figure out the circumference of your circle, and thus the length of rectangle needed, with a little math. But who wants to do math??? Instead, you can make a little tick mark on the mouth of your pot. Lay the pot on the clay and gently roll it around until you reach the tick again, marking your start and end points. The distance between the points should be the length of rectangle you need!

I wrapped the rectangle around the base of the pot, gently rubbing the seam where they join together being careful not to distort the shape or thin the clay.

DIY backed clay person planterNow you should have a cup shape. I had some ragged looking edges on the upper rim of the pot that I wanted to smooth out.

Smoothing Sculpey clay

Can you see? The left side has been smoothed and the right side is the original rough edge. Also, you can see the potting soil that I kept rolling into my clay because I didn’t clean my work surface well enough!

To smooth these edges out just gently rub your finger along the rim with very little pressure. Run your finger over the edge a few times and the heat from your finger should smooth out the edge. Use this technique to cover up the seam where the two short edges of the rectangle joined. Again, be careful to not push too hard and distort the shape or thin the clay.

Next, I rolled out a couple little logs of clay and cut them to size to form the arms of the person planter.

DIY backed clay people planterBaked clay plant pot tutorialGently press the arms onto the sides of the pot, supporting the back as you do so. I really rubbed the shoulders and made sure that they were well attached to the pot.

DIY Sculpey clay plant potAs you can see in the picture above, that distorted the upper rim of the planter a bit so, again, I just gently rubbed it with my finger to smooth it out.

I used the same technique to make a pair of legs that I attached to the pot and even added some cute little feet at the end. I very carefully transferred the whole thing to a Pyrex baking dish and put it in the oven for 20 minutes. The Sculpey clay packaging suggested 15 minutes in a 275 F oven per 1/4″ thickness, but you should definitely check the directions for your clay before proceeding. The Sculpey packaging also warned not to microwave or over bake the clay. I have no idea what dire consequences you’d experience if you attempted either of these things.

Sculpey clay person planterOnce the clay cooled, I plopped my cactus in and I think the end result is pretty darn cute! As I mentioned previously, I did get a little warpage as my clay heated but the baked clay products don’t dry rock hard like kiln-fired clay and my cactus was in a thin plastic pot so I was still able to fit the cactus in no problemo!

DIY Clay person planterAnd there you have it, a DIY baked clay “Person Planter”!


Tutorial: DIY Thread Organizer

Spool Organizer TutorialI don’t know about you, but for the longest time my thread and bobbins have been stashed wherever they fit. In boxes, laying around on my sewing table, in my sewing kit. I was always have to search three or four places to see if I had a certain color of thread.

Now that I have a dedicated sewing space, I decided to build myself a wall hanging (or leaning) thread organizer! It’s not the prettiest thing I’ve ever made but it could be easily prettied up with a coat or two of paint and it sure does the trick!

DIY Spool Holder Tutorial

Materials:

– Hammer
– 2/12″ nails
– 12″ x 36″ board
– measuring tape
– pencil

First thing’s first. I ran into a little trouble hammering nails into knots and wood grains in my board, so try to get as un-knotty a board as possible.

For average thread spools, you’ll want to put nails every 2 inches (more if you’re doing large spools like for sergers). Using your measuring tape and pencil, put a tick mark every 2 inches down both long edges of your board.

DIY Thread OrganizerNext, match up the tick marks across from each other with your measuring tape and make tick marks going across the board every 2 inches. You should end up with a grid of tick marks, like this;

Sewing organization

Can you see my little tick marks?

Next, hammer a nail in at every tick mark, with an upwards slant to the nail. I found it easiest to start at the bottom and work my way up the board.

Sewing Room OrganizationYou’ll end up with what my husband was referring to as my ‘bed of nails’….

Homemade Thread HolderAnd that’s it! In about 30 minutes from start-to-finish, you’re done!!!

DIY Thread HolderI set mine up so that spools of thread hung on every other row. Then, the matching bobbin can hang under each spool making it super easy to see what I’ve got.

DIY Spool OrganizationThe only word of caution I would extend is that if you’re going to hang this on a wall, bear in mind that it is very heavy. I wouldn’t recommend hanging if there are no studs available. I haven’t tried hanging mine yet. Finding studs in my….er……”economically” built apartment can be….sporadic. At best. But even leaning against the wall, this sure beats the pants off what I had going on before!!!


Tutorial: Reusable Gift Tags

I originally made this tutorial to introduce a new item to my Etsy shop, but my super supportive mother-in-law already purchased the item! So it’ll be a few days before I’ve got more in there. Anyway, without further ado…..a tutorial for making your very own reusable gift tags!

Homemade Gift Tags

Materials:

– felt (one 9×12 inches makes 6 tags)
– rotary cutter and cutting mat
– thin ribbon (1/8″ width)
– white card stock

DIY gift tagsI found it easiest to build myself a card stock template to trace onto the felt. I cut each template to be 2″ wide and 9″ long, folded it in half and trimmed the corners then cut a rectangle out of one half. This rectangle cutout will make the window that the card stock will fit into.

Make your own gift tagI found it was easiest to cut the strip out with a rotary cutter. To cut out the window, I found it easiest to fold the felt in half length wise, trace the window and cut it out with scissors. I also cut a little slit above the window for inserting replacement card stock.

Homemade gift tagsAt the end, you should be left with something that looks like this:

Reusable gift tagsUnfortunately, as often happens with me, I got a little engrossed in the process and stopped taking pictures. Whoops! But it’s pretty simple so I think you can follow along without them.

If you want to sew an extra embellishments on the back of the tag, it is best to do it before assembling the tag. I just used a couple bits of scrap felt and sewed them up the center to make a pair of leaves.

Felt gift tags

If you’re going to add buttons like I did, it’s best to wait and do that at the end. To assemble, just fold the felt in half bringing the tips together. When pinning, insert a folded length of ribbon (about 6-8″) at the point and sew all around the tag as absolutely close to the edge as you can get. I used a contrasting thread for a nice extra bit of detail!

These gift tags are also great to use as ornaments when gifting money! (And could be easily converted into gift card holders if sewn a bit wider)

Gifting money

Gifting money ideas


Tutorial: DIY Placemats With Pockets!

DIY Table LinensWith Christmas fast approaching and my employment still in the “un” category, I’m looking at trying to do an almost entirely handmade holiday season this year. I think kitchen linens can make a great hand sewn gift, and I know my mom appreciated the double-sided napkins I made her earlier this year! Anyhoo, with this type of gift in mind I decided to try out a pattern for placemats with utensil/napkin pockets on them. Cuuuuuuuute!

DIY Pocket PlacematsMaterials (for a place setting for 6):
1 yd linen/burlap (heavy)
2 yd coordinating lightweight cotton (1 yd for placemats and 1 yd for napkins)
coordinating thread

As I’ve mentioned before, I absolutely love the fabrics available from Fabricworm.com. I came across this fabulous print from Tegan White for Birch Organics and thought it would work well with the current color scheme happening in our apartment.

Fort Firefly, Jars Gold

Awwww, I want a string of firefly jars to light up my apartment!

I liked the idea of making a place setting for 6. Even if we don’t always have that many people for dinner it’s nice to have extra around in case something gets an irreparable stain or to put serving dishes on. So. Using my roller blade, I cut out 6 15″x15″ squares from the Firefly cotton for the napkins, and 6 19″x15″ squares each of Firefly cotton and my linen for the placemats (the Firefly cotton goes on the back to make them reversible!).

Placemats with PocketsI also cut 6 8″x5″ linen pieces and 6 5″x2″ cotton pieces (or 5″ lengths of coordinating bias tape) to make a cute little pocket for your silverware and napkins!

As was the case with the double sided napkins, ironing with this project is key. Siiiiiiiigh. To make the napkins iron a quarter inch hem on all sides, then fold it over and press again with about a half inch hem. Top stitch using a coordinating thread and you’re done!

Handmade Cloth Napkins

Table Linen Tutorial

BAM! Cute napkins. Done.

To make the placemats, you’re going to want to sew the pocket to the linen before assembling the front and back pieces. This keeps the back neat, without any visible stitch lines making the placemat reversible. So pull out that iron again, we’re not done with it yet!

You’ll want to fold and press the 5″x2″ strips of cotton into bias tape (I’ve talked about how to do that before here), then sew them to one short edge of each 8″x5″ square of linen. This will be a decorative edging on the top of the pocket.

How To  Make PlacematsNext, press a half inch hem into the remaining three naked sides of the pocket piece, folding toward the wrong side.

Placemat Sewing Pattern

More ironing? Don’t say I didn’t warn you! Siiiiiiiiiiiiiiiiiiiiiiiiiiiigh!

Next, attach the pocket to your linen placemat front. I put the pocket on the left side of the placemat (though a quick interwebs search told me that people do either side) 2.5″ from the left edge and 2″ from the bottom edge.

How to Make Placemats

Once you’ve got your pocket pinned in place, neatly top stitch the three unadorned sides down as close to the edge of the pocket as possible.

DIY Placemats

Placemats with PocketNow we’re ready to sew the backing to the placemats. With right sides facing, sew the linen to the cotton backing with a half inch seam allowances on three sides. Leave one of the short sides open. We’re going to turn this inside out so cut the corners to help the fabric lay flat when we do this. You should end up with something that looks like this:

DIY Placemats

Flip the placemat right-side-out. You might have to use a pencil to really get in the sewn corners and get them nice and crisp. Fold a half inch hem inward on the open edge of the placemat and press (siiiiiiiiiiiiiiiiiiiiiiiiiiiiiiiiiiiiiiiiiiiiiiiiiiiiiiiiiiiiiiiiiiiiiiiiiiiiiiiiiiiigh). Top stitch around all sides of the placemat with coordinating thread about a quarter inch from the edge.

Pocket Placemat Sewing PatternAnd blammo! You’re done!!!!!!!

Handmade Placemats

Placemat Sewing PatternHandmade Place Settings

Sewing Placemat Tutorial

DIY Placemats


Tutorial: Mending A Torn Dress Shirt

OLYMPUS DIGITAL CAMERAI’m not sure why exactly, but my husband has gone on an elbow-tearing bender with his work shirts. Right in front of my eyes he tore the elbows out of two shirts while putting them on yesterday morning! We’re trying to keep to a budget these days (and try to live frugally and consciously in general) so I decided to try to mend the shirts to avoid buying new ones (four in total!!!). I’ve written up a little tutorial here that I hope is easy to follow!

Materials:
OLYMPUS DIGITAL CAMERA scissors
– iron
– thread in the color of the shirt
– fusible interfacing

Step 1: Interfacing.
To add some stability to the torn area, I first started by fusing a small patch of interfacing to the shirt. Fusible interfacing is two-sided; fabric on one and little bumps of glue on the other. You can see in the picture below the smooth side of the interfacing is in the foreground and the fusible side in the back.

OLYMPUS DIGITAL CAMERAI cut a patch of interfacing about at least a half inch larger than the tear in each dimension. I’ve also found with past experience that round edges are less likely to peel up than sharp corners, so cut out a oval rather than a rectangle.

OLYMPUS DIGITAL CAMERALay the shirt on the ironing board then lay the interfacing patch on top of the tear, glue bump-side down (contacting the shirt). Try to pull the tear together as much as possible so that the two torn sides of fabric are in contact. This will make your mending job easier and less noticeable. Set your iron to as high a heat as your fabric will allow and iron with even, firm pressure for about 15 seconds then allow to cool.

OLYMPUS DIGITAL CAMERA

Step 2: Sewing the Tear
First neaten up the tear by trimming any loose threads that are hanging off the shirt.

OLYMPUS DIGITAL CAMERANext, you need to sew the tear itself closed. You’ve got two options for this depending on how noticeable you want the final tear to be. Option 1 is waaaaaaaaaaaaaay faster, but definitely a more noticeable mend and may work better on non-patterned shirts.

Option 1: Set your sewing machine to a wide zigzag stitch and top stitch over the tear, making sure to backstitch at the beginning and end of the sew and to catch both sides of the tear while sewing. You’re left with a neat mend, but one that can definitely be noticed.

OLYMPUS DIGITAL CAMERAI tried Option 1 first, but since my husband was going to be wearing these shirts to work and potentially meeting clients, I decided to take the time to do Option 2, an (almost) invisible repair.

Option 2: This option is much more tedious than the first because it requires hand-stitching. Using the smallest stitches possible, I sewed over the tear making sure to catch both sides of it. Since this was a patterned shirt, as I sewed I tried to keep my stitches with the white thread to the white parts of the check pattern. I then sewed in a similar fashion about 2 mm around the tear for extra stability.

OLYMPUS DIGITAL CAMERATear??? What tear?? Ok, it’s not quite invisible and you’ll never have a perfect mend but this is pretty darn close!!! Keep in mind this image is zoomed in on the tear and when he’s wearing it, you’re really hard pressed to find it!

Step 3: Secure the Interfacing
I find that over successive washes, fusible interfacing often starts to peel up off the fabric it was attached to. To try to keep this from happening, I also used tiny stitches around the perimeter of the patch, keeping to the white parts of the pattern to secure the edges of the interfacing and add extra stability (You can just make this out in the picture above).

Here’s how the wrong side of the repair looks:

OLYMPUS DIGITAL CAMERAI’m hoping these repairs, hold up in the wash and I don’t find myself repeating this process too often! Fingers crossed!

Tutorial: Knitting Needle Wrap


OLYMPUS DIGITAL CAMERA
After wrestling with a messy bag of loose yarn, needles and other knitting bits, I finally decided that it was time to make a proper wrap to keep my knitting needles organized. It’s a simple project that takes just a couple hours from start to finish (or less with a few shortcuts!).

Materials:
– Three pieces of your main fabric** cut into the following sizes;
– 18″ x 5″
– 18″ x 8 ”
– 18″ x 16″
– Three 2″ wide strips of edging fabric (or bias tape) cut to 18″ lengths
– Two 2″ wide strips of edging fabric (or bias tape) cut to 17″ lengths
– 2″ x 25″ piece of tie fabric (or ribbon)
– 2″ x 13″ piece of tie fabric (or ribbon)
(Optional: 18″ x 6″ piece of decorative fabric)
– thread
– scissors

**To make your life easier and your project neater, try to choose a fabric without obvious right and wrong sides. A heavy cotton will hold up well. I used the leftover scraps from some curtain panels.

OLYMPUS DIGITAL CAMERA

Step 1: Preparing your edging
This step is essentially creating your own bias tape, so it can be a real time saver to just use bias tape for this step instead of contrasting fabric as I have here. To create your edging you’re going to want to make sure your iron is heated  up!

First, press each strip of fabric in half length-wise, creating a center crease (wrong sides together). Open up the folded fabric, then bring each long edge to the center crease and press again. You should now have a long strip of fabric about 1″ wide with two long edges folded to meet in the middle. Finally, recreate that strong center crease by folding the fabric in half length-wise again, hiding the fabric edges on the inside.

Press the fabric for the ties (skip this if you’re using ribbon for the ties instead) in the same manner.

OLYMPUS DIGITAL CAMERA

While you’re at it, with wrong sides together, go ahead and iron a half inch seam allowance along the long edge of your contrasting fabric for the decorative strip around the outside of the wrap.

Step 2: Sew decorative strip
Take the 18″ x 6″ contrasting fabric you just pressed and top-stitch it to what will be the outside of your wrap on the largest piece of main fabric. Placement doesn’t need to be precise but the top of the strip should be around the middle of the main fabric.

OLYMPUS DIGITAL CAMERA

Something to take into consideration if you’re using contrasting fabrics is that the stitching will be visible from the other side. So if you care about that (which I don’t on a project like this) you may want to match your needle thread to the decorative panel and your bobbin thread to your main fabric.

Step 3: Sew edging/bias tape to top edges
Using 3 of the 4 pieces of 18″ long edging, pin one piece of edging to each piece of main fabric along the 18″ side. You’ll want to insert the piece of main fabric into the edging fold so each side of the main fabric has decorative edging on it.

OLYMPUS DIGITAL CAMERANow carefully sew along the edging as close to the open side as possible. Remember that these stitches are meant to catch both sides of the edging fabric, so check periodically to ensure you are doing so.

OLYMPUS DIGITAL CAMERAYou should now have three pieces of your main fabric, each with a strip of edging sewn to one of the long edges.

Step 4: Sew the bottom edge
Line up your three pieces of main fabric along their bare bottom 18″ edge and baste all three together. This basting step makes it way easier to sew the edging on. Now sew your final piece of 18″ length edging around this bottom edge. This stack will be a little thicker than the first edges so make sure your catching both sides of the edging/bias tape when you sew.

OLYMPUS DIGITAL CAMERA

(Notice on this picture the stripe of green stitches – this is showing through from the decorative strip on the outside of the wrap and can be avoided as I described above).

Step 5: Sew the sides
Next, baste the overlapping sides of the fabric as you did along the bottom edge (this is visible in the picture above), then cover these with the 17″ long edging strips. The sides of the main panels are 16″ long so you should have about an inch of overhang with the edging. Center the edging so you’ve got a half inch of overhang on either end, then fold under and pin before sewing.

OLYMPUS DIGITAL CAMERA

Step 6: Sewing the ties.
This is another easy shortcut for this pattern. Instead of making your own ties, you can simply buy lengths of coordinating ribbon. If you’re making your own ties you should have them pressed as you did for the edging. Top-stitch the ties as close as possible to the open edge.

OLYMPUS DIGITAL CAMERAOnce you’re ties are made you can sew them the right side of your wrap on the inside. Try to line them up with the center of the outside decorative strip.

OLYMPUS DIGITAL CAMERA

Step 7: Pockets
The final step is just to sew some pockets to hold your needles and notions. Top-stitch straight lines from the bottom edge of the wrap to the top of the second pocket (8″ height). I sewed one of these lines every 2 inches because I rarely use really chunky needles. My size US19 needles barely fit in a 2″ pocket, so if you have a lot of chunky needles you may want to consider different spacing. I also left a larger pocket on one side to hold odd shaped bits and pieces.

OLYMPUS DIGITAL CAMERAOLYMPUS DIGITAL CAMERAAnd that’s it! You’re done! Go ahead and fill your new knitting needle wrap! As you can see in the pictures below, I also chose to label some of the pocket with needle sizes I commonly use, but keep in mind that this prevents reorganization of the roll in the future.

Stuff, fold, roll, and wrap! And away you go with your very own handmade knitting needle wrap!

OLYMPUS DIGITAL CAMERAOLYMPUS DIGITAL CAMERAOLYMPUS DIGITAL CAMERAOLYMPUS DIGITAL CAMERA

OLYMPUS DIGITAL CAMERA

Hand-Sewn Felt Embroidered Baby Onesies: Tutorial

Since all my friends simultaneously decided to hop on the baby train about a year ago, I’ve been making adorable (if I do say so myself!) hand-sewn onesies for the little booger machines. I’ve given a sneak peak before in my previous post showing what I made my nephew for Christmas and now it’s time for a tutorial!

This week I made a couple onesies for some cute little baby girls and took pictures along the way. Check out this cute skull with a bow onesie!

OLYMPUS DIGITAL CAMERAHere’s what you’ll need for this project;

SAMSUNG

Materials List:
– onesie
– felt
– embroidery floss
– scissors
– fabric glue

Seems like for a new born baby you’d buy the newborn size (0-3 mos.) onesie, right? Not always. Some of my friends have birthed behemoths….er….I mean, healthy-weight…..babies that actually never fit the 0-3 mos. clothing size. You might want to consider purchasing a 3-6 mos. onesie, the baby can always grow into it!

When getting started I take the time to first sketch my pattern out on a piece of paper. This gives the nice advantage of reproducibility if I save the paper template for future projects.

OLYMPUS DIGITAL CAMERAUse this template to trace out your pattern onto a square of felt and cut the pattern.

OLYMPUS DIGITAL CAMERAOLYMPUS DIGITAL CAMERAAlthough I reinforce the felt with embroidery, I always like to first adhere the felt to the onesie with fabric glue. This helps to hold the applique in place while I’m sewing and adds a little extra strength to the final product.

OLYMPUS DIGITAL CAMERAI use bottled glue instead of spray glue because I find that when working with small pieces of fabric like this, the spray glue can get a little messy. I try to keep the glue away from the edges where I’ll be sewing because putting the needle and thread through the glue repeatedly really gums it up and leads to tangling while trying to embroider.

Center your felt cutout on the onesie. I usually try to position it so that it will center on the child’s chest, but it can be pretty cute to sew something to the bum of the onesie.

OLYMPUS DIGITAL CAMERAFor both a decorative detail and additional strength, I embroider around the edge of the felt with a complimentary color of embroidery floss.

Standard embroidery floss is actually composed of 6 thin threads. I find it is too difficult to work with the floss at full thickness so I separate out 3 strands to embroider with. Just hold on to the 3 you want to use, gently pull on the 3 you’re setting aside and it should separate pretty easily (the longer your thread, the more likely it is to tangle).

OLYMPUS DIGITAL CAMERAOLYMPUS DIGITAL CAMERAI used blanket stitch to embroider around the edges of the felt applique. Blanket stitch is a really easy way to add a cute embellishment that I’ve shown before in my double-sided napkin post.

To do blanket stitch, first come up through the fabric from the bottom, then put the needle back down through the fabric about 1 cm over and 1 cm down (or whatever spacing you’d like), and pull the floss through. Leave a little slack in the floss, don’t pull it all the way through.

OLYMPUS DIGITAL CAMERAWhen bringing the needle back up, bring it up on the edge of the felt across from where you brought the needle down. Make sure to bring the needle up inside the loop of floss left on the top. Pull taught.

OLYMPUS DIGITAL CAMERA

OLYMPUS DIGITAL CAMERAHere’s a nice YouTube video describing the process if you found that a bit confusing.

Embroider around all edges of the felt to give it a cute hand-made look.

OLYMPUS DIGITAL CAMERA

OLYMPUS DIGITAL CAMERAI wanted to add just a touch more sweetness to this little skull so I also cut out a bow in pale pink felt. Just cut two pieces, one larger oval and one thin rectangle.

OLYMPUS DIGITAL CAMERATo form the bow, pinch the oval in half along the long edge, then fold the edges back onto themselves.

OLYMPUS DIGITAL CAMERA

OLYMPUS DIGITAL CAMERAI added a little stitch at this point to hold it together while I used the thin rectangle segment to wrap around the center of the bow and stitched it all together.

OLYMPUS DIGITAL CAMERAHand-stitch the bow to the skull and you’ve got one adorable onesie!!

OLYMPUS DIGITAL CAMERAI’ve probably made about 20 of these over the past year or so. Once you get the hang of it, it usually only takes about 1.5-2 hours to pull a onesie together!

Here are a few other ones that I’ve made over the past year…

SAMSUNG

SAMSUNG

SAMSUNG

SAMSUNG

SAMSUNG

SAMSUNGI’ve linked this onto parties over at Thirty Handmade Days, So You Think You’re Crafty and Nap Time Crafters. Head on over and see what other crafters have linked to the parties!


DIY Mixed Flower Bridal Bouquet: Tutorial

I got married last week in a small family-only civil ceremony on Jones Island in the San Juan Islands off the coast of Washington. It was perfect! It was really important to both of us to have the things we wanted without breaking the bank. For me, that meant a couple small DIY projects. One of these was the flowers.

Photo credit: Matthew Land http://matthewland.com/

Photo credit: Matthew Land
http://matthewland.com/

Getting married in such an isolated location puts some limitations on vendor availability. I really just had two florists in town to choose from and at a starting price of $125 for a bridal bouquet, I chose neither! Instead, I bought my wedding flowers from the grocery store!!

I popped into the grocer a couple days before the wedding to scout the flower situation and found out when their shipments of flowers come in so I could buy the freshest flowers with the largest selection. I chose three mixed flower bouquets in a purple and yellow color scheme for a total cost of $28 (that’s $97 savings!).

OLYMPUS DIGITAL CAMERAMaterials list:
2-3 bouquets of flowers
Green florist tape
Straight pins
Elastic bands
Shears/scissors
Ribbon/hankie

Step 1: Strip your flowers.
While all those leaves and filler bits look great in a bouquet in a vase, they get in the way when trying to construct a bridal bouquet. So before getting started with any arranging, you want to strip your flowers of ALL leaves and organize them by flower type.

OLYMPUS DIGITAL CAMERA

Step 2: Pick your “Show Off” flower.
Once you’ve got all your flowers laid out, you’ll want to choose one or two flowers that will be the center of your bouquet. This should be a larger flower and should be your favorite. I chose the Gerbera daisy as the focal point for my bouquet.

Next you want to select a few flowers to surround your center flower. When adding these it’s nice to work in odd numbers and to keep things even. I add three stalks of flowers around the daisy (pardon the blurry photo!).

OLYMPUS DIGITAL CAMERAStep 3: Florist tape.
Take the time to arrange these few center stalks. When you’re satisfied, use florist tape to hold them in place. Florist tape is a stretchy green tape that’s a bit tacky, so when you wrap it around itself it will self-adhere. It’s what boutonnieres are often wrapped in.

OLYMPUS DIGITAL CAMERA

Step 4: Add more flowers.
Next you’ll want to add a few more flowers, in the same even manner as above. If you’re going to add odd flowers, try to balance them with an odd flower on either side of the bouquet. Here, I’ve added clusters of purple flowers evenly spaced around the yellow. Secure the stems with more florist tape every four or five stalks.

OLYMPUS DIGITAL CAMERAIf you’re going to add flowers unevenly, try to balance them. For example, in my bouquet I added a yellow lily and orange carnation to one side, then some white daisies to the other (see finished pictures).

Step 5: Add your “filler” and greenery.
Once you’ve got your bouquet built up a little, but not quite finished, it’s time to add your filler and greenery. I added stalks that stood up straight to the back of the bouquet and added looser more droopy stalks to the front of the bouquet.

OLYMPUS DIGITAL CAMERA

As the bouquet gets larger it gets more difficult to secure the stems with florist tape alone. I wrapped the florist tape with an elastic band when I found it was getting a little unwieldy, just to make sure everything would stay nice and secure.

OLYMPUS DIGITAL CAMERA

Step 6: Add finishing flowers.
The final step is adding a few flowers to the outside to fill in the bouquet and to surround the filler and greenery. I just added flowers until I was happy with the size of the bouquet, making sure the central showcase Gerbera daisy was always visible.

For the final step to keep things nice and tight, I secured the florist tape with straight pins.

OLYMPUS DIGITAL CAMERA


Since the bottom of the bouquet would be visible, I also took the time to give the stems a nice even blunt cut at the bottom. I don’t have any pictures of it, but as a final step I wrapped the bottom of the bouquet in my granny’s handkerchief to cover the florist tape.

And voila! My finished bouquet! (I’m hoping there might be a better picture when we get our photos from the photographer. I’ll update the post if I find a better shot).
OLYMPUS DIGITAL CAMERA

bouquet in action