
I made another shirt! Some of you might remember when I made this red and white wearable muslin, and now I’ve finally finished the real deal shirt.
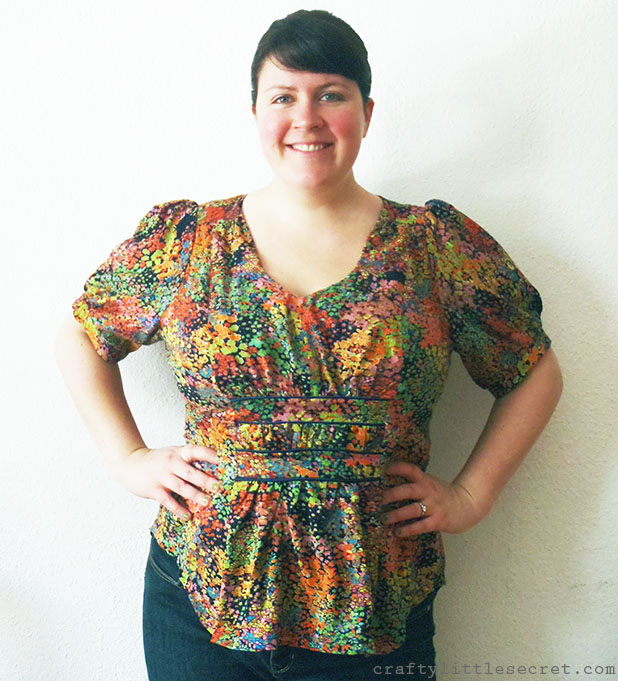 This blouse is a shortened version of the Vogue dress pattern V1152 made in a super soft I dunno what….poly/cotton, probably? I was surprised when I finished this shirt because when I bought the fabric and as it was coming together I was sure that the print was mostly navy blue with some bright flowers splashed across it. Now that it’s finished I can clearly see that the navy blue barely shows at all!!! (And in all the photos it actually looks black. But I swear it’s blue).
After making the muslin I brought the neckline up a full 3.5 inches! It’s definitely way better, but surprisingly I think I’d still need to wear a camisole under it, if only to prevent gaping when I lean over.
 I also took a bit out of the front side panels along the princess seams. Even with taking it in a few inches though, I still opted to take the side zipper out. The elastic back and enormous sleeves/armholes made it easy enough to pull over my head and my not-so-awesome zipper skills made the zipper look just a little too obvious.
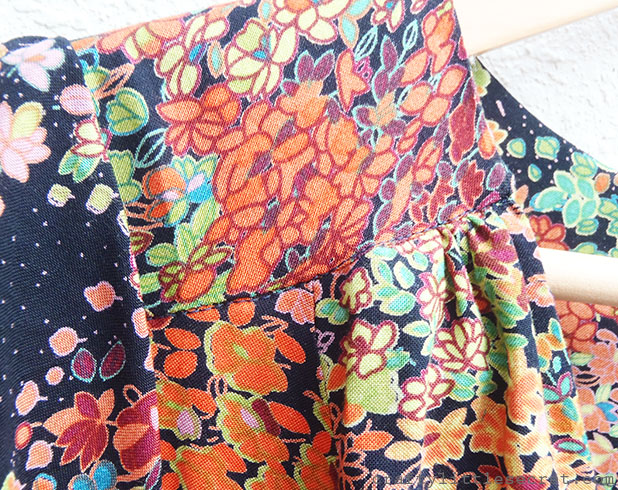
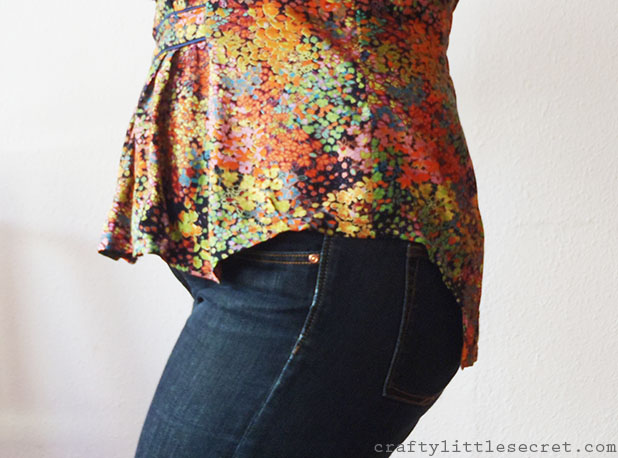 The shirt has a curved hemline and I tried really hard to keep it from going all wobbly but I had a little trouble. I got the curve above my hip ok (once I ironed it out), but I feel like the lower point as it transitions into the front ended up too sharp.

I had looked up online the secret to making a curved hem and tried stay-stitching it before I sewed it, but it didn’t help. Oh well!
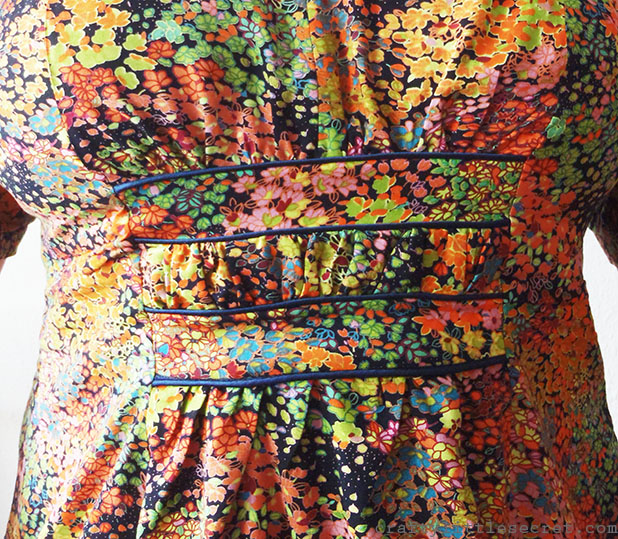
I’m really pleased with how the front detail worked out though. This was my first time doing piping and I think it turned out lovely! I used my zipper foot to sew as closely in to the piping as possible (it also turned out a lot more even and less wonky than in my muslin).
I didn’t worry about making pretty seams with this shirt. The fabric doesn’t seem to fray much and it was a more complicated pattern. I thought if I started messing around with French seams I would probably just mess it up.
 The pattern instructions suggested a lot of hand sewing – all around the yoke, the sleeve cuffs and the front panel. I didn’t feel like doing that. So wherever I could I just did some top stitching in the ditch instead.
The front shoulder is, I think, the worst seam and the stitching is still barely noticeable. I’m all for quality sewing but why make life harder than it needs to be?
 I did however, manage a little hand stitching on the front panel and to tack down the neckline facing.

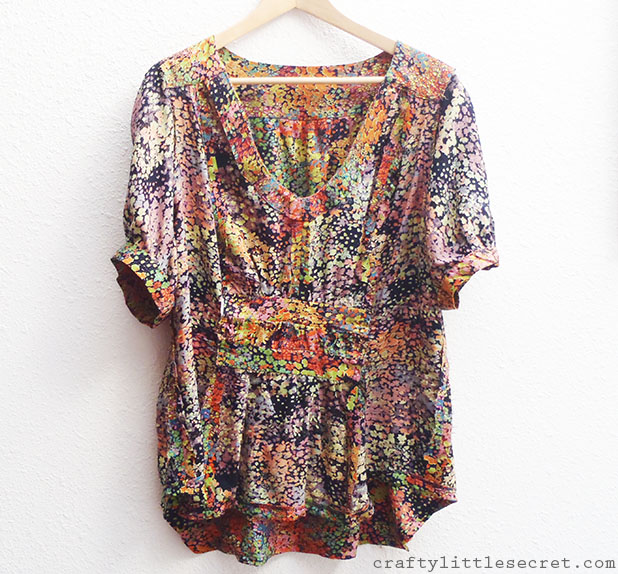
 I’m going to definitely hold onto this pattern, I think it would be great as the dress it is supposed to be. Actually, I wish I had enough of this fabric to make a dress!

 Ta-daaaaaaaaaaaaaaaaaaaaaaaa!!


What a lovely pattern! It looks great on you!
Thanks! I’m really happy with how it turned out!
that print is delicious!!! i’m all for ease when you can get it (not that kinda ease, you know what i mean…). i usually hack away a curve till i like how it looks 🙂
Yeah, I loved this print when I saw it and bought it completely on impulse (hence the reason I didn’t buy enough for a dress). I think you’re right about the curve, I probably should have left a little more length so I had room to play with it.
Pingback: Tutorial: Twin Needle Sewing | Crafty Little Secret…
Great job!! Also know that I am going to try twin needle sewing after seeing the tutorial, thanks!
Awesome! Let me know if you have any more luck than I did adjusting the tension with the twin needle.
Pingback: Me-Made May: Days 19-26 | Crafty Little Secret…