
I just want to take a minute to thank Jillian of Refashionista for featuring my Ele-Fun Refashion on her blog today! I love her blog, her creative refashions, and her conscientious approach to fashion and it was so amazing to see my very own re-refashion on Refashionista (that’s a lot of “refashion”)!
I can tell from my stats that many of you are joining me for the first time from her blog – Welcome!!! To help orient you and give you an idea of what I do here, I thought I’d share a link to my “Best of 2013” blog, so you can see some of my favorite projects and what I’m planning to do this year. Check it out here. And this is actually a good day to join me because this is a tutorial based on my elephant skirt refashion.
Ok. On to the tutorial. Bias tape is a folded strip of fabric that’s been cut on the bias and is used to add a decorative trim or to help finish edges like a neckline or armhole. When fabric is cut on the bias, it means that it is cut on an angle across the grain line.
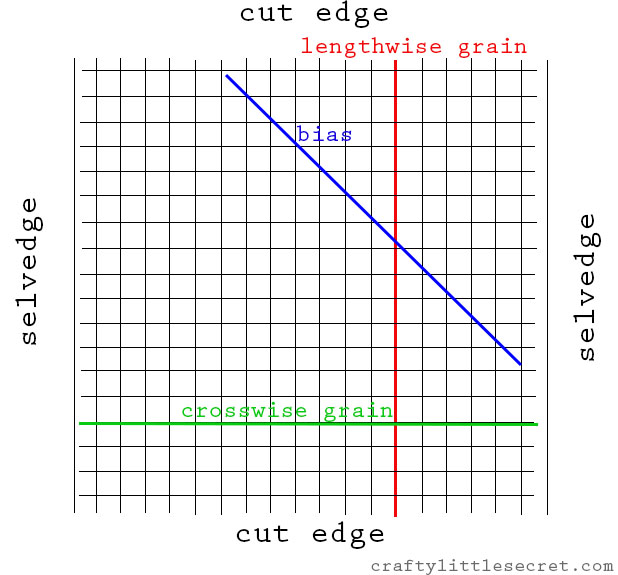 Bias tape can bend with curved shapes (like armholes) and stay smooth, where tape not cut on the bias would go all wonky. Technically, the tape I made for trim on the sleeves of my elephant top isn’t bias tape because I cut it on the grain, not on the bias (I din’t bother because the sleeve wasn’t a curved shape).
Here is a great tutorial on how to cut the strips to make your bias tape using just a 10″ square of fabric.
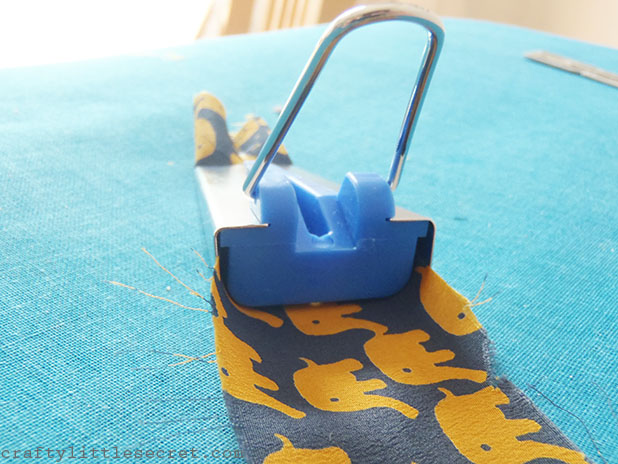
Once you’ve got your strips, making bias tape is a cinch if you’ve got a bias tape maker. You can find fancy schmancy ones that heat and press the tape as it moves through the machine but in my humble opinion, you don’t need it. All you need is one of these simple bias tape makers;
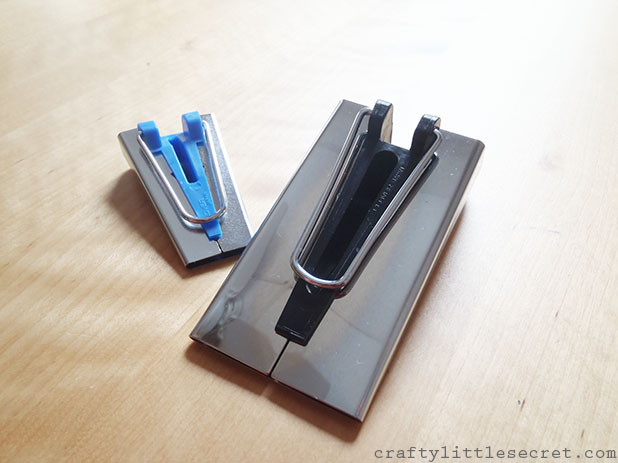
I got these for Christmas and they cost less than $10 each! Why spend $50 when you don’t need to??
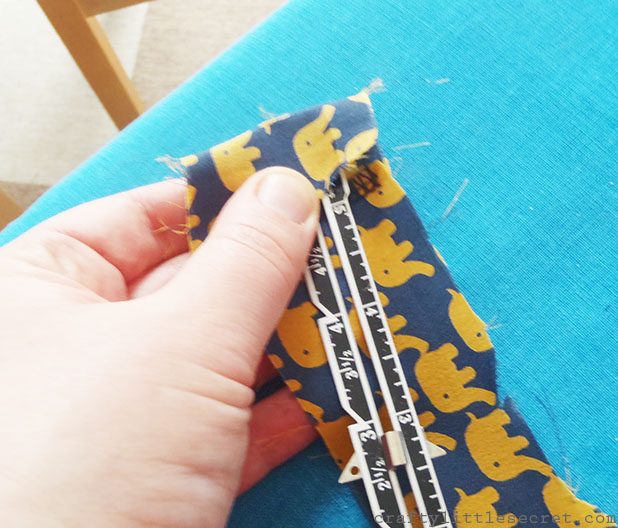
Feed your strips of fabric into the large open at the back of the bias tape maker. Especially with flimsy fabric like mine, it can be really difficult to get it fed through the machine, so I always use something like a hem ruler to push it through.
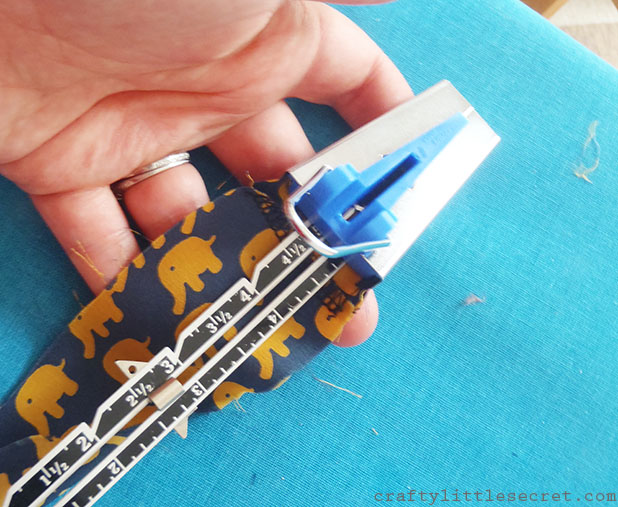 As the tape comes out the other side, the edges will be folded in.
 If you look at bias tape that you’ve bought from the store, you’ll see that the edges aren’t quite folded in evenly. One edge is narrower than the other.
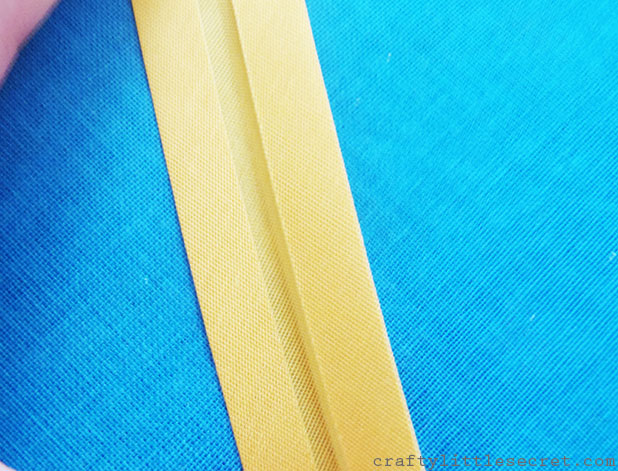
Can you see that one side is less thick than the other?
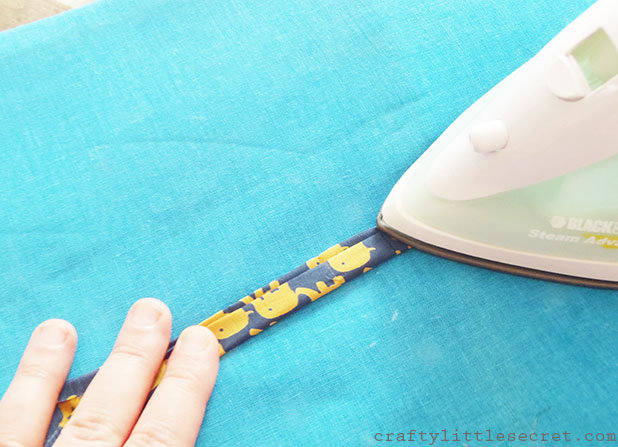
When making your own bias tape, you can adjust the widths of the folded edges by how you feed it through the mechanism. As the folded tape comes out, I press it using my iron and gently pull the bias tape maker.
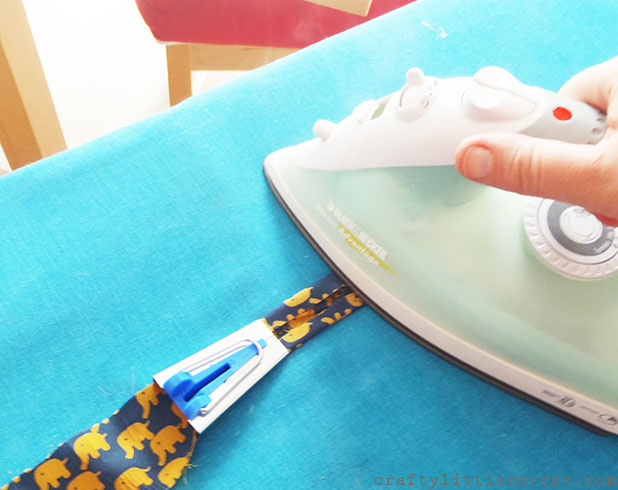 See why I say you don’t need the fancy schmancy bias tape maker? It’s so easy to just plop your iron down as you pull it through and your wallet stays about $45 heavier!
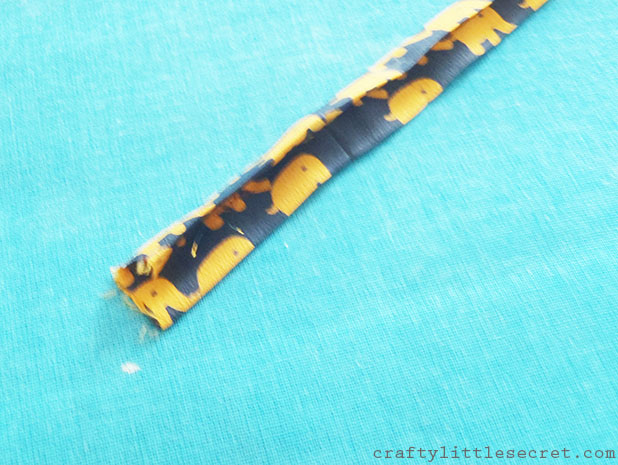
Once you’ve got your strip with the two long edges folded and pressed, you just need to fold it in half lengthways and press it again.
 Et voila! You’ve got homemade bias tape that perfectly matches your project!!
 There are so many fantastic tutorials online for attaching bias tape, that I decided not to make another and instead to direct to a couple that shows different ways you can use bias tape; either visible, or not, (also these two on knits here and here).
So go ahead, get crazy with your bad bias tape self!


Pingback: DIY Grill Apron: Tutorial | Crafty Little Secret…