
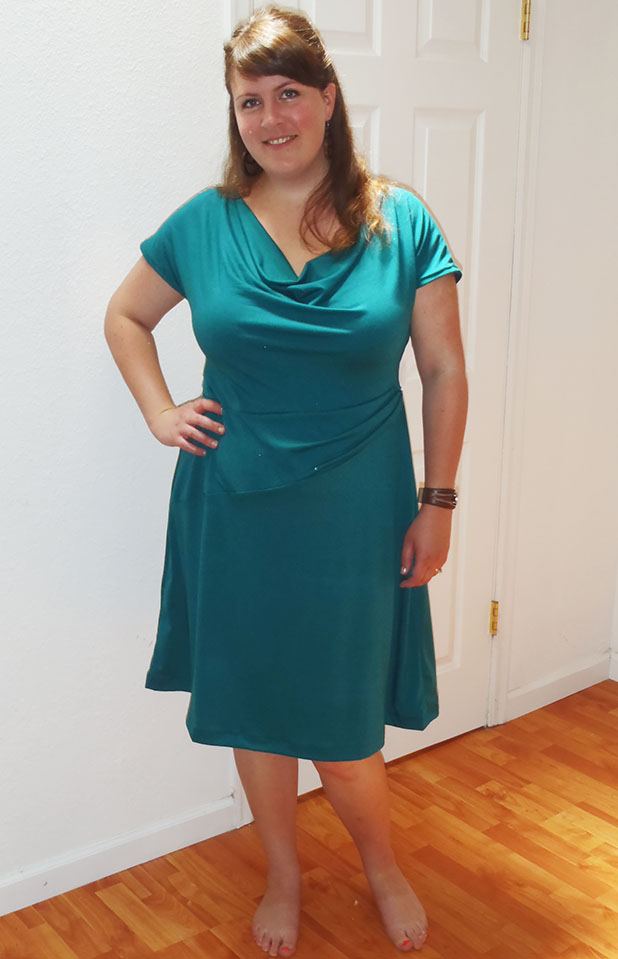
I made a new dress!!
One nice thing about being unemployed for a few months is that I’m finally working my way through my sewing basket and getting to things I’ve been meaning to for a while. Waaaaaaaaaaaay back in May I posted about a little fabric shopping spree I’d gone on, where I purchased a beautiful teal/emerald jersey for a dress with no pattern yet in mind. I settled on the Eva Dress from Your Style Rocks and I am so pleased with how it turned out!
 This was my first time printing a pattern pdf myself (it’s FREE!!!!) and had underestimated how long it would take to cut out and tape together all the pattern pieces. I think it took me as long to do that as it did to put together the entire dress!
I had made the resolution this year that I was going to start trying to sew “properly”. That is, reading patterns fully, following directions properly, ironing seams and using suggested techniques. I was somewhat successful with that on this dress and am proud of how it came together.
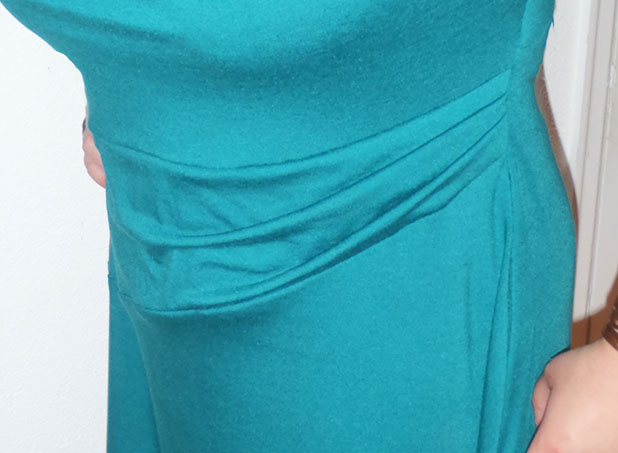 Because I used a fabric with stretch, I double-stitched then trimmed every seam in the dress as the pattern instructions suggested. I think it definitely helped to keep things looking neat. I could not, however, bring myself to iron the seams as the pattern instructed and I do think that decision subtly shows in the front waist detail. The ‘swoops’ are not quite as neat as I think they could be and I was left with a tiny bit too much fabric in the waist panel. I briefly contemplated trying to fix it but decided that picking apart the jersey then resewing it was likely to cause more damage than good.
 The pattern was fairly easy to follow. The only place I got a little tripped up was when sewing the facing to the back neckline. I interpreted the instructions as telling me to fold the facing in half, then stitch it to the dress, which I did. Then, the pattern instructed me to understitch and trim to just 1/4″. Lacking any kind of technical training whatsoever with sewing, there are many techniques and terms that I don’t know and “understitching” was one of them. I looked it up on YouTube, did what I thought I should and found that I had this 1/4″ little ragged edged facing bit that stuck up around the whole back of the edge!!! In the end, I just top-stitched over the whole thing. All that stitching made the back neckline a little heavy, but it turned out not too badly.
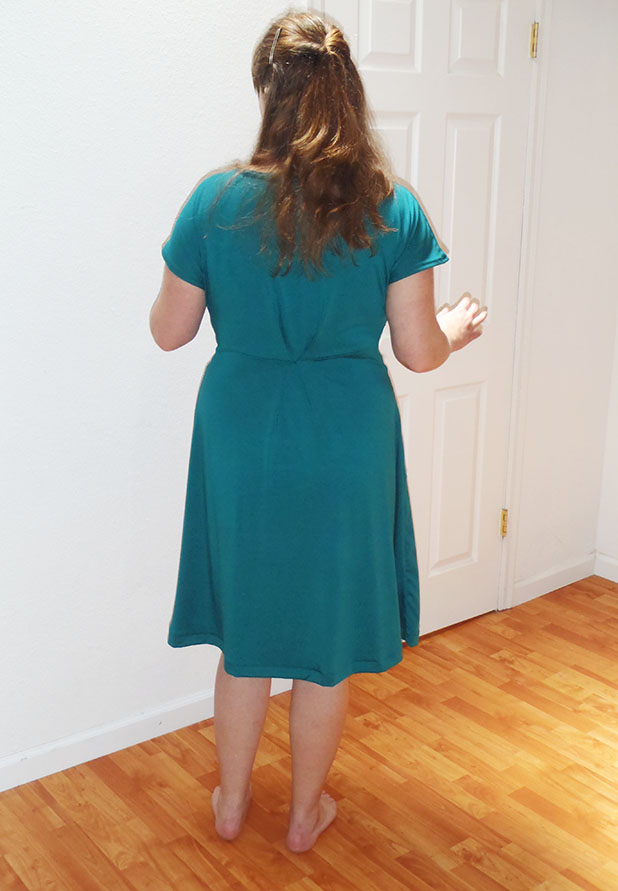
I also didn’t really know what the pattern was talking about with respect to the armholes. I opted to just leave them until the end at which point I did a double-turn edge on them and I thought it worked out great. No problem at all! I also opted to do the double-turn hem which, while making a nice neat edge, may have made the hem a little heavy for the dress.
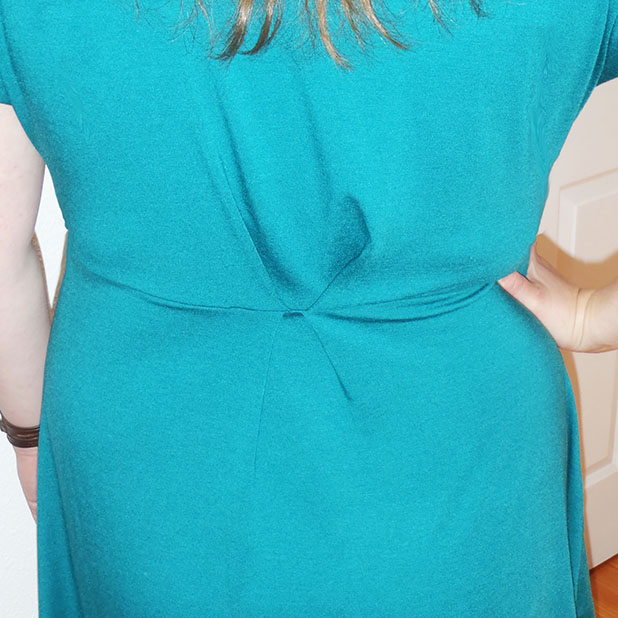 I also didn’t read to the end of the pattern, which means I constructed the back pleat improperly 😦 Once I did read the end of the pattern, their way really seems like it would have been much easier.
All in all I’m really pleased with this dress and would definitely make another!!


This is so pretty!
Thanks! The pattern came together really easily, I’m definitely going to keep it in my pattern library.
Hoping you can help. I am making the same pattern for my vow renewal ceremony but when I print the pattern my test square is not the right size. Did you have this problem? If so how did you fix it? BTW – Your pic is the one that made me finally decide on this pattern. 🙂
Hi Shannon,
I’m so glad that you liked my dress!! I think it would be beautiful for a vow renewal ceremony, what color will you be making?
As for the printing, the only thing I needed to do to have it print correctly was to unclick the box that says “Scale to Fit” or something like that. Hope that helps you! Good luck!
Hi – I love your version of this dress. I’ve made it twice, bothtwice I’ve missed off the pleat in the back, ut yours is really good!
Thanks so much! I’ve been debating doing another version and making it a full maxi dress. Yours look great too! The print in the black and white version really emphasizes the swoosh and gather of fabric across the front.
Pingback: Me Made May ’14: Days 13-18 | Crafty Little Secret…
This looks great! I am attempting this pattern soon. Thanks for your tips.
Let me know how it turns out!!
Pingback: Me-Made May ’14: Days 27-31 | Crafty Little Secret…
Pingback: Bronte Top by Jennifer Lauren Vintage: “Sangria” | Crafty Little Secret…