
 My first Mathilde blouse from Tilly and the Buttons!!! I’ve been seeing these all over the sewing blogosphere and while I loved the pattern, I just wasn’t sure it would work for me. After searching and searching for some cute blouse patterns I decided it really is one of the cutest ones out there and bought the pattern. I’m so glad I went for it because, as you can see, it turned out super adorable!!
My fabric choice was a nice lightweight quilting cotton by Monaluna for Birch Organics, Next Stop City Park, that I purchased online from Fabricworm (I can spend literally hours just drooling over their cute fabrics!!).

I’d be eyeballing this fabric for a while and when it went on sale for 10% off how could I not click ‘buy’??? Of course, now it’s on sale for 60% off so you can get it at a steal and the joke’s on me! Oh well, I still love it.
A lot of the comments I’ve seen online from people who have made the Mathilde blouse echo one of the concerns I had before making it, that the sleeves just have too much volume. Unfortunately, I don’t have any pictures of me wearing the shirt with the sleeves as patterned but I agreed. The sleeves just looked…..weird….on me.

This picture was taken before I decided to shorten the sleeves – not sure if it’s apparent just how much volume the sleeves have.
Tilly has really detailed photo instructions for each step of the blouse construction on her website and they definitely came in handy when it came time to construct the front tucks.
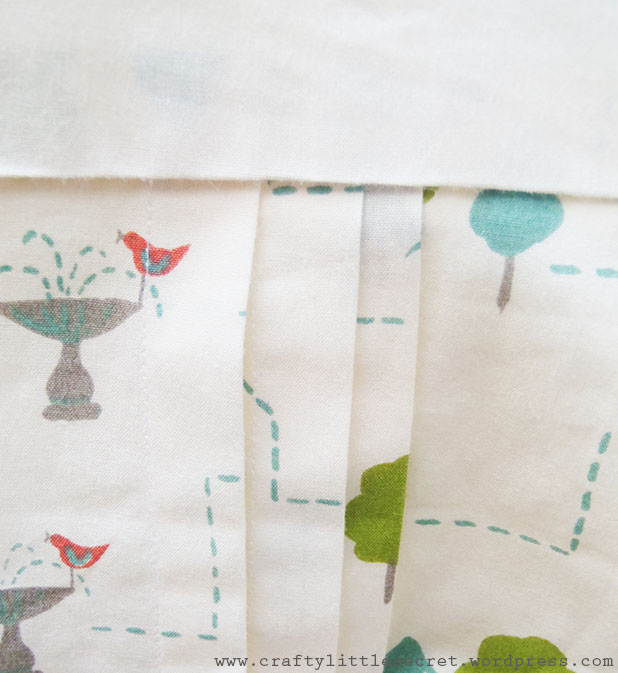
I’m like, practically a tuck expert now. No big deal or anything…
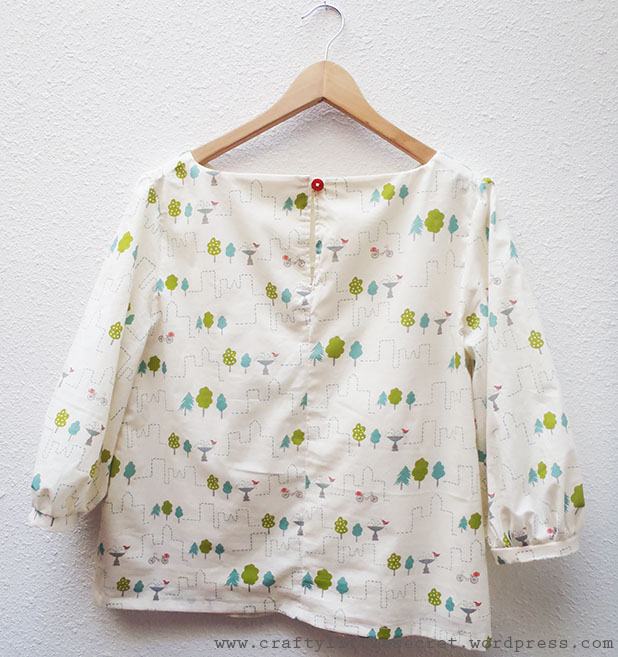
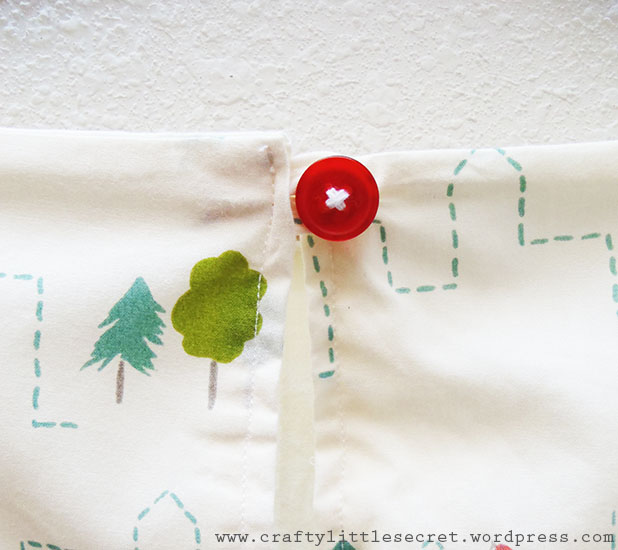
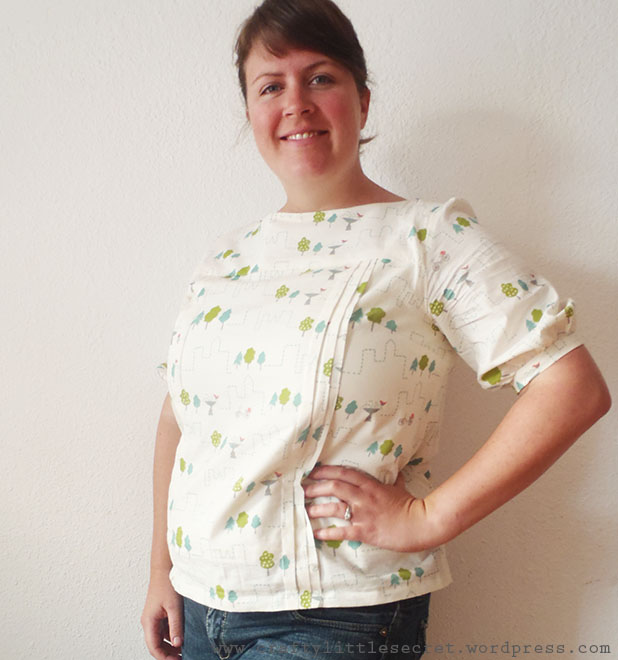
The major change I made to the pattern was actually taking out one of the design features of the blouse – the back button placket. I’ve definitely seen versions of the blouse with the back buttons that look great, but I think that with patterned fabric the buttons end up making the blouse look a little too busy. So instead, I sewed a seam up the back leaving a bit of space at the top and adding a button and loop closure at the neckline.
 I was a little worried about the top being too sheer so I decided to line the body of the top. Although the I added about an inch and a half to the center of the pattern front, the blouse ended up just fitting. Of course it was only after I cut all the pattern pieces in the fabric and the lining that I realized, duh. I should have cut the lining first to use as a muslin, then cut the good fabric. Oh well, these are things that, being new to this whole sewing properly thing, I just don’t always think of. Meh.
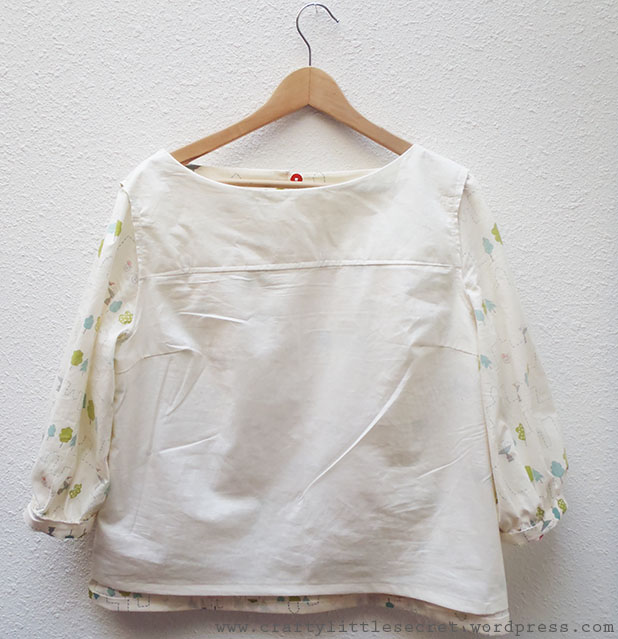 As you can see above, I subtracted the tucks from the lining when cutting the pattern to simplify my life a little. I assembled the lining and the blouse bodice independently, then stitched them together at the neckline, and finally added the sleeves. I ironed up the seam joining the yoke to the front of the blouse, then top stitched over the seam to seal it up and keep the inside of the blouse purrrrty. I also did French seams for every seam that I could and did double-turned hems.
Ooooooooh! Ahhhhhhhhhh! Nice and neat seams and hems are a thing of beauty!!
One thing I think I’ll change the next time I make this blouse is to lower the neckline a little. It feels a bit restrictive and looks like it’s choking me. I wasn’t sure the flat panel look to the front of the blouse would flatter my…er….ample bosom, but in the end I’m pleased with how it looks.
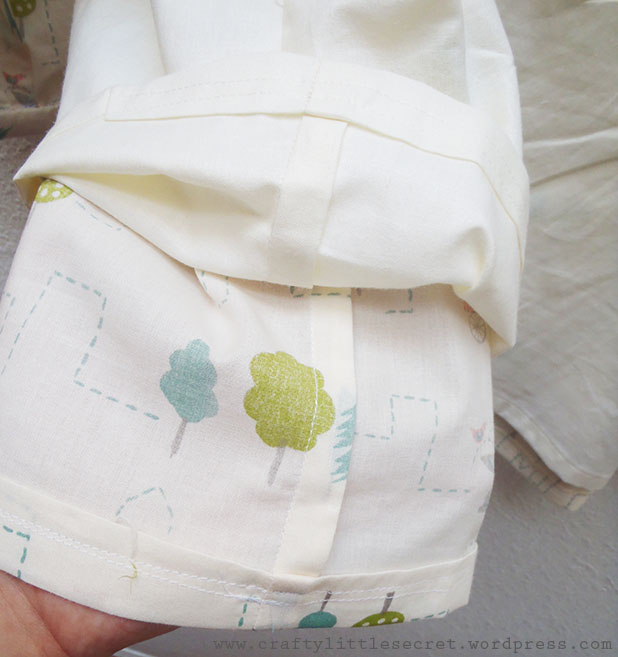
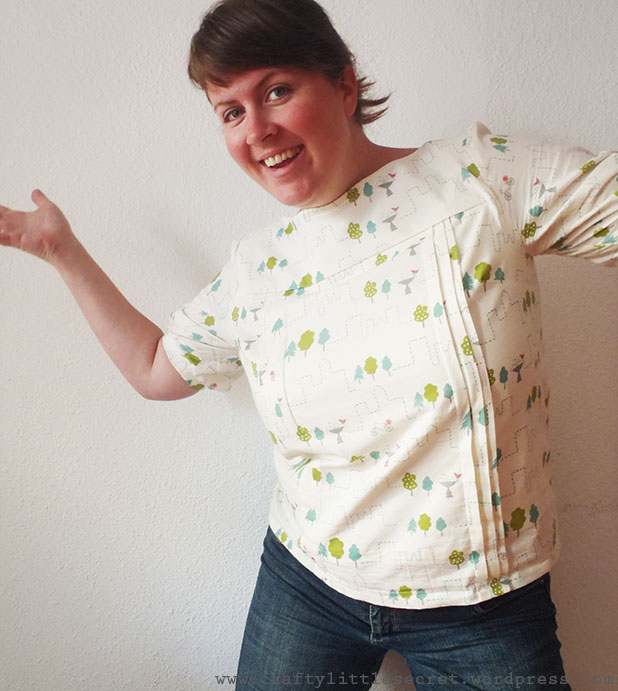
Notice the cute short sleeves!!! I just cut a few inches off the length of each sleeve then reattached the cuff. If my arms were like, and eighth of an inch fatter, I would have had to widen the cuffs but luckily they’re just fat enough, LOL!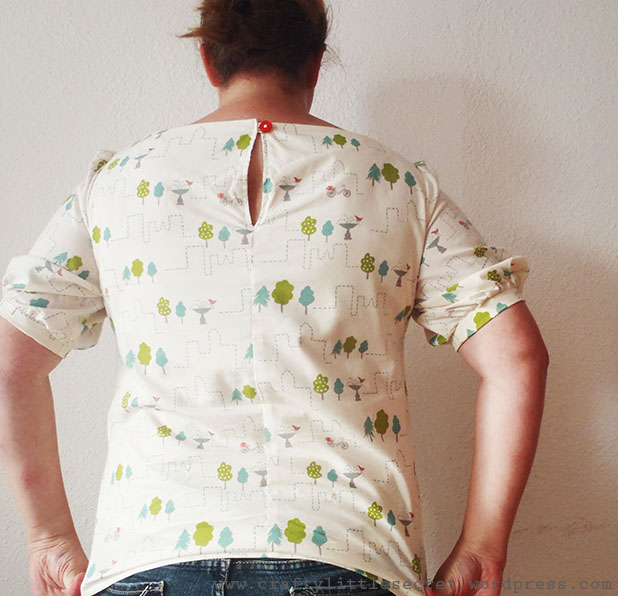 Materials:
– Mathilde blouse pattern size 6
– 2 yards of Monaluna for Birch Organics: Next Stop, City Park, 45″ width (barely enough! )
– 1 yard of unbleached cotton for lining, 60″ width
Alterations:
– added 1.5″ to center of the front (yoke and body)
– shortened sleeves by a few inches
– lined the body
– replaced the back button placket with a seam
All in all……success!!!!! I’m so proud of the extra attention I paid to some of the details like the French seaming, hems and lining. It may take a little longer during construction but in the end the extra bit of pride I have was worth it!


It looks excellent! I love your French seams and neat hems – you’ve done such a lovely, precise job. The shorter sleeves look great and really suit you. I adore this pattern but unfortunately I don’t think it would flatter my figure. I’ll just have to sigh and covet everyone else’s beautiful creations 🙂
Thanks Ruth! My next iteration is going to have the gathered front instead of the tucks, so we’ll see how that looks in comparison. Now I just need to get the By Hand London Anna dress and the Grainline Archer shirt and I’ll be all caught up with the trendy indie patterns, LOL!
So cute!
I’m so happy I found that print! Thanks for the pattern!
What a lovely, professional job! I love the blouse, the fabric and the shorter sleeves. Great work. Looks great on you, by the way! Karen
Thanks Karen!! I’ve got another variation in the works with different fabric 🙂
Pingback: 2014 Re-SEW-lutions | Crafty Little Secret...
Pingback: Mathilde Blouse #2! | Crafty Little Secret...
Pingback: Me-Made May: Days 19-26 | Crafty Little Secret…
Pingback: Me-Made May ’14: Days 27-31 | Crafty Little Secret…
Pingback: Me-Made May ’14: Roundup and Reflections | Crafty Little Secret…