
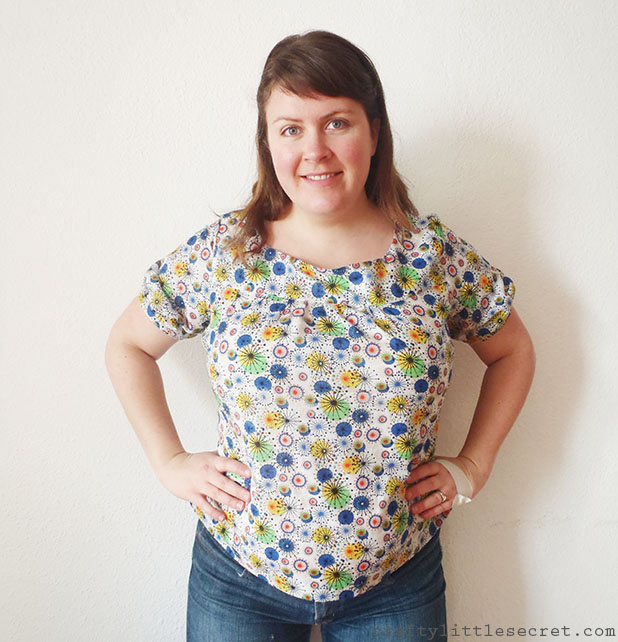
You may notice my hand is taped up in this photo – earlier in the day when, trying to catch up on some deferred maintenance around the apartment, I stabbed my hand with a screw driver! Owwww!!!
Crazy eyes in a crazy print Mathilde blouse! I could not get a reasonable picture of myself today! Well….I’ve started off 2014 a little behind the ball and have been trying to catch up on promises made and deferred maintenance spilling over from last year. As a consequence it’s been two weeks since I posted last – oops!

I made my first Mathilde blouse last year, and almost immediately moved onto this one. But some earlier errors and frustrations have kept me from finishing it until now. I LOVE my first version of this blouse and am still completely in love with this pattern. But this version….mmmmm…..maybe not so much.
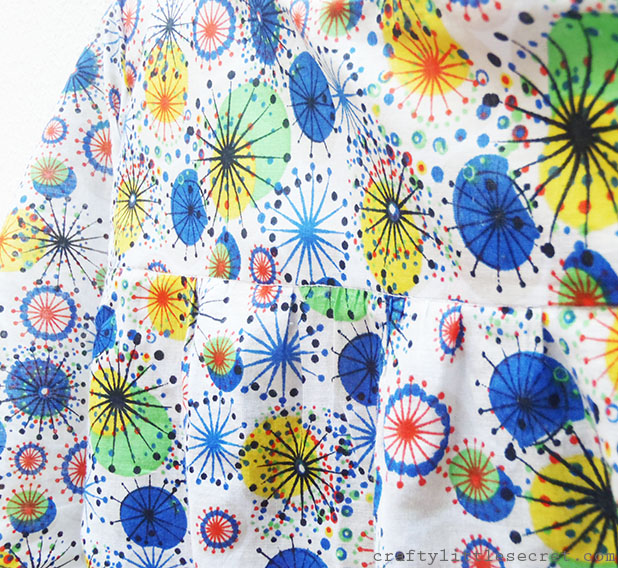
The main problem is that I just chose the wrong fabric, plain and simple. This fabric is a really breezy cotton lawn that I got for about $6/yd at Discount Fabrics. The problem is that the fabric is a little too flimsy and I didn’t know how to deal with the seams properly so just from trying it on during fitting, the back seam is already giving. D’oh!
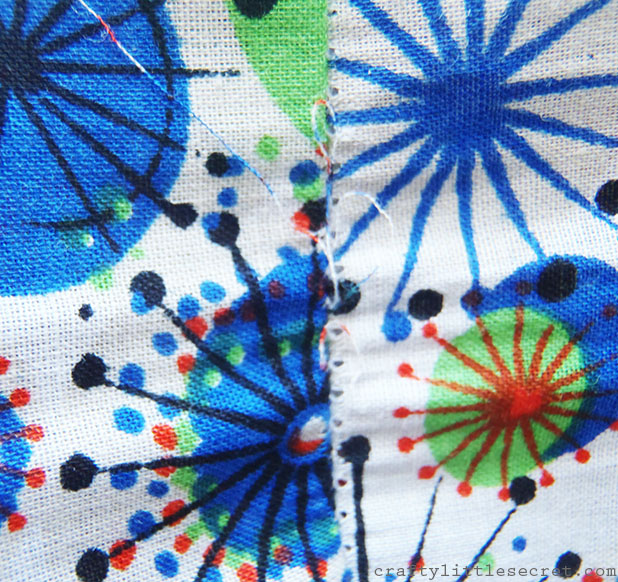 I’m worried that I’ll be stretching for something one day and will just hear “Riiiiiiiiiiiiip!”. The other thing I don’t like about this fabric is the print. I’m always attracted to loud colors and fun prints but I sometimes fail to consider how they’ll actually look as a garment. This print in the finished top reminds me of a duty shirt that a vet or dental assistant would wear. Sad face.
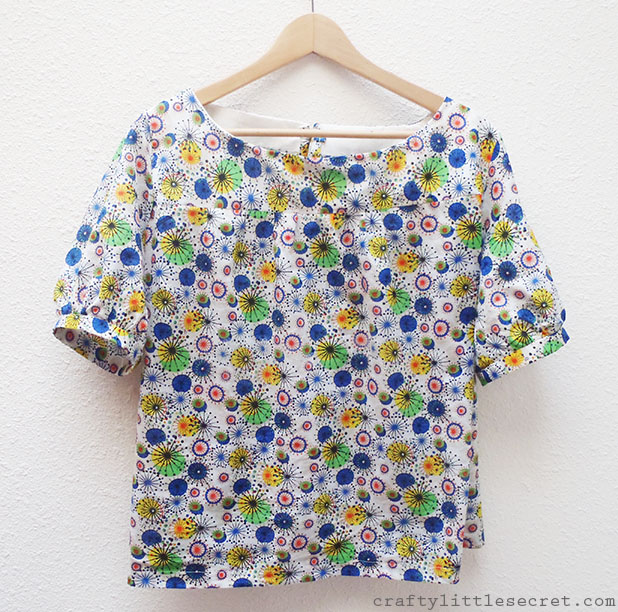
Last time I made this blouse I went with the tucks instead of gathers across the front. Because it was more fitted I added some width to the front bodice to make sure it would fit over my bust. Since this one was gathered I assumed I wouldn’t need to do that. Errrrrrr! Wrong! The front yoke was actually too narrow so after assembling the whole shirt I had to take it all apart, cut a new yoke and reassemble. Lesson learned! I’m glad I didn’t add an extra width to the bodice front though, it is already very loose on me and would’ve looked a little maternity-esque with any more volume.
The other change I made to the front yoke was to lower the neckline by about an inch. I’m not sure that I like that change. I might just leave it alone next time. I do think the gathers look quite nice though.
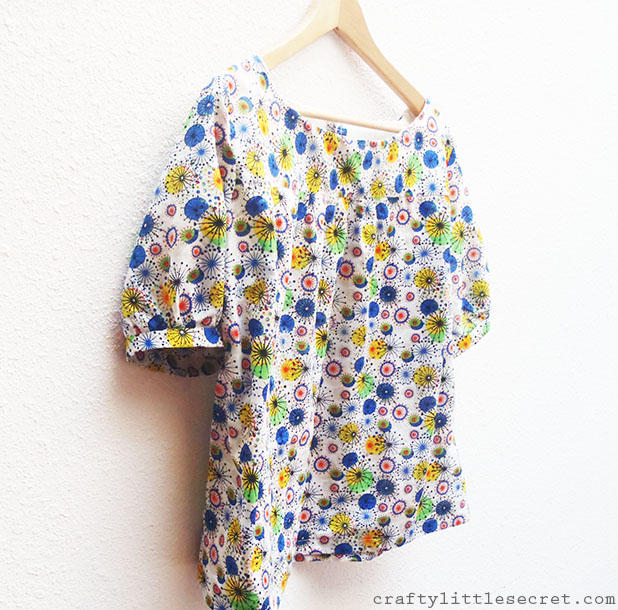
 I also made the short-sleeved version of this dress, but to add a more structured shape, I added cuffs to the sleeves. I made the same alteration to my last Mathilde and just used the cuff pieces as patterned, but I’ve found the cuffs are a bit tight on my huge guns. So this time I added about an inch when cutting the cuff pieces and they’re definitely more comfortable.
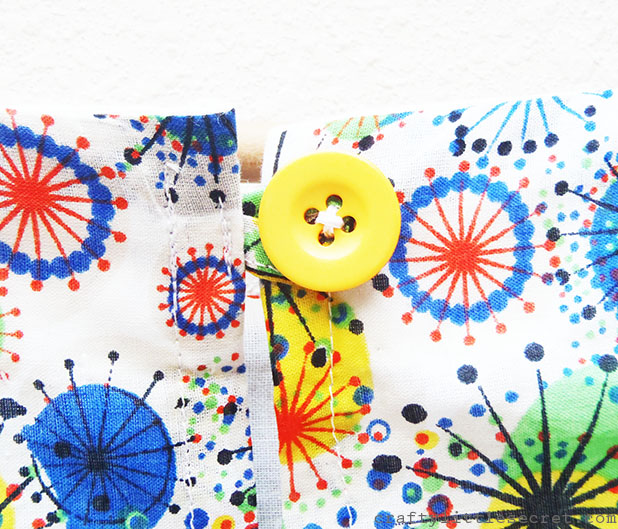
 Finally, I also eliminated the back button placket as I did with the last blouse and for the same reason; I thought it would look too busy to have a button placket with such a busy pattern. I left an opening at the top of the back seam and made a button closure, but especially with the lowered neckline, I definitely could have sewn it all the way to the top and still easily fit my head through. The bright yellow button is a cute detail though!
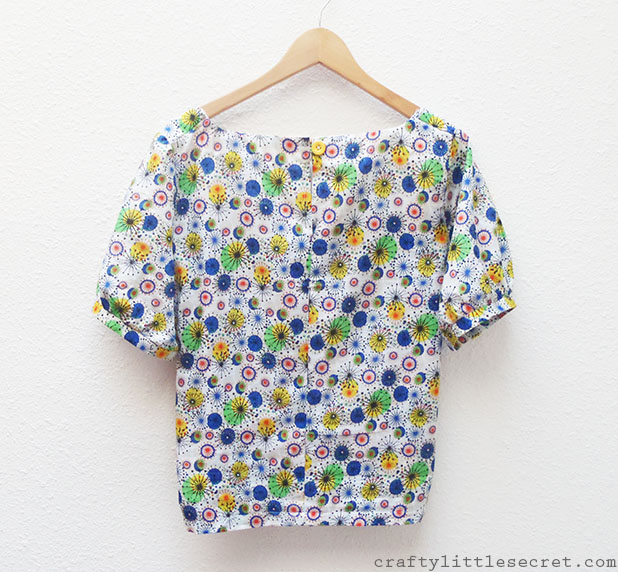
 Having made this pattern twice now, one piece of advice I have for tall ladies (I’m 5’10”) is to add lots of length to the bottom. I added a couple inches (and did a double turn hem) and am definitely going to let it out as much as I possibly can to try to get a bit more length. At it’s current length I don’t feel like I could tuck it in if I wanted.
So there we have it. I’m still in love with Tilly’s pattern, but not in love with this version that I’ve made. Thoughts to make it feel less like a pediatric nurse’s scrub top???


Add lace at the bottom and a Peter Pan bib!
Oh it’s cute! I love the little button loop that you added.
I think blue ribbon accents as the cuffs and bottom hem would help transform it from scrub-esque to chic-esque. It’s super cute already though!
I like the ribbon idea! Adding an accent like that would certainly distinguish it from an all-one-fabric scrub top. I’ve debated inserting some piping between the yoke and the bodice to emphasize the pattern details as well but am still on the fence about what I’ll do…
Pingback: Me-Made May: Days 19-26 | Crafty Little Secret…