
Author Archives: missphd

BioCouture
Leave a reply
A friend originally turned me on to Suzanne Lee and her BioCouture a while ago and I was recently reminded of her insanely cool work when I saw her Ted Talk online.
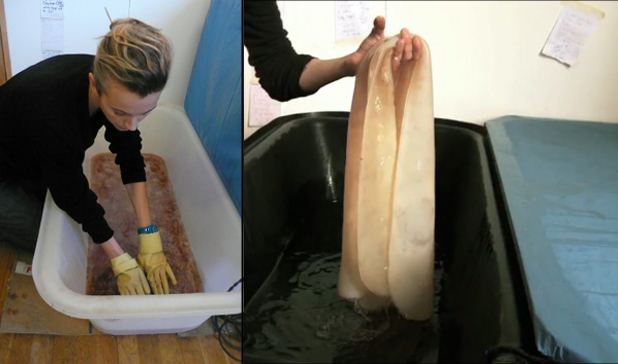
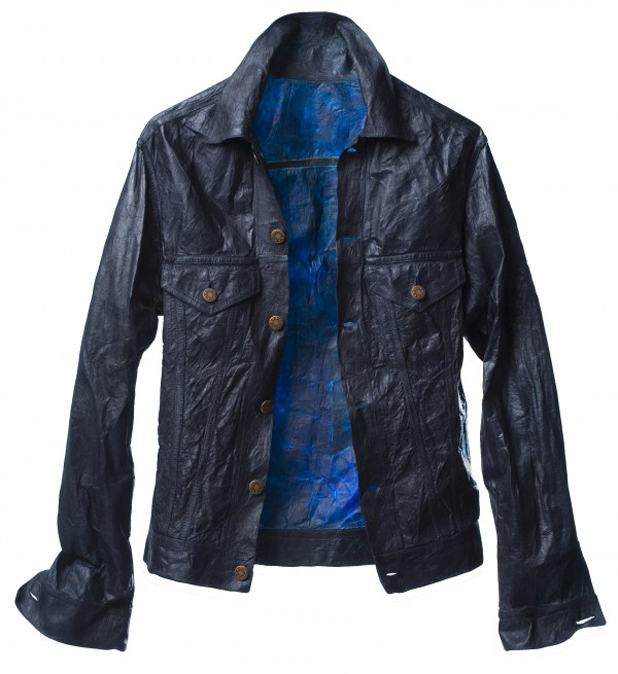
Suzanne is a fashion designer who paired up with a microbiologist to basically grow her own fabric! The fabric has the look and texture of a strange translucent leather and can be molded or cut and sewn into all different patterns.

In a simple fermentation process, similar to that used when making Kombucha, a mixture of yeast and bacteria essentially spin cellulose fibers in a sweet green tea bath. After a little more than a week, a thick mat of cellulose is harvested from the top of the culture. This is the fabric Suzanne uses as the base of her creations.
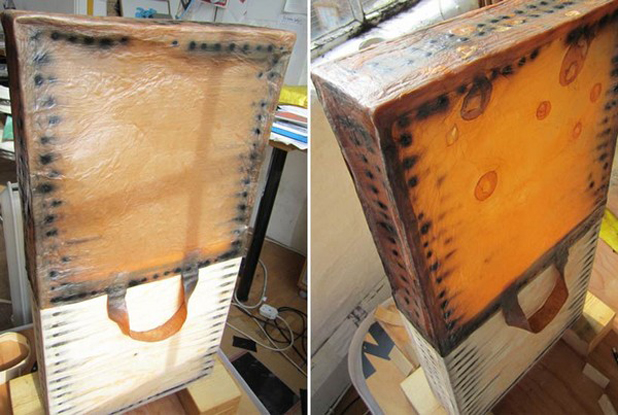
 She can create patterns and colors on the clothing using iron oxidation,
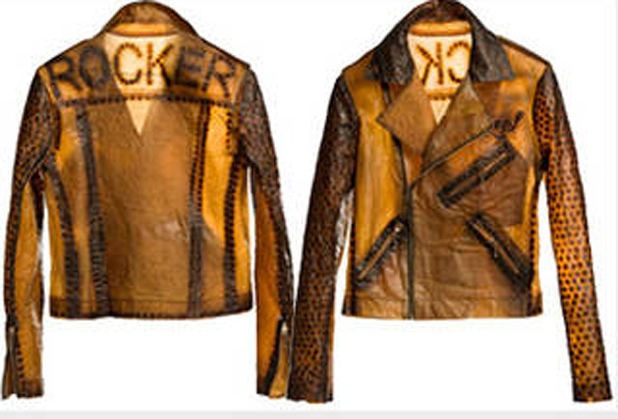
vegetable dyes,
 or indigo dye.
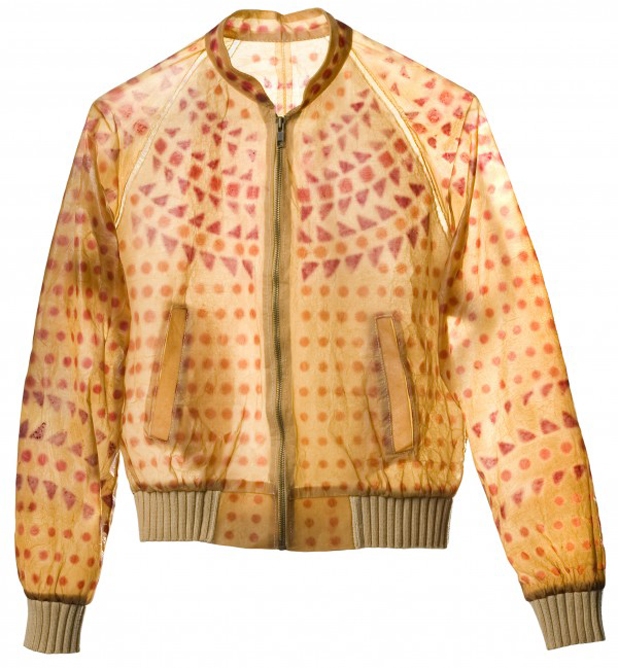
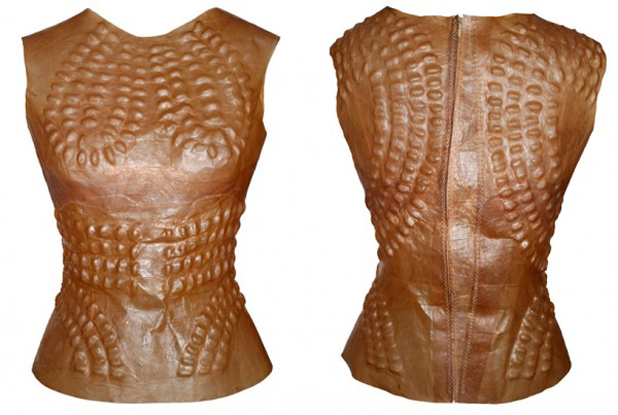
 She can even mold the fabric into whatever shape she wants to either add texture to a piece, or to mold the piece in its entirety.
One of the major hurdles for BioCouture to overcome is that the fabric produced biodegrades and is not waterproof. Meaning if you got caught in the rain wearing one of these outfits, you’d likely ended walking home in the buff. But using microbes to create fabrics leaves the door open for remarkable innovations as bacteria themselves are master innovators. If an organism could be engineered to create a cellulose mat with all the desired characteristics, growing your own fabric could become a reality!
You can watch Suzanne’s full Ted Talk and learn more about it, below.
Share this:

DIY Sewing (in progress) – Striped Tanktop
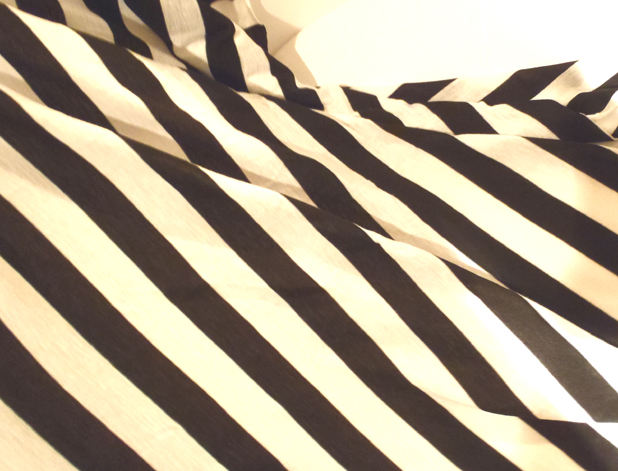
I’m addicted to horizontal stripes, especially in black and white. For a while I restricted myself from buying anything too stripy, but one of my favorite black/white striped sweaters is starting to look a little worse for wear so I’m allowing myself another new shirt or two.
Whenever I go to the fabric store I always check out the odds and ends bin, you can find some great deals in there. For instance, I found about 2 yards of this black/white striped jersey knit for $3!! It had a couple holes and blemishes that needed to be worked around but for that price, I figured I couldn’t go wrong!
 I thought about it for a while and ultimately decided to make a tanktop with the fabric. I’m a self-taught sewer, so I’m not sure if these techniques are proper but they’re what work (sort of) for me! Though, you’ll see at the end that this project had a few issues I’m still trying to sort out.
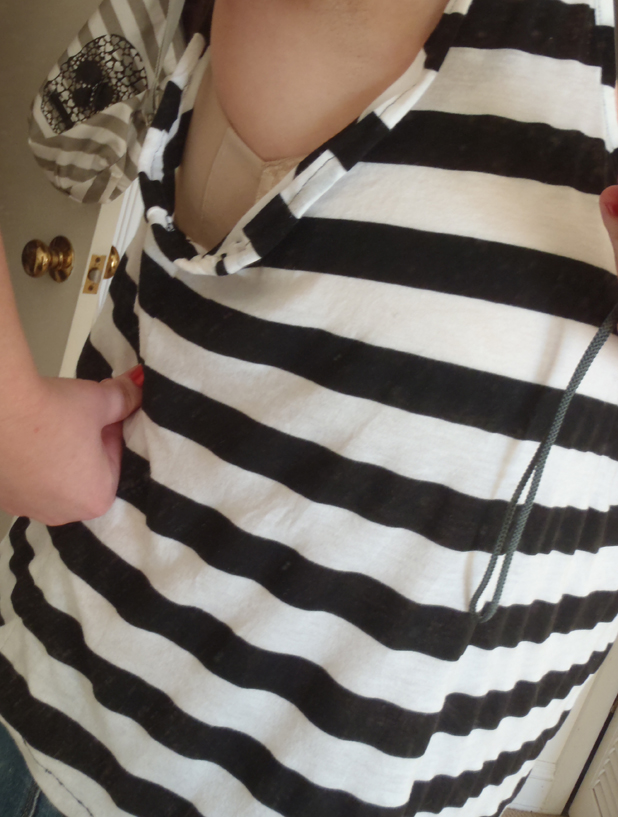
I have a sheer tanktop from Nordstrom that I really like the fit of and decided to use that as a rough template, leaving about an inch around all edges for seam allowance and some room to mess up.
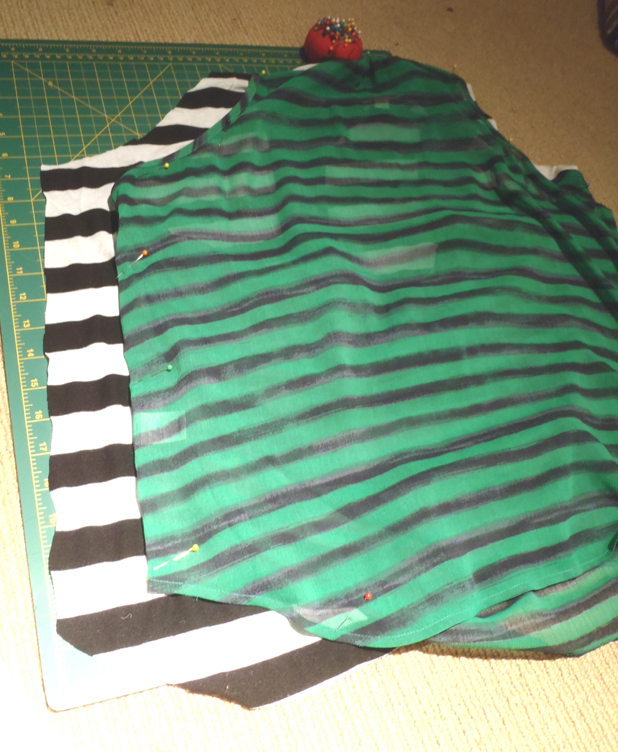
 It’s hard to tell in the top picture, but this tanktop is actually made of 3 pieces total. The front is a single panel, then the back has a seem across the shoulders with a bit of gathering to allow it to sit flat across the shoulders then flow out from the body.
I started by preparing the front and back panels for sewing together. I didn’t take a picture of it, but the front of the tanktop has a bit of gathering in the center of the neck opening. When I cut the fabric, I allowed a couple inches extra for this and gathered the fabric before sewing the two pieces together. There’s a really simple way to do this.
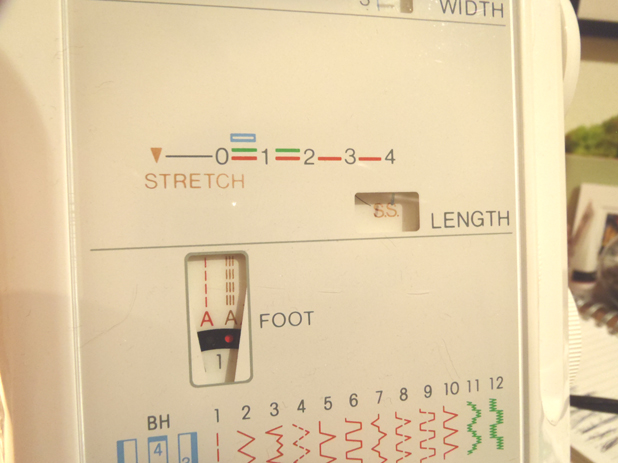
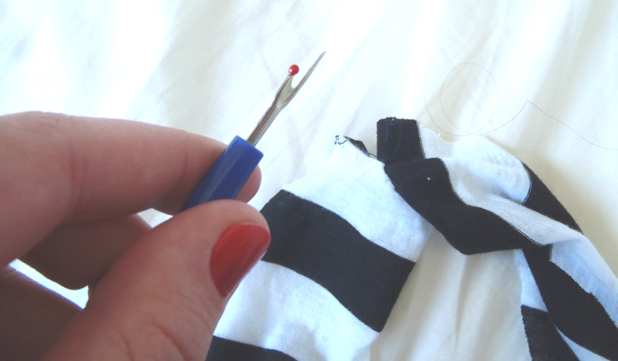
First, sew a straight line on the portion of the fabric that you are going to gather (don’t use your stretch stitch settings yet!). Be careful to do this close to the edge of your fabric (less than 5/8″) so that it will be sewn into the seam and not visible in the finished garment. Next, you want to grab the thread from the top side of the start of the stitching and the bottom side of the end of the stitching (I’ve drawn arrows to show which threads, the one on the right is coming from underneath the fabric).
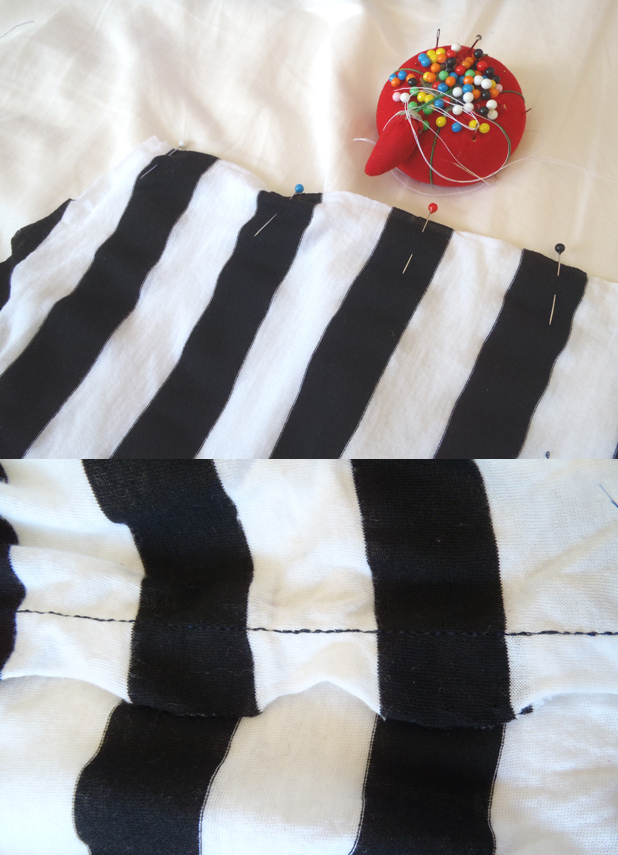
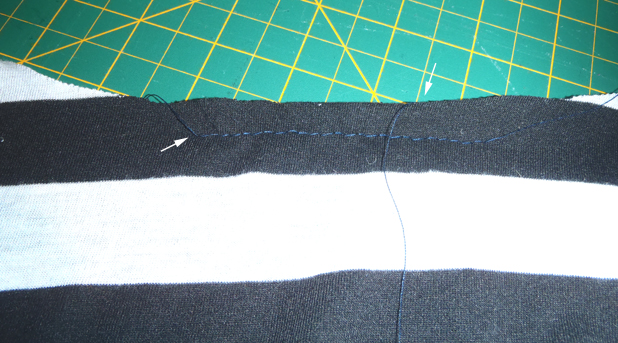 Gently pull on the threads and the fabric will gather. When it has the look you like, run it through your machine again and baste it down with a quick top sew.
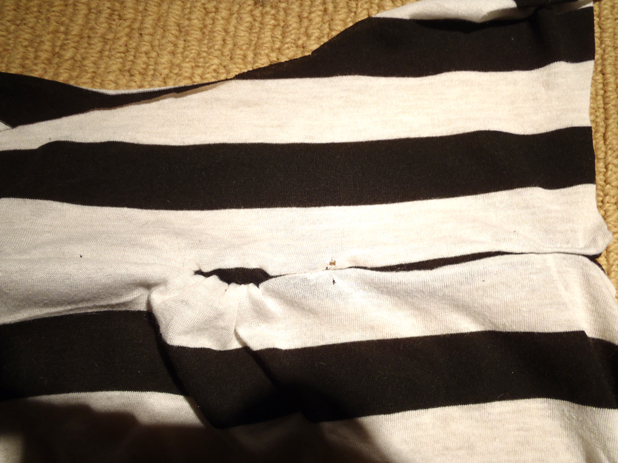
 I did the same thing at the back of the shirt, then sewed it to the upper back panel. When I did this, I forgot to change the tension on my machine first and ended up getting a snag and putting a hole in the fabric. Whoops!
Every sewing machine is different, but it’s important to sew stretchy fabrics with the proper tension settings to allow your seams to stretch with your shirt and avoiding thread breakage. My machine has a stretch stitch setting that I used for sewing all the seams (once I remembered to do so, that is!).
 Now I was ready to stitch the front to the back. Unfortunately, at least once in every sewing project I will sew the right side to the wrong side. I guess that’s why stitch rippers were invented!
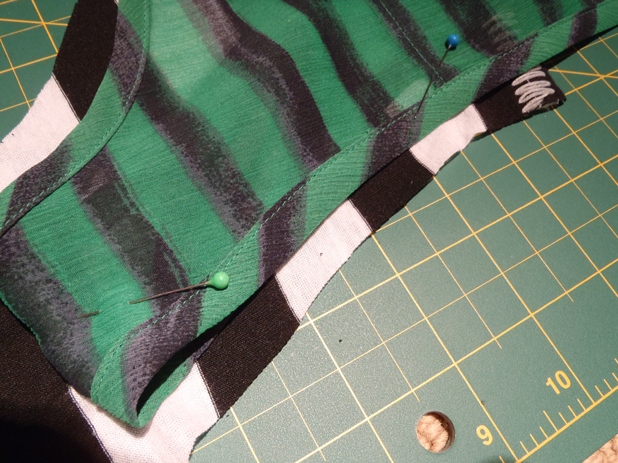
 Ok, with that out of the way I was free to pin and sew right sides of fabric together, sewing the side seams up the torso of the shirt and the shoulders. I always use a seam allowance of 5/8″, since I was taught this is what most sewing patterns allow for. I also took care to make sure I matched stripes. It’s a simple way to make your projects look a little more tailored.
 Next, I wanted to add binding to the neck and armholes. Full disclosure here, folks: I’ve never done binding before and I totally made it up, so I may not have done it properly.
First, I cut long strips of fabric, 2″ wide, that I would use as the binding. At this point, other craft blogs would tell you to do something crazy like iron it. If you like doing things properly, go ahead! Iron away! If you’d rather get it done quickly and sloppily, my way is the way!
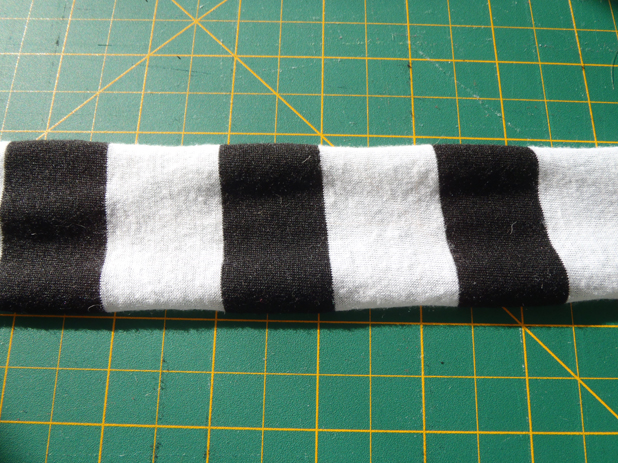 Next, I sewed one long edge of the binding to the armholes and neckline, right sides together.
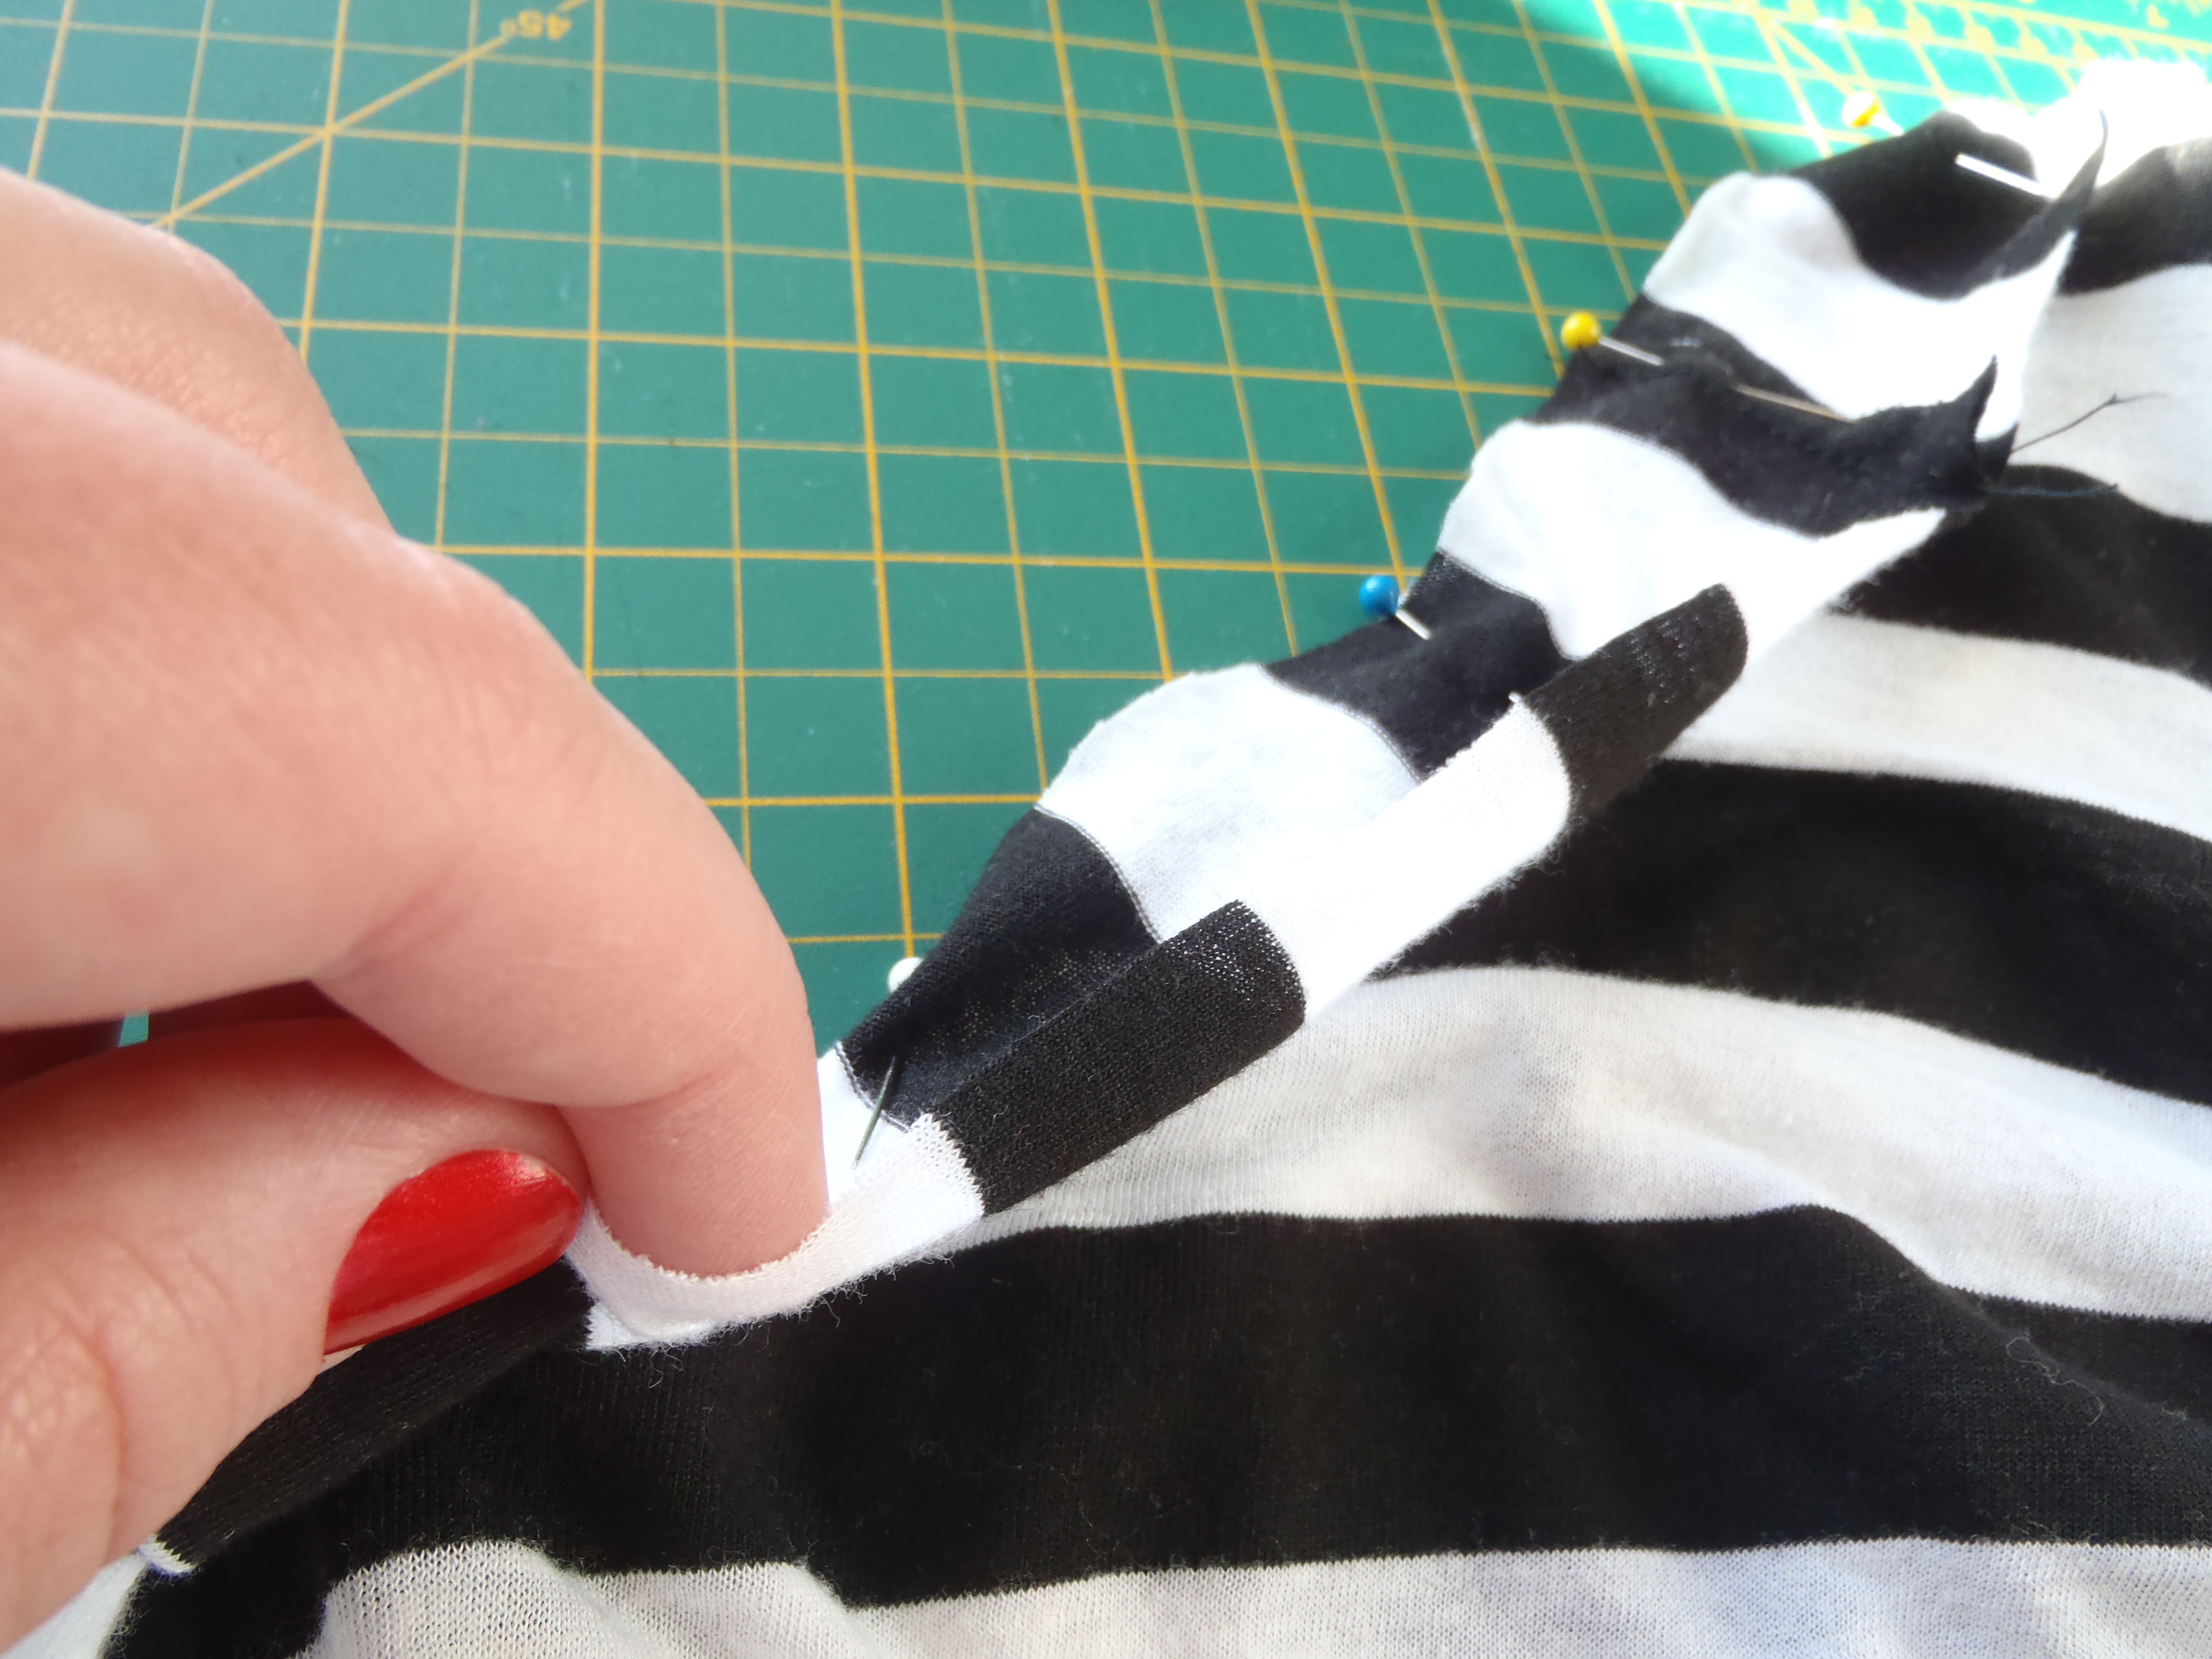 This next part might be a little difficult to see with my fingers in the way, but what you want to do is this:
1. Fold the binding, wrong sides together so that the edge meets the edge of your seam (along the dotted red line I’ve drawn).
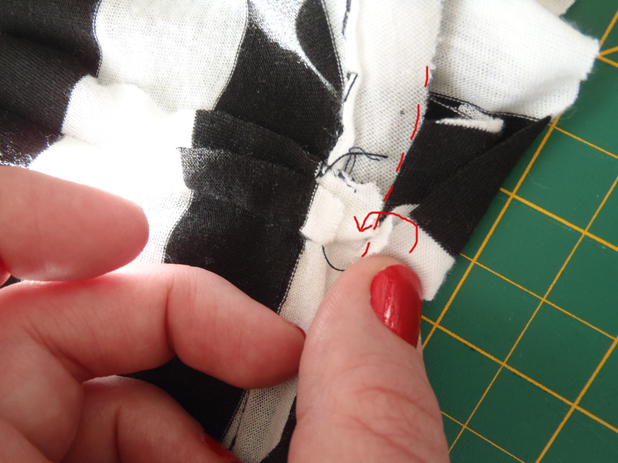
2. Fold again, so that now your binding is folded over itself and covering the raw seam edges and pin.
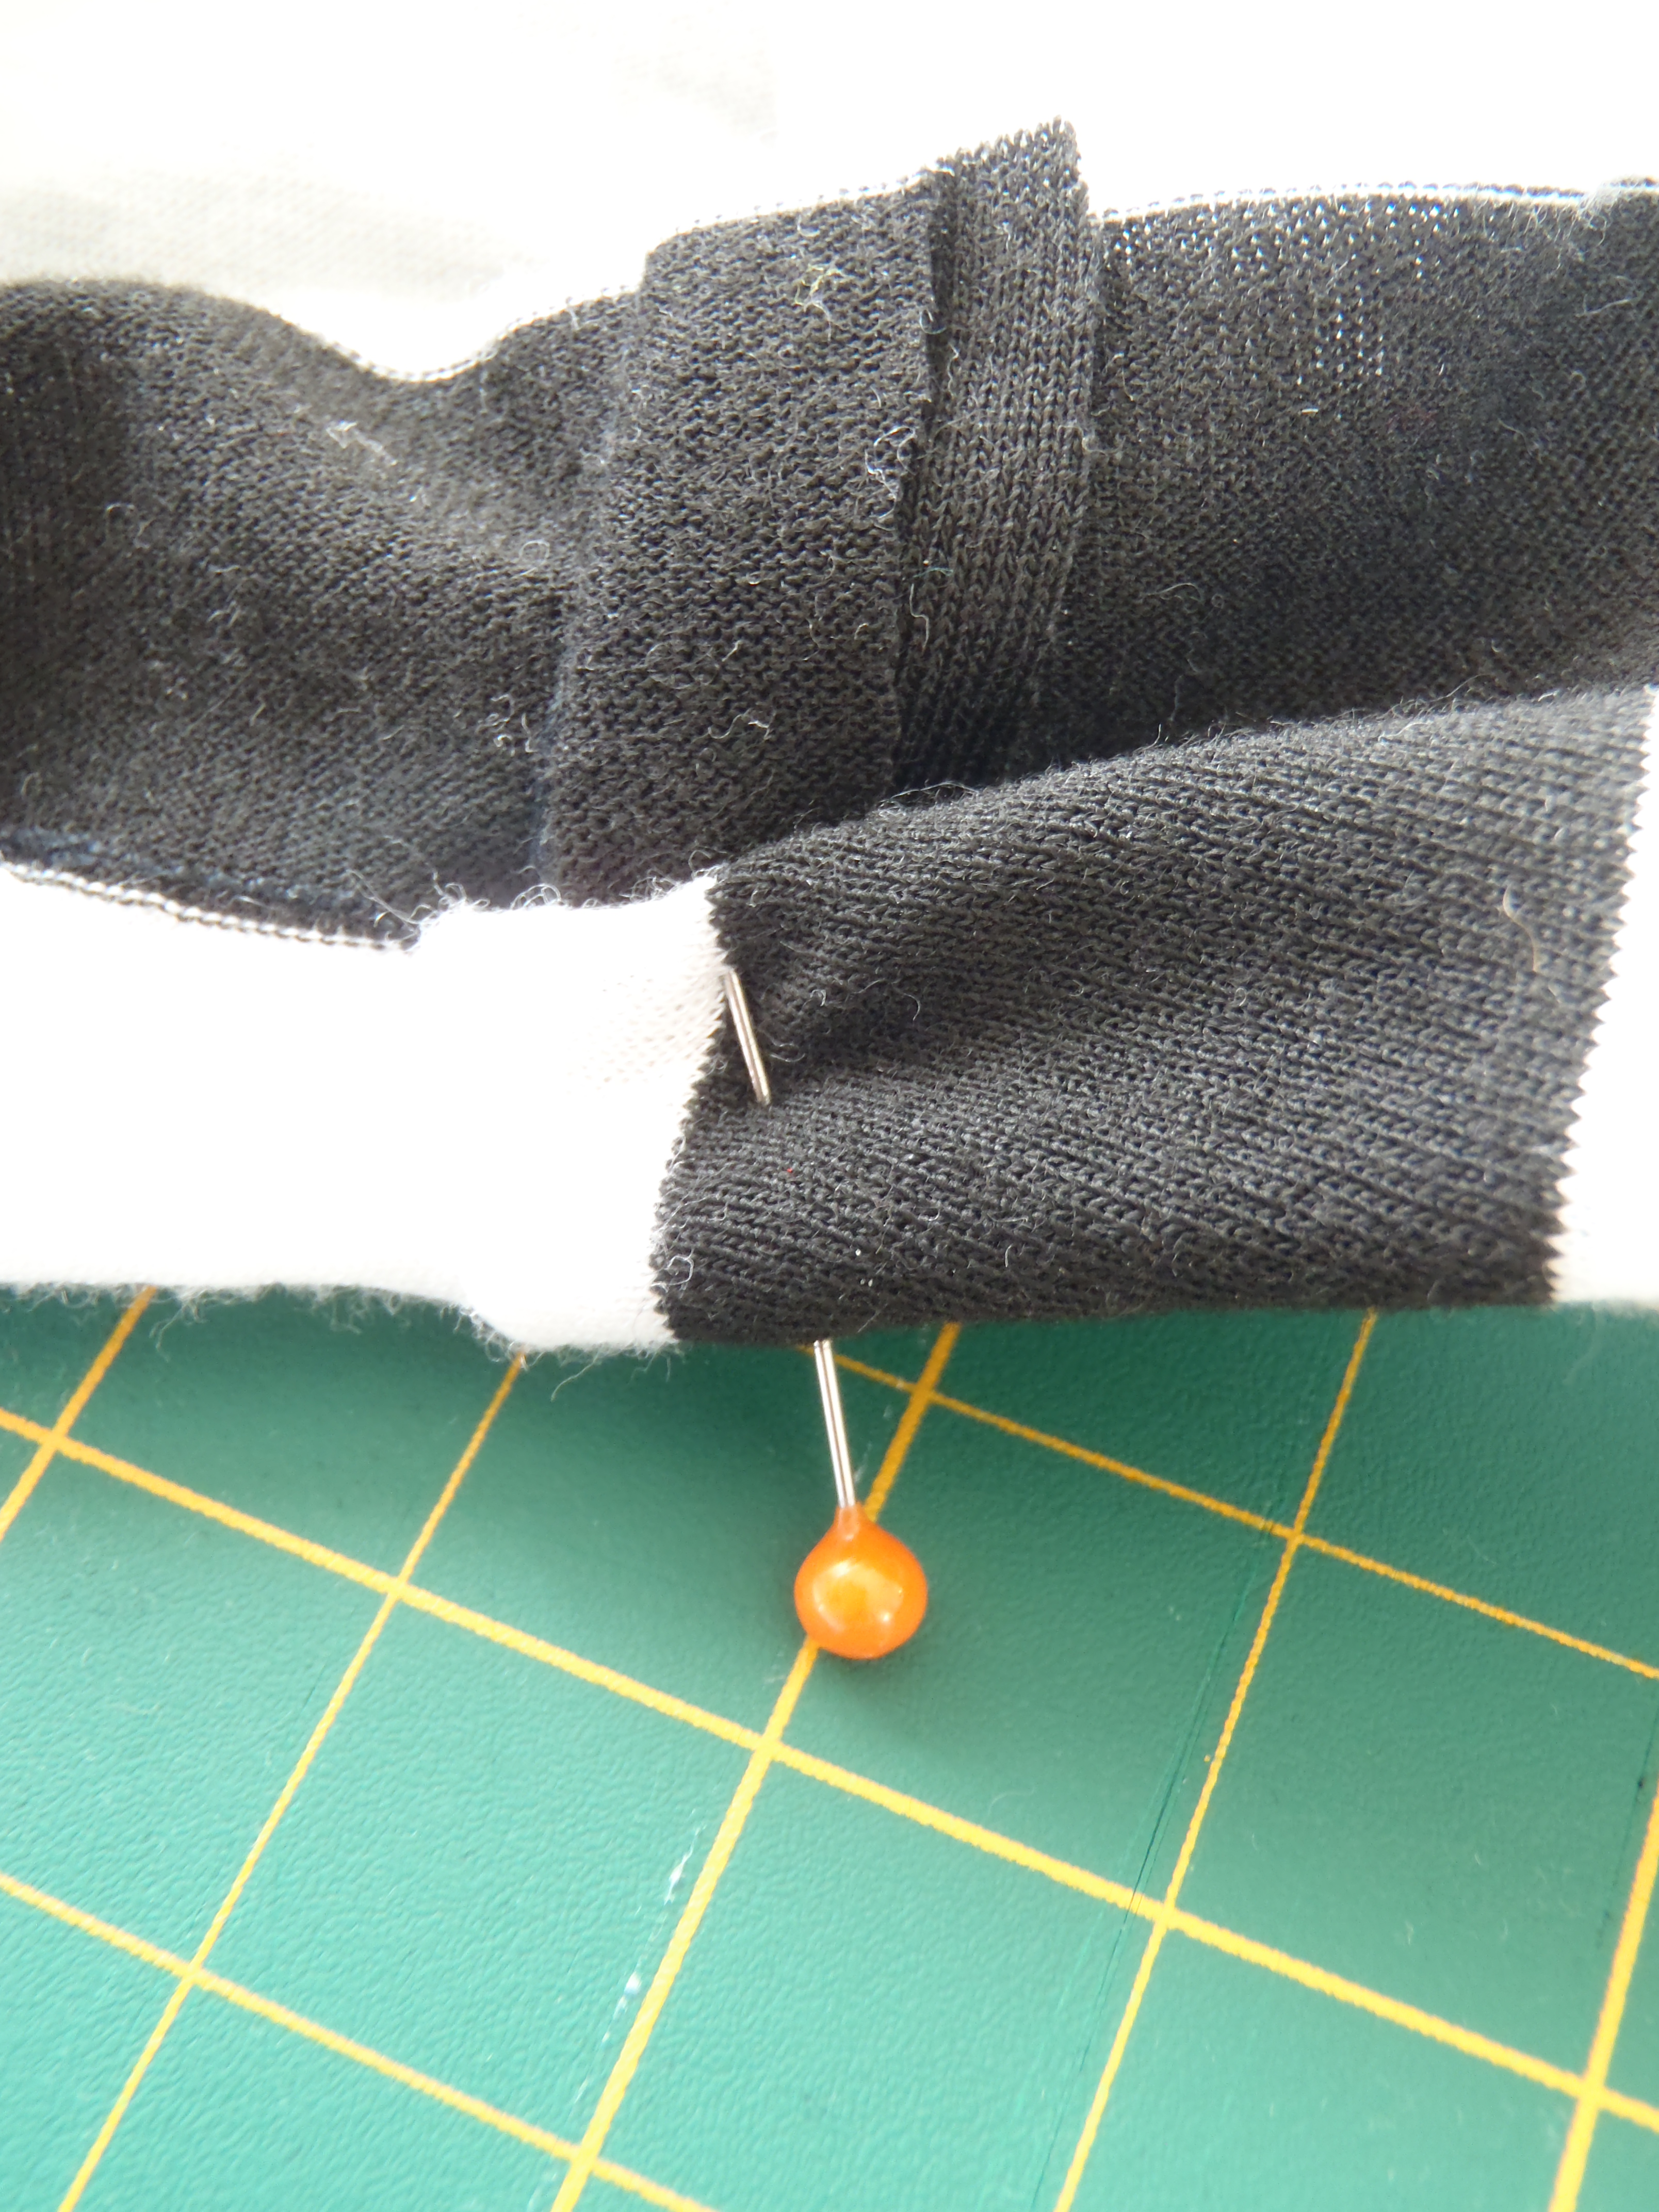 Stitch as close as you can to the inner folded edge of the binding all the way around, until it looks something like this…
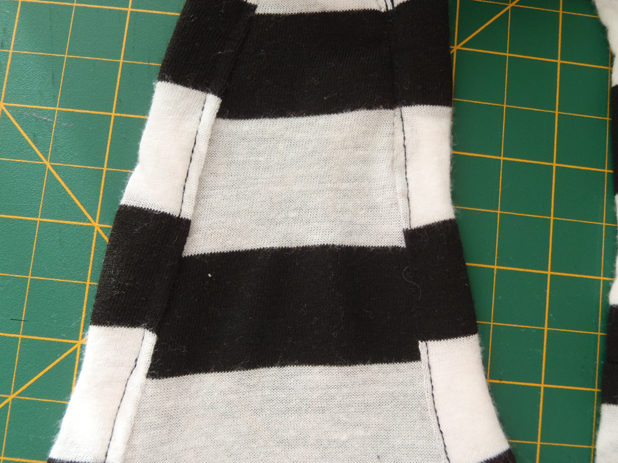 This technique worked great along the neckline and I’m quite pleased with how it turned out. The armholes??? That’s another story….

 So. Here’s where we end for now folks. I’m debating a couple possibilities to fix this issue.
1. Remove the binding, put in a dart and try again.
2. Be really lazy and try to add a dart without re-doing the binding. This seems unlikely to work.
3. See if I can just sew up that side seam and take in the extra fabric on the armhole.
I’ll post again once I decide what to do. In the meantime, any experienced sewers out there with a suggestion on how to fix this mistake?
Share this:

Jewelry Armoire: DIY Up-Cycled From a Sewing Cabinet
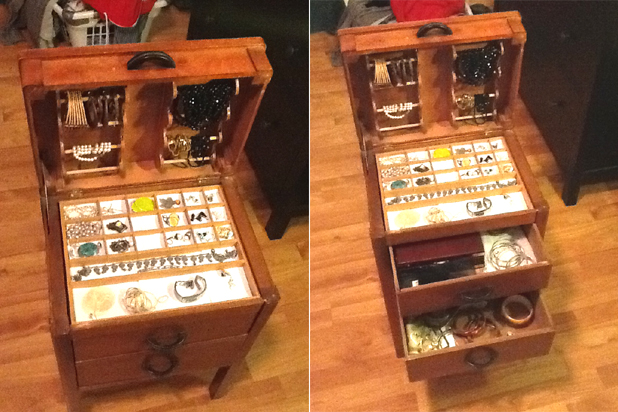
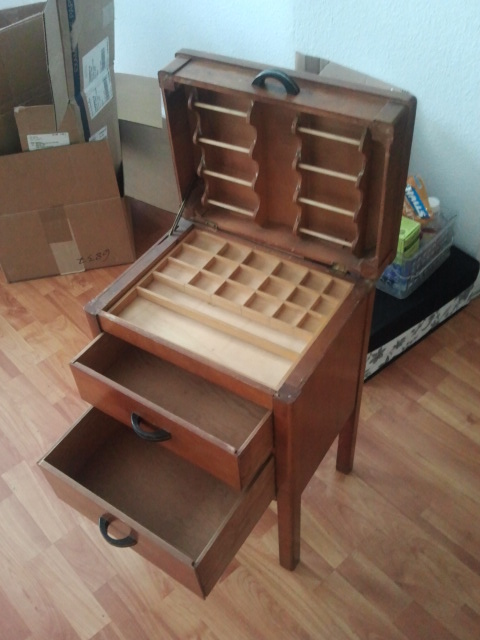
I decided to go ahead and convert my found jewelry armoire (I blogged about it a couple weeks ago, here) into a jewelry armoire for myself. It was a great no-fuss (no sew, no glue, no construction, no paint) project that took me about 30 min to finish last night and I’m really pleased with how it turned out!
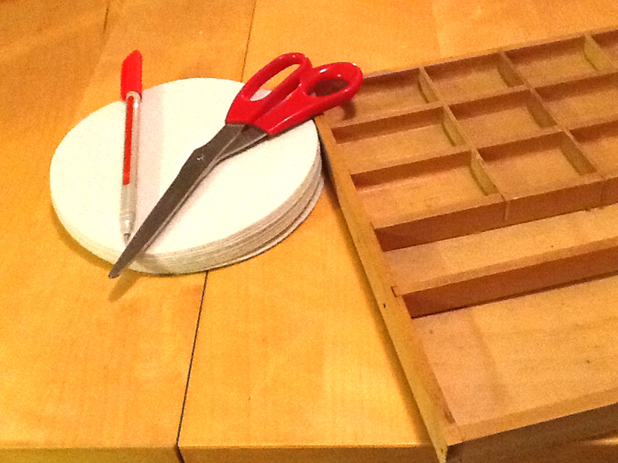
The only adjustments this cabinet really needed were to have the screws replaced in one of the hinges on the lid and to add some felt lining to the compartments in the top that I’d be putting my jewelry bits and pieces in. I used some felt rounds that came stacked between a new set of plates we bought to cut out the inserts I’d need, and that’s all the materials I used!
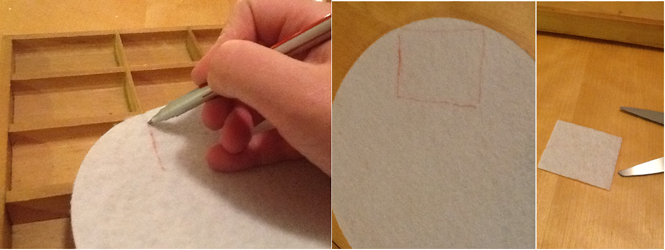
My original plan was to remove the bottom sheet of wood from under the compartment drawer, lay a piece of felt across the whole thing then reattach the divisions. Unfortunately, the small compartments originally intended for spools and bobbins each had their own curved bottom so that wasn’t going to work. Instead, I laid a piece of felt on top and gently traced the shape of each compartment using a felt pen, then cut out the traced shape.
 Luckily, the inserts fit perfectly and didn’t even need any glue to keep them down! I just tucked them neatly into each little slot. I needed to cut a few pieces to fill the long compartments.
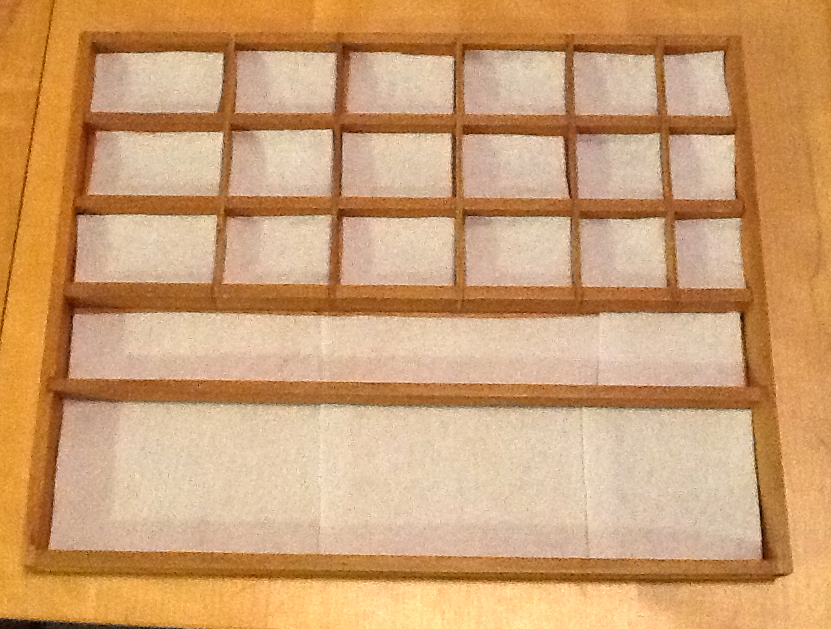 All that was left was to load it up with my jewelry! I used the small felt-lined compartments for earrings, pendants and necklaces, and used the larger ones for necklaces that I didn’t want to bunch up and some pieces that didn’t fit neatly into the smaller openings.
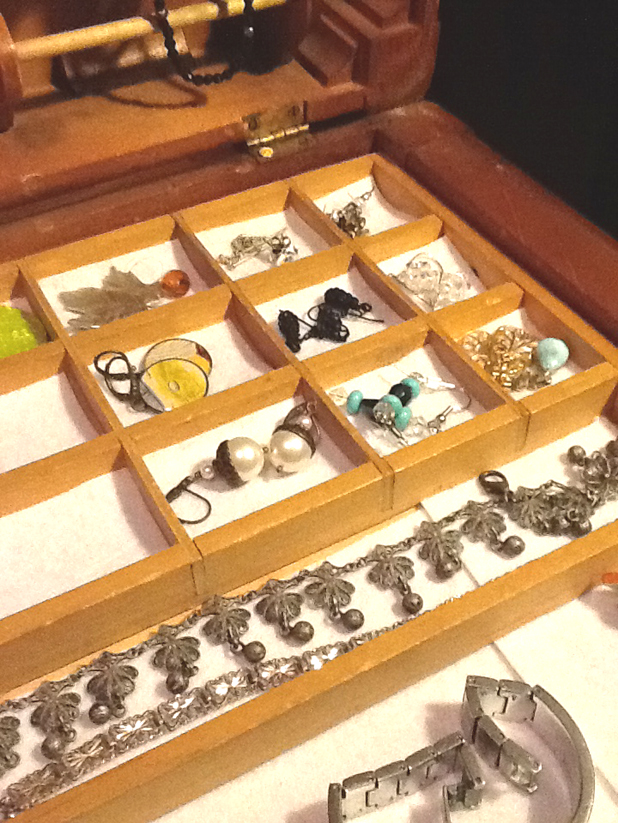
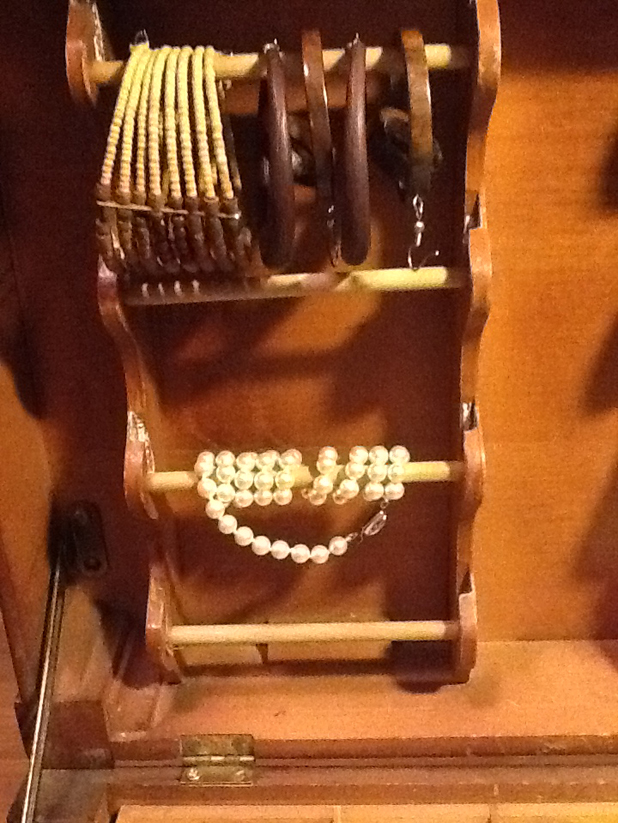
 The spindles of the lid were originally intended for large spool or bobbin storage, I think. They’re removable so are perfect for storing my large hoop earrings and necklaces that tend to get all wrapped up on themselves and tangled.
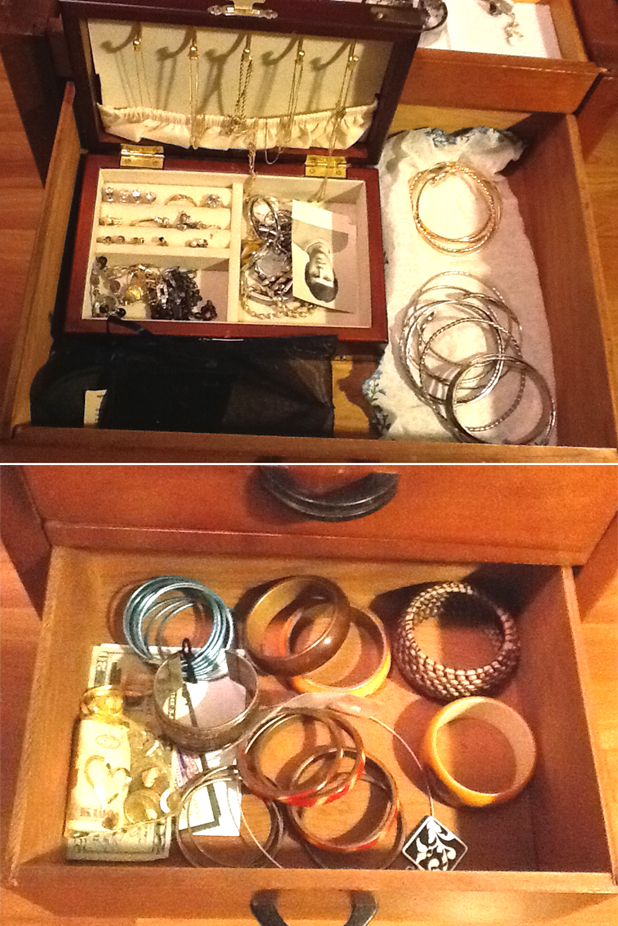
 I used the drawers to store larger items that wouldn’t fit into the top compartments. The top drawer now houses my nicer jewelry and perfectly fits one of my jewelry boxes for more storage of fine rings and earrings, with enough space to store my bracelets off to one side. The bottom drawer is a little deeper and perfect for large costume pieces and a few keepsakes.
 I’m thrilled that I finally have a jewelry armoire and the space to lay out all my pieces! Who knows? Maybe I’ll get really crazy now and actually wear jewelry on a daily basis! LOL!
Share this:

The New Apartment: Bathroom Organization
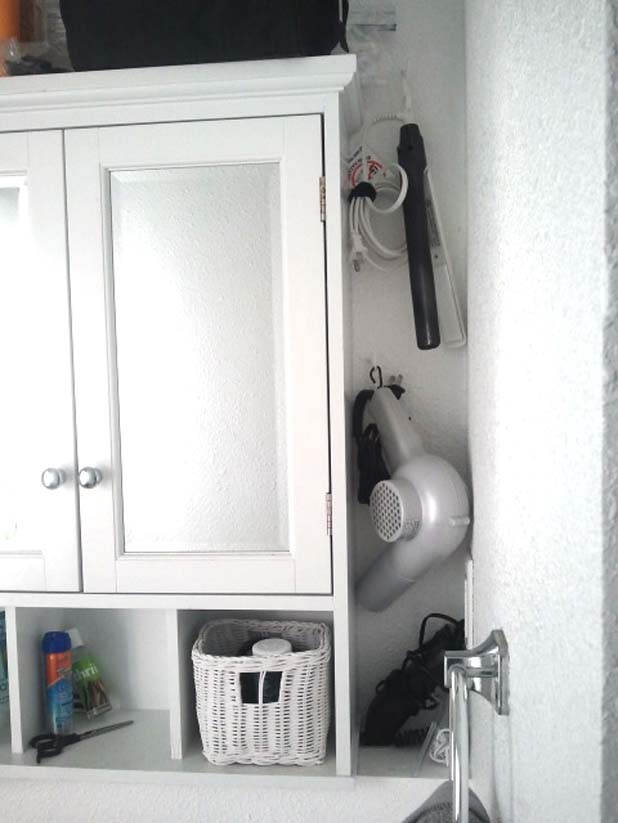
Like many bathrooms, ours doesn’t have much built in storage space. With a pedestal sink, the only tuck-away storage we have is in the medicine cabinet. I hate having bits all over the place and cords hanging everywhere, so I wanted to find a storage solution for my flat iron and hair dryer in the bathroom.
I had pinned a few ideas on Pinterest, like this one below, thinking that maybe I could use mason jars to store my hair appliances.
 We don’t really even have enough space around the sink for mason jars though, so Pete came up with a much simpler solution!
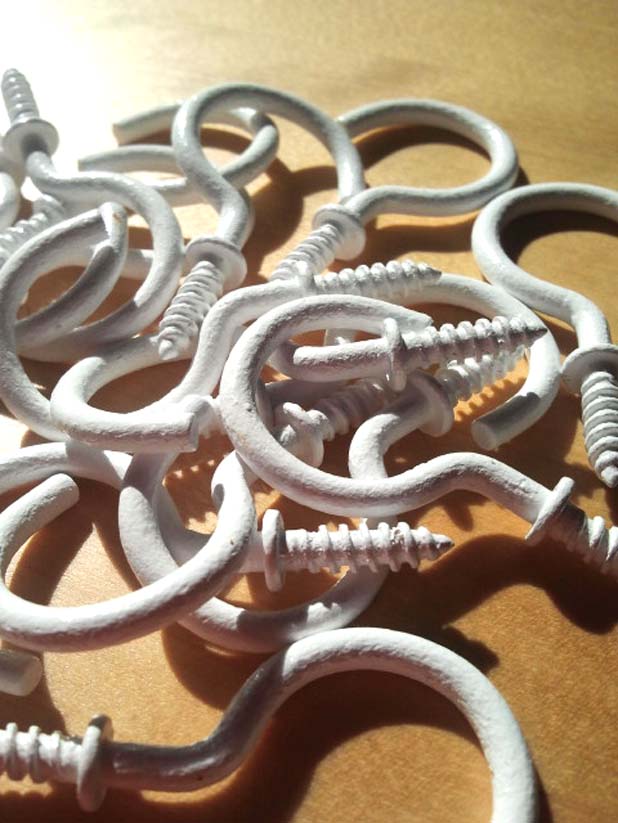
Pete just put a couple screw-in hooks from the hardware aisle at Target into the wall in a nook we have between the medicine cabinet and the wall.
My hair dryer already had a little loop to use to hang it, but my flat iron needed a little piece of ribbon tied to the end.
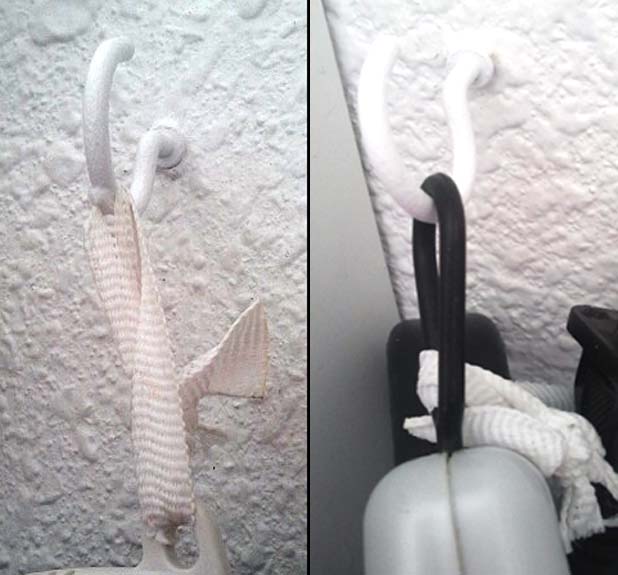
And voila! Neat, easy access, hanging storage for my hair appliances!
 I can’t claim any credit on this one. It was all Pete’s vision. I was making things much too complicated and sometimes the simplest solution is the best. I did, however, find a use for some mason jars in the bathroom. I removed the lid inset and used them for Q-tip, cotton ball, and make up pad storage on the back of the toilet.
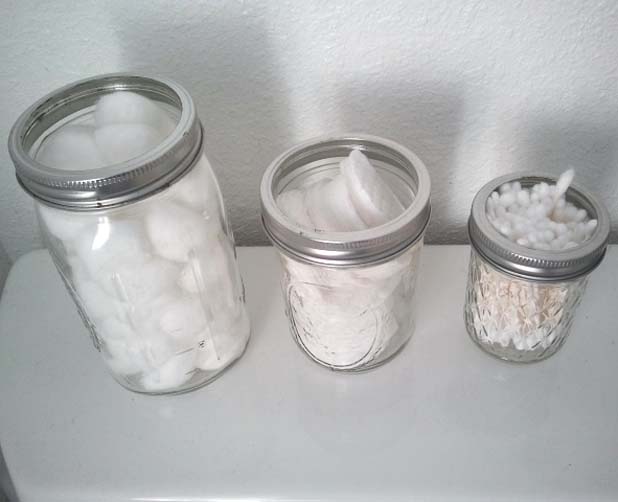 One day, if I get enough fire under my butt, I might paint the rims of the lids to match our bathroom. But then again, probably not….
Share this:

Knitting Pattern: Chunky Green Cowl
I really can’t go near my favorite San Francisco yarn store, Imagiknit, without buying something. The struggle is usually to limit myself to just one yarn, if I don’t have a specific project in mind!
On my last trip I picked up this gorgeous Malabrigo yarn. I’ve been thinking about making the leap into chunky knitting lately (up until now, I think the largest needles I had ever used were a US 10) and this yarn was enough to entice me!
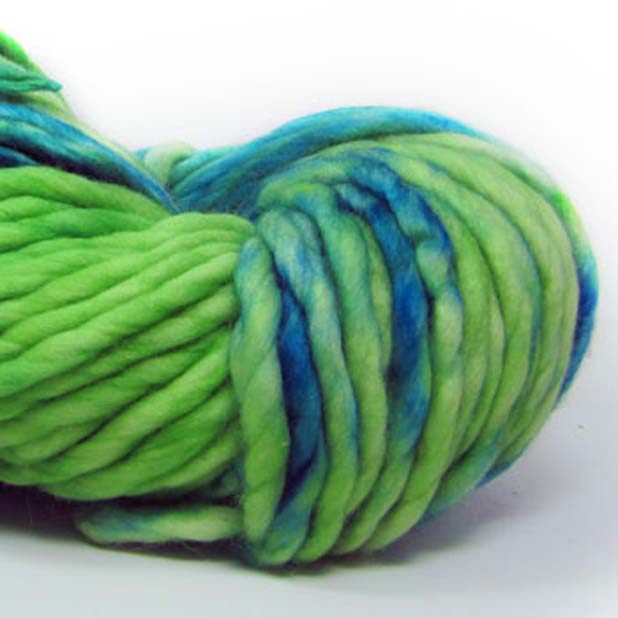 These pictures really don’t capture the depth and gorgeous color saturation with this yarn. It’s a gorgeous aquatic swirl of lime green with the deepest teal blue. All the colors in this line were beautiful and it was almost impossible to choose just one! Luckily, a quick look in my wallet usually makes it seem a lot more possible…
Since this was $22/90 yards I could only afford one skein and had to make sure I made something that I would definitely wear. The yarn was also so incredibly soft I wanted to make sure that whatever I made would be worn right against my skin.
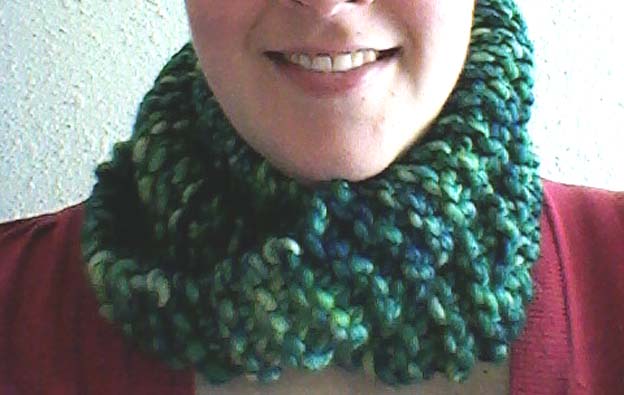
So, without further ado, I reveal my Chunky Green Cowl.
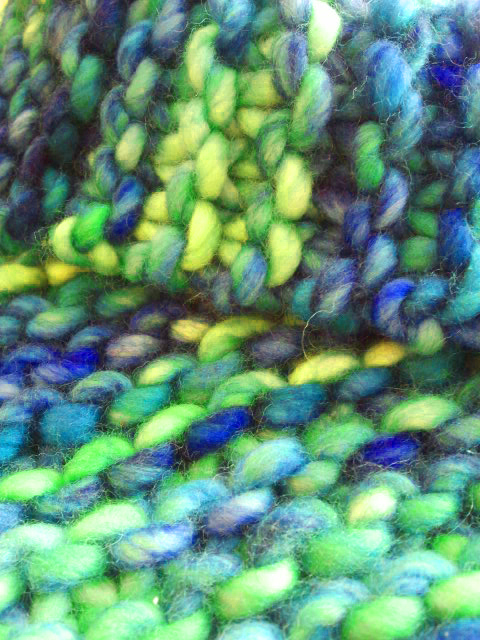
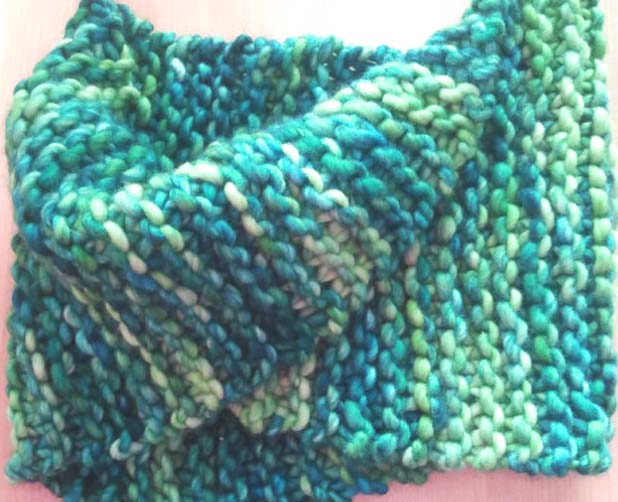 Once again, the picture above is washing out the color and not doing it any justice whatsoever. The photo below is really the one that is closest to what it looks like in reality.
I did a garter stitch on single point needles until I ran out of yarn. I put a single twist in it before I stitched it together to turn it into an infinity scarf.
Here’s the pattern: Enjoy!
Yarn: Malabrigo Rasta (100% Merino Wool)
Yardage: 90 yards
Weight: Chunky
Needles: US 16, single point
CO 20.
Row 1: K 20.
Repeat until out of yarn.
Put in a single twist by joining the front side of one end to the back side of the other end to make an infinity scarf. Join using Kitchener stitch.
Share this:

Found: Sewing Cabinet!
I’ve just moved in with my boyfriend and it’s been a crazy couple weeks with packing, moving, unpacking and trying to keep up with normal life on time of that! Unfortunately, pretty much as soon as I moved in, Pete had to head out of town for a trip that had been planned much earlier than our move. I’ve unpacked a bit and made a few organizational improvements but haven’t wanted to make any major purchases or executive decisions about decorating. It’ll be so much more fun to make our home together!
I did however, make a great sidewalk find last night when I was out to dinner with a girlfriend……a cute little sewing cabinet! And it came with a free drawer full of spiders!!! Oh wait, that second thing was horrifying not exciting. Luckily, it looked like whatever had happened in there was well in the past and only a few dead guys remained (it was far too disgusting to take any pictures). It was a good reminder though that you have no idea where found furniture has been, so I made sure to give it a good once over with some all purpose cleaner.
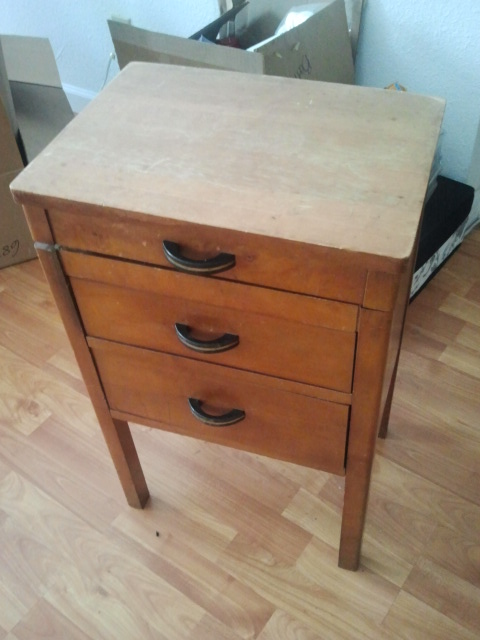
It’s adorable as is and would probably make for some fine notions storage but I’m actually debating converting it into a jewelry armoire. I’ve been wanting one for a year or two now and all the ones I’ve been able to find online are either expensive or ugly (or both!). I’m thinking all this little cabinet would need would be a bit of liner/padding in the little wells and in the drawers below. Maybe use the wooden dowels in the lid, meant for bobbin or thread storage, as storage for necklaces? While a little rough on the top, the finish on the cabinet isn’t too bad but I might refinish the outside as well as the inside.
Anyway, I’m not sure yet what’s going to happen with the apartment but I’ll probably put up a couple posts with any clever decorating or refinishing ideas we come up with, as well as any good storage ideas I come across! While a pain in the butt, the one really nice thing about moving is that it is pretty much weekend project heaven!!!!!!!!!!!
Share this:

Where The Wild Things Are Costumes: Tutorial (sort of)
This post is a little off-season but better late than never, right? Also, I’ve discovered that my photo documenting skills definitely need improvement. I get way too into a project and forget to take pictures of the steps along the way! Whoops! Anyway, here goes.
For Halloween this year, Pete and I decided that we would do a couple’s costume. He’s not normally a big one for Halloween but he agreed that if I made us the costumes he would wear it. We tossed around a couple ideas but eventually decided that we would be characters from Where the Wild Things Are!
I dressed up as Max and Pete was one of the monsters. Here’s our inspiration:

And here’s how we turned out! (Sorry for the photo quality, I need to start taking pictures with my camera instead of my phone)

Ok. Mine First. I didn’t actually take any pictures of the construction because I kinda just made it up as I went along.

For the onesie I used a cream-colored soft fleece fabric with a wrong side that was indistinguishable from the right side, that way I could be as careless as I wanted cutting and sewing. If I recall correctly, I think I bought about 3 yards.
I accordian folded the fabric length-wise so that there were 4 layers of fabric. The patterning was VERY rough. I just laid out a hoodie and a pair of pj pants on top of the fabric and cut around the edges, leaving at least 1″ for seam allowance and a little extra room. I was left with four identical pieces, each making up an ankle-to-neck panel.
I first sewed together the inseam and the crotch on the legs. When sewing up the crotch I sewed all the way up the back of the onesie but left the front open. I then sewed up the sides of the onesie, extending all the way from leg cuff to sleeve cuff.
For the front of the onesie, I decided it would be easier to just sew in a zipper than to make functioning buttons so I cut a ~6″ strip of fabric to act as the button flap on the front. I folded the fabric in half length-wise so that I had a 3″ wide folded strip of fabric that extended the length of the onesie torso. I pinned the flap to the zipper edge and sewed the flap into the costume as I was sewing the zipper. This was probably a sloppy way to do this, but it was quick and easy and just a Halloween costume! I then sewed some nice big buttons to the front of the flap for decoration and held the flap closed over the zipper with a hook-and-eye closure at the top.
I added the tail next. I used a taupe-colored fleece and free-handed the outline of a tail swoop on a double thickness of fabric. I sewed up the tail, leaving a small opening where it would attach to the onesie so I could turn it right-side-out and stuff it with pillow poly-fill. I ended up stuffing the tail a little more than I had intended, so I made sure to sew it high enough up on the costume that I could flip it up if I wanted to sit down. It’s all about comfort for me on Halloween!

I finished the onesie with some whiskers and claws. The claws were easy. I just cut out some mitten-shaped pieces and as I sewed them together, sewed in some triangle-shaped claws. The paw pieces were only connected to the costume at the back of the hand, just covering the fingers and leaving the palm exposed. This let me keep a better grip on my beer and let me slip them off easily when I needed to.
The whiskers didn’t turn out as well as I had hoped. I meant to go to the Hardware store and pick up some black electrical wiring to use as the whiskers but ran out of time and had to make do with what I had at home. I ended up using some pink pipe cleaners that I tightly wrapped with black yarn. I bent them in half forming a V-shape, cut two small snips in the hood of my onesie and slipped the pipe cleaner through. I tried to hand stitch them into place but found that they were too floppy and didn’t stick out the way I would have liked. I think they needed a support sewn on but I had just flat out run out of time, so I left them as they were!
The crown was the easiest part. I just took gold-colored bristol board. It was white on one side, so I cute the sheet in half and glued the two wrong sides together so that both the inside and the outside of the crown were gold. The fur around the bottom is just a feather boa wrapped around a few times and stapled/glued in place! I didn’t bother with the scepter because I figured it was just one more thing to keep track of and would probably get lost at the bar anyway.
All-in-all, I think it turned out pretty well!!
But Pete was definitely the star of the evening! All night people were running up to him to compliment his costume or even pose for pictures with him! And he was such a good sport, obliging every time 🙂

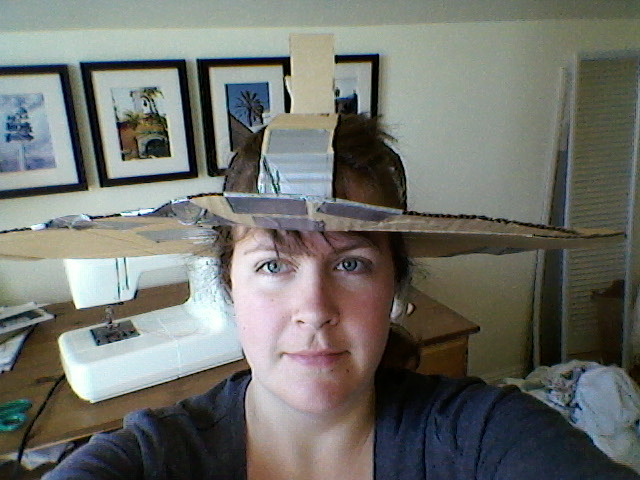
Clearly, the head was the major effort in the construction of this costume. I found a fantastic Instructables tutorial and used that as my jumping off point. They do a much better job of documenting the process and anyone interested in trying this out for themselves should definitely take a look.
As in the Instructables tutorial, I started with a cardboard ring that would serve as the top of the monster’s mouth.
 I wanted the head to be huge and oversized, but didn’t really think about how heavy it would get once everything was attached. Poor Pete was walking around with about 5 lbs of extra weight on his head! As an after thought, I wondered if constructing the whole thing around a bicycle helmet for stability would have been a better idea.
I built up the spaces with more cardboard formed around my head, then lined the inside with a cheap skin-colored spandex fabric. To form the head I also built an outer shell out of cardboard that connected the base of the head to the bit sticking out at the top. I then spray glued poly-fill to the outside of it and covered the whole thing with more of the spandex fabric, attaching it with a combination of hot glue, spray glue and staples.
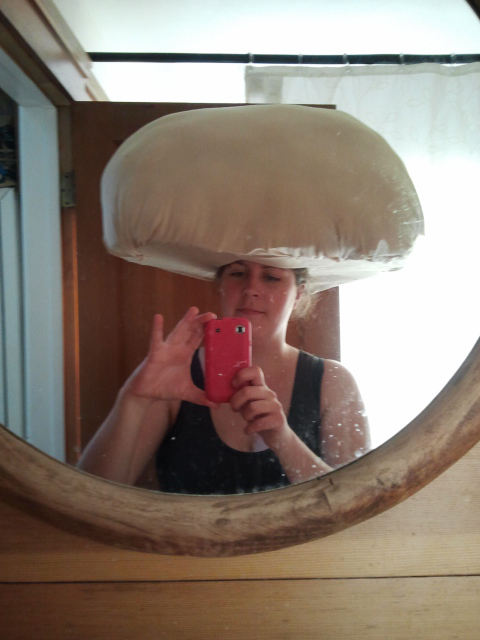 At this point I had what looked like a mushroom head that I could carefully balance on my head. As a side note, I think this would be the perfect base for a Super Mario Toad costume!!
The basic construction of the head was by far the most difficult part. After that it was just decorating which, while time consuming, wasn’t too technically difficult. I had sewed the facial features out of bits of felt, then used a combination of hot glue and hand sewing to attach them to the face. I managed to find the perfect fur to frame the face! It was so shaggy that I really didn’t need to be careful while cutting it and gluing it, the seams weren’t visible. I hot glued/spray glued the fur to the head and made sure to leave a flap at the back to cover Pete’s neck. The horns were just little felt tubes that I sewed and stuffed, then hand stitched to the fur.
 At this point it occurred to me that I had in no way considered how I was going to attach the lower jaw. When I referred back to the Instructables tutorial I realized that I didn’t have any foam and wasn’t going to be able to construct the lower jaw the same way they did. What I did instead was to cut a jaw shape out of cardboard and covered that with fabric. I used an Exacto knife to cut to slits on either side of the face on the underside and just kinda shoved the jaw up in there. It came out a couple times during the night but I would just cram it back in and, remarkably, it held up pretty well!
 The teeth were just doubled up pieces of felt. I lined the mouth with red felt and cut little slits in it that the teeth inserted into. With a little spray glue, they held up pretty well!

Pete’s job was to find pants and a sweater that we could use for the costume. For the sweater, I just spray glued strips of the same fleece I used for Max’s tail onto a brown sweater Pete had. Infinitely easier than trying to sew him a brand new shirt, and with all the effort I’d put into the head, I was looking for infinitely easier options! The pants were equally easy. We just took a black Sharpie to some old slacks and drew on some scales.

I made Pete’s paws the same way I made my own and hand stitched them to the cuffs of his sweater. The tail is just a tube of fur, I didn’t even bother hemming it. I was worried about directly attaching it to the pants because I thought it might get pulled off through the course of the night. Instead, I sewed a loop at the top of the tail and he just looped it into his belt!
And there you have it! A couple’s Where the Wild Things Are costume!

Share this:

Deadly Beautiful….
My mom sent me this link from Apartment Therapy featuring beautiful glass sculptures of infectious diseases by artist Luke Jerram. I think my favorites are the E. coli

and the T4 bacteriophage sculptures.

Though HIV is pretty cool too…

Read more about Jerram’s sculptures here.
Share this:

Leave it to the Pros….
Well kids, they can’t all be winners.
I pinned this pillow a couple weeks ago and thought it was so simple and so cute! “Pffft”, says I, “pfffft! I could make that!”. Famous last words.
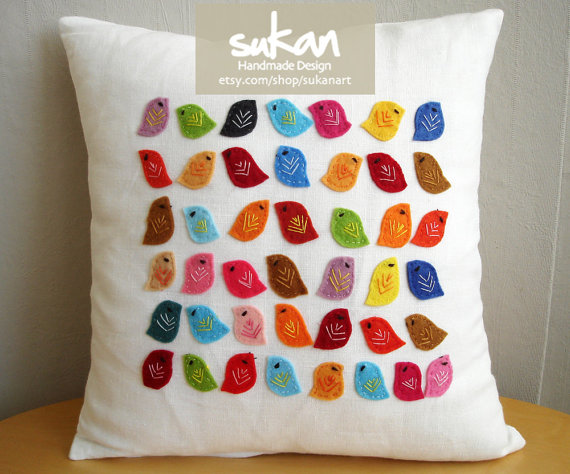 I cut out 25 little felt birdies in all different colors, and embroidered the eyes and wings before sewing them to the pillow, which was probably way easier than embroidering them once they’re on there. Mistake #1, though, was making the birds too big and too spaced out on the pillow. My second mistake was using highly contrasting thread, like that used for the wings, to sew the birds to the pillow. Finally, I should have clustered the birds more tightly together in the center of the pillow and left some white space around them to make it look more graphic and modern. Meh. Live and learn, right? Trial and error, the pillar of all great invention….or some such nonsense.
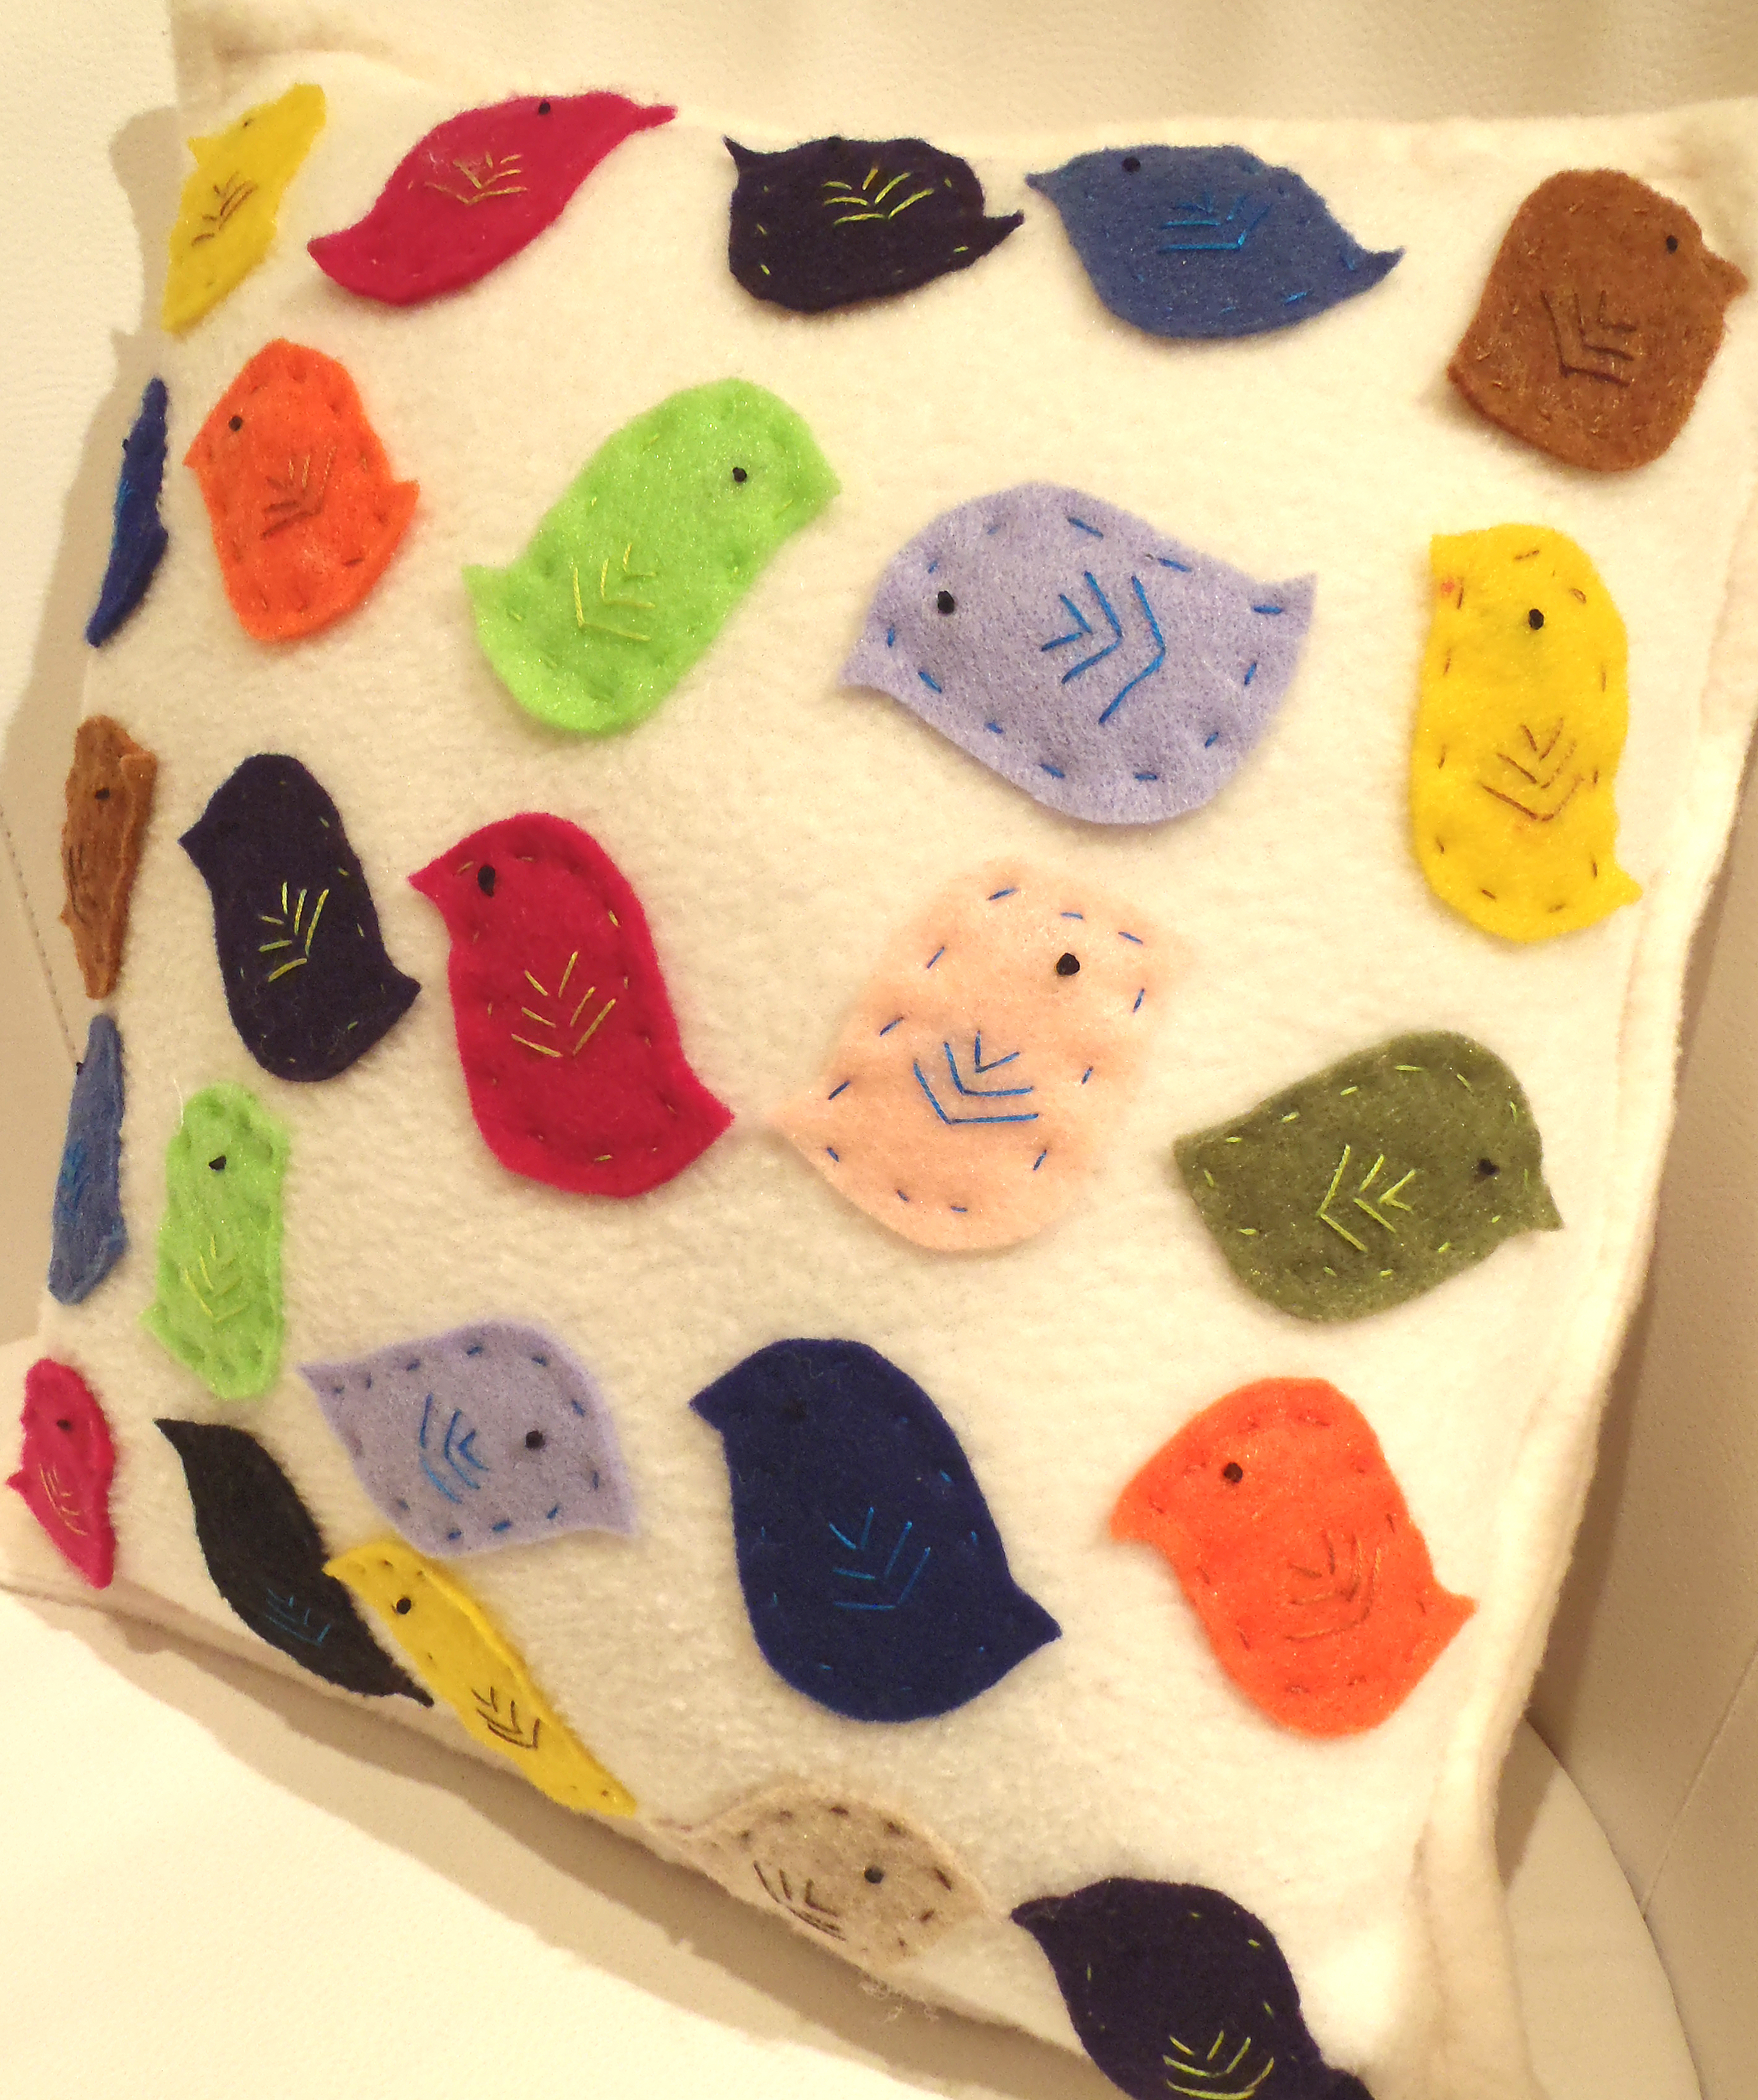
Didn’t quite work, did it? Mine definitely looks more kindergarten than the original. It just lacks in sophistication. I often have a picture in my head and just can’t seem to quite achieve the aesthetic that I’m after. The one thing I added to mine that I did like, was after I stitched the pillow together, I went around and top-sewed all the edges with my machine. I think it helped to give it a more finished look.

Oh well, at least the colors go well with my bedspread and it didn’t cost me a dime! (LOL! I even managed to take the picture with the pillow laying sideways. Hmmm….looks entirely possible that I may never be a stylist…..)


