
A friend of mine just had a gorgeous baby girl: Stella Joy! My go-to baby gift is normally a set of felt applique onesies (tutorial, one day!), but I really dropped the ball with baby Stella and before I knew it….she was here!
I decided to branch out a bit and, inspired by some things I found on Pinterest here, here and here, I made Stella some baby name art. I’m so happy with how it turned out and I hope her parents love it too!
 This project wasn’t too difficult, but all the stitching around the name took a lot longer than I expected!
To make this, all you’ll need is;
– an embroidery hoop (mine was 16″)
– one sheet each of green, white, pink, and blue felt
– white and pink seed beads
– one skein each of white, black, blue and pink embroidery floss
– two skeins of green embroidery floss
– lightweight cotton/muslin (18-20″ square)
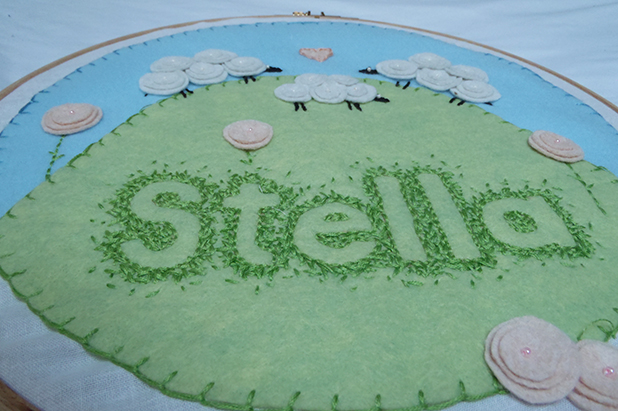
 I first cut a large circle from the blue felt, about 1″ diameter smaller than the embroidery hoop and, with muslin secured in the hoop, sewed the blue felt to the white cotton backing using the blanket stitch with blue embroidery floss. I then sewed the green felt on just as I had the blue.
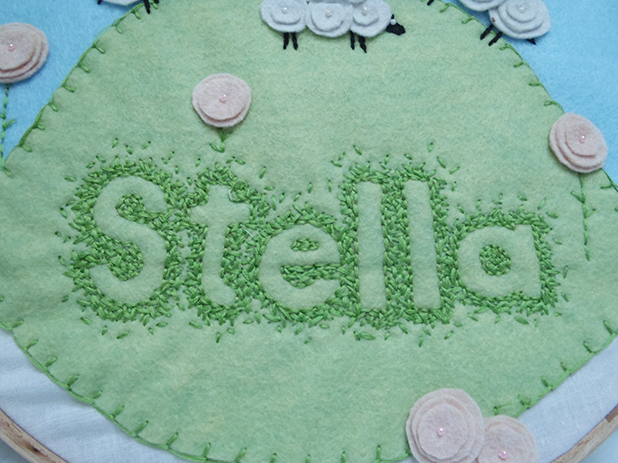
To make the name, I cut paper stencils and held them in place with straight pins while I gently traced around them with a felt pen. (I’m not sure why the color is off in these couple photos, the green is really more of a soft mint rather than the harsh lime it appears here).
 Once I had the name traced onto the fabric I sewed around it using a simple backstitch.
 The grassy embroidery effect around the name was created by sewing small straight stitches in a random pattern about a centimeter around each letter. I diluted the stitches toward the edge of the letters to try to give the impression of grass.


 Inspired by something I’d seen on Pinterest I used concentric circles cut out of felt to make some sheep and flowers, adding a seed bead to the center of each for a nice girly touch.


 The little sheep legs were made using backstitch and the heads were a simple satin stitch. The expanse of blue sky seemed a little vacant when I was done and I was worried clouds would compete with the sheep, so I added a little heart embroidered on using blanket stitch.
 With the front finished, I wanted to make sure the back looked just as polished, so I tried to finish it as nicely as I could (without wasting too much time on it). Unfortunately, I didn’t take pictures of the process because I was going to just link to another tutorial on a blog I frequent. When I went back to look at it though, I realized that I didn’t actually follow it at all and made up my own method instead after I’d already finished without taking any pictures….whoops!

I cut the excess backing fabric away leaving about a 2″ border. The I ran my needle through it very loosely gathering it toward the center of the backing. I cut a circle from felt about and inch smaller in diameter than the embroidery hoop and attached it to the gathered backing using blanket stitch. And that’s about it! Hope Stella likes it! 🙂


Holy Crap I LOVE this so much Eileen, if the Christians don’t love this I will steal it from them and pretend that my name is Stella.
LOL, I actually thought of you as I was doing the sheep…
Very pretty, love the straight stitches round the name!
Thanks!!
This is so adorable – the lettering stitching is fantastic. Would love to feature this if you had the party button or a link somewhere on your blog. Thanks for linking to the Craftastic Monday party at Sew Can Do!
So glad you liked it! I figured out how to add the button onto my sidebar, hope it’s not too late!
Cheers,
Eileen