Monthly Archives: January 2014

Vogue V1152 Sewing Pattern: Wearable Muslin

V1152 Wearable Muslin

Quite a while ago now I made a total impulse purchase and bought myself some wonderfully soft bright floral fabric with the idea that I would sew myself a dress. When I got it home and held it up to myself though, the print seemed like it would be too overwhelming in a dress and so I decided on a blouse instead.
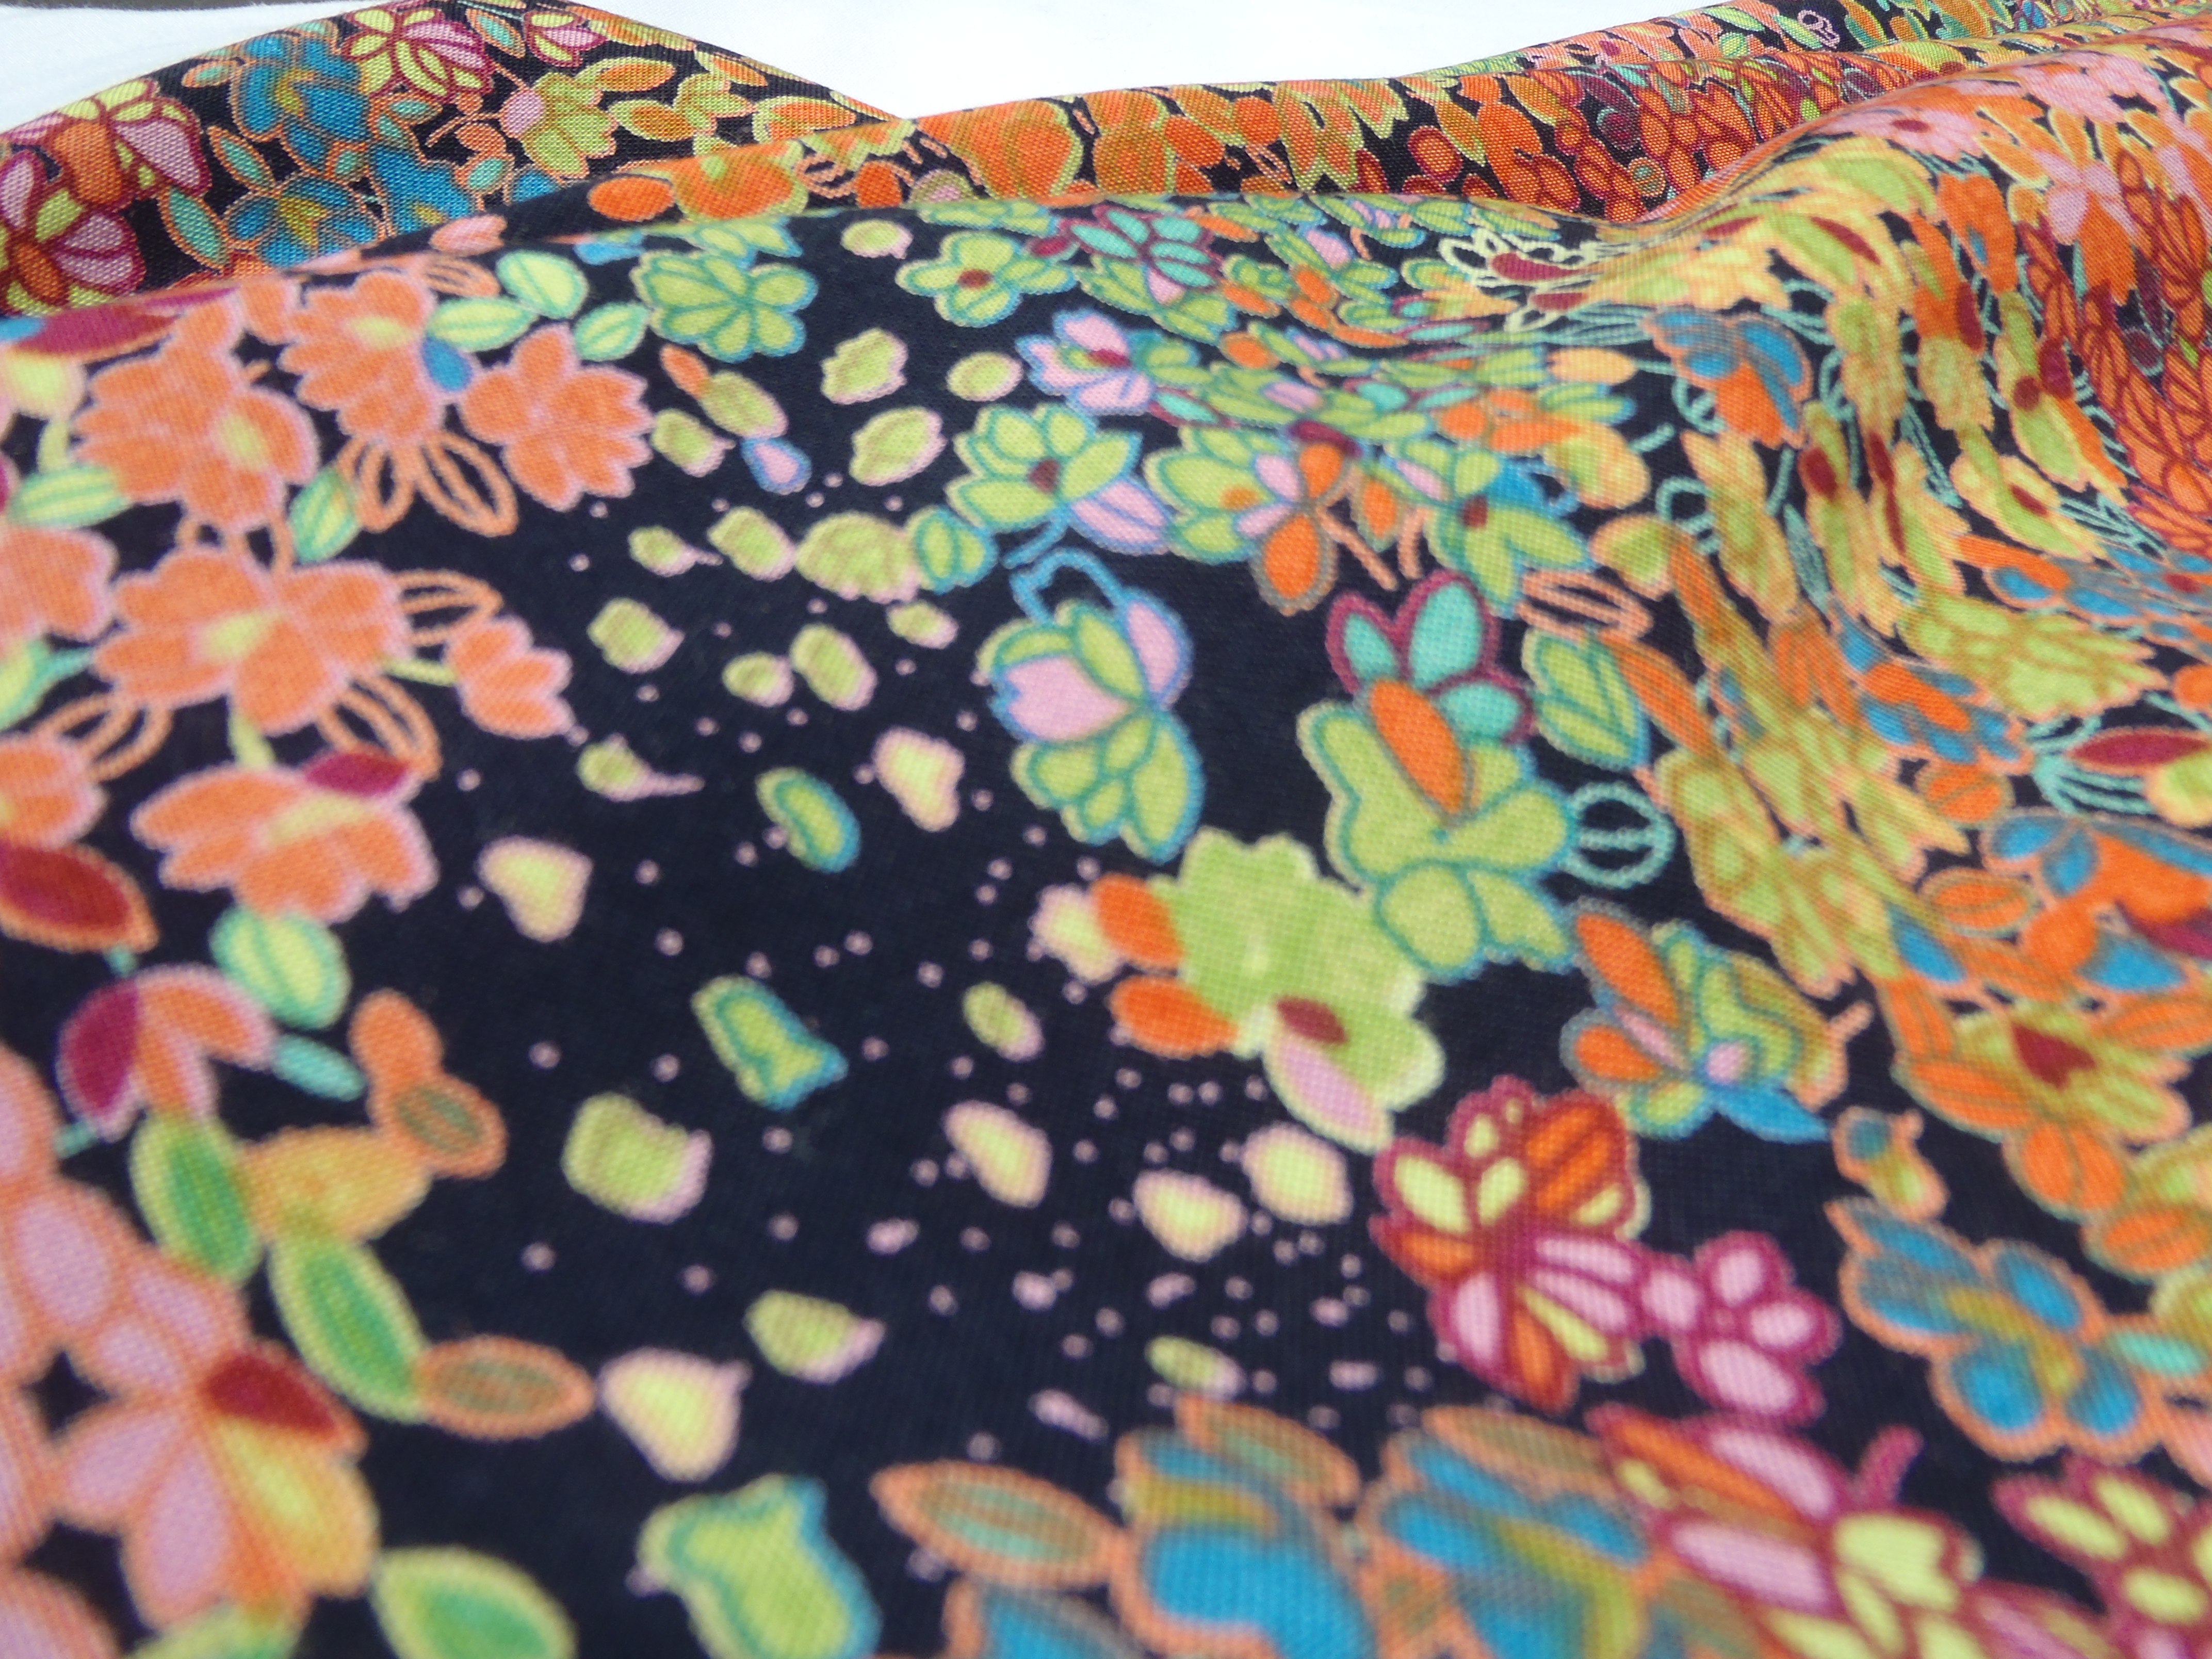
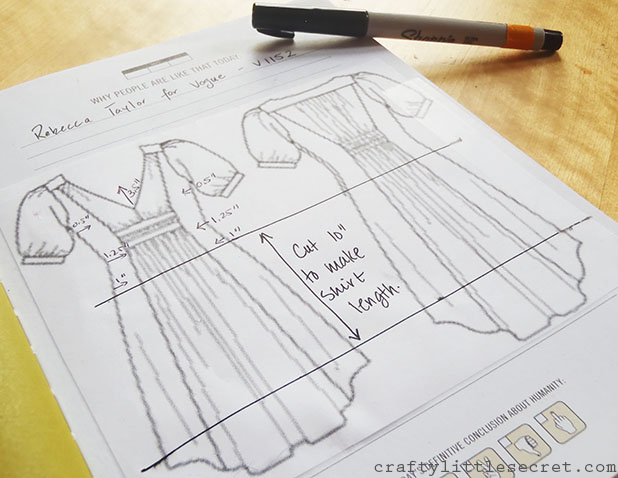
OLYMPUS DIGITAL CAMERAI originally wanted to make a button-up blouse but I’m not confident with sewing obvious button holes just yet and my machine has a tendency to catch when sewing them. I still wanted that general look though, and for the shirt to be a bit more fitted than the Mathildes I’ve been sewing lately. I landed on a Rebecca Taylor for Vogue dress pattern, V1152, and decided to shorten it into a shirt.
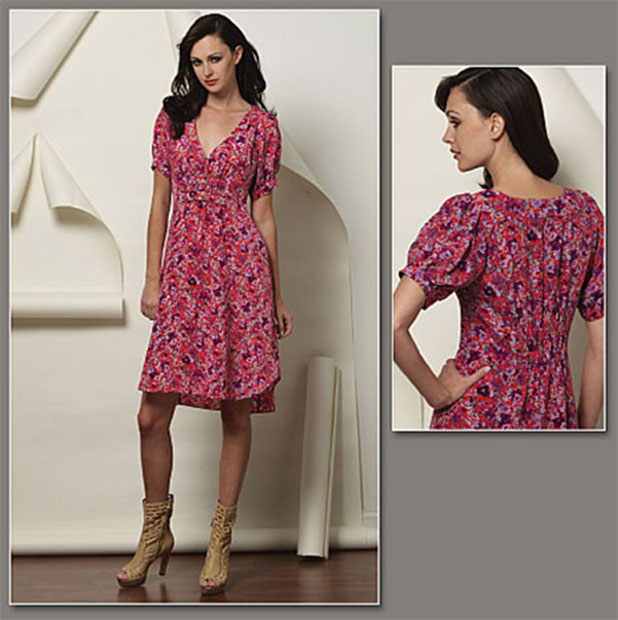
Vogue V1152 Sewing PatternI found a few bloggers who had made it and most raised the neckline a little to decrease the depth of the V and make it a little more modest, and some also had to increase the bodice length to get proper placement of the gathered detail under the bust. I hummed and hawed and hummed and hawed and finally decided that with my large bust and limited experience patterns, I should make a muslin first. And if you’re bothering to make a muslin, why not make a (hopefully) wearable one?!

I pulled some red and white polk-a-dot quilting cotton out of my stash that I had found at Goodwill for $1.99 and figured it would do the trick! I always check out the textiles section whenever I’m in a thrift store, it can be a great place to find inexpensive fabric for making muslins!

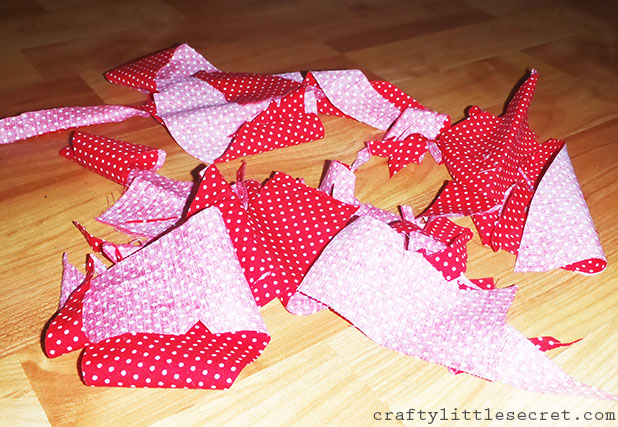
I only had 1 meter of the red fabric, but seriously guys, you have never seen someone get so much out of so little fabric! I literally only had a handful of mini-scraps left after cutting. I felt compelled to commemorate my achievement with photographic evidence. The leftovers;
V1152 Wearable Muslin

It’s hard to get a feel for the scale here, but none of these scraps are wider than about 3 inches!

Even with my creative cutting I still have a couple weird seams (hidden in gathers) and some pattern pieces that needed to be cut from white. Oh yeah, and no sleeves either (I’m not worried about fitting those on the final garment since they are heavily gathered).

V1152 Wearable Muslin

You’ll notice immediately that the neckline is quite…ahem….plunging. I measured it out and I’ll need to raise it 3.5 inches to make it at all wearable without a cami underneath! Even with this one it seems like the neckline gapes a little where it comes to a V and I think I might be able to stitch it up a couple inches to make this muslin more wearable. I safety pinned it so you could see what I mean.

V1152 Wearable MuslinSee? Already better.

I was pleasantly surprised though that the gathered detail at the front actually sat below my bust without making any adjustments. Usually those details end up at nipple height on me with RTW tops!

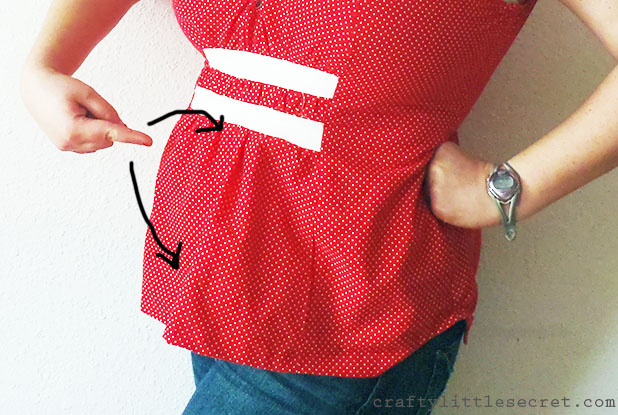
Upon flicking through the photos though I did notice a troubling detail; I managed to make a big sticky-outy gather right in the middle of the bottom bodice piece. A closer look for you;
V1152 Wearable Muslin

Not ok.

When I make the real version I’ll have to be careful to make sure my gathering is even and that I’m not adding belly bulk. Might not be such a big deal though  because the fabric I’ll use for the real version has much better drape than this relatively stiff quilting cotton.

The back came out pretty well, although I can’t quite decide if there’s a bit too much fabric in the gather, or if it just looks that way because I used a stiffer quilting cotton. The elastic in the back though (and lack of sleeve) meant that I could leave the zipper out of this muslin, which was nice because I get lazy sometimes.

V1152 Wearable Muslin

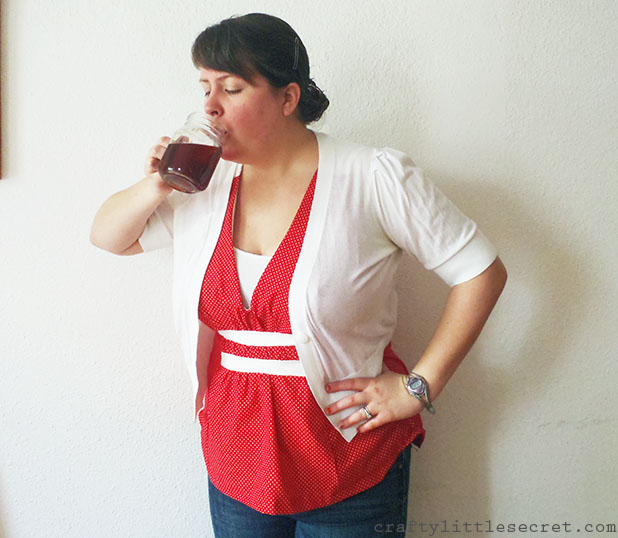
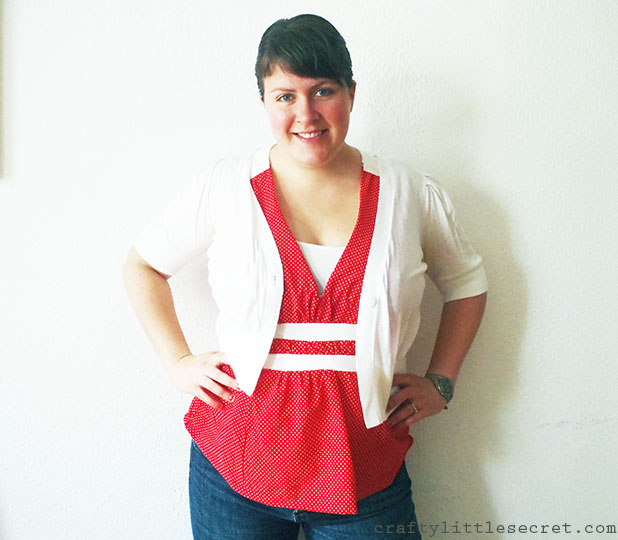
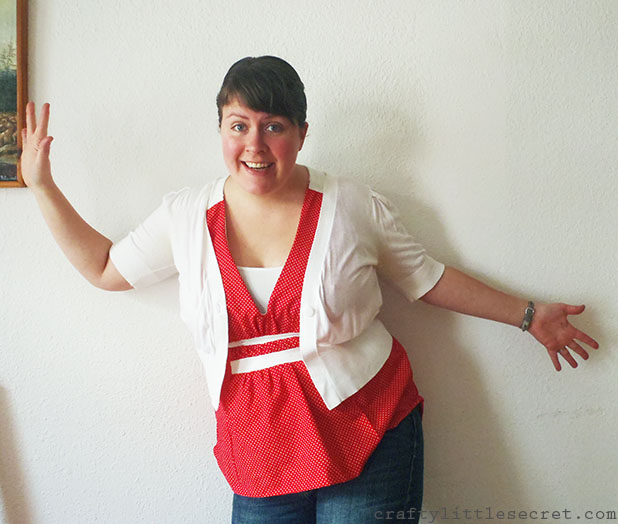
Honestly, although this is technically a wearable muslin I’m not sure how much wear it will actually get. Red is just not a color I wear much and I usually prefer tops with at least a little cap sleeve. Adding a little white cardigan definitely helps with the wearability for me!

V1152 Wearable Muslin

You caught me! I’m wearing it!

I also took in the shirt a bit – more at the waist and hips because I’m narrower there. I think this muslin, wearable or not, served it’s purpose as a dry run so I can cut my good fabric with confidence now that I’ve made not of all the adjustments I need to make!
V1152 Wearable Muslin

The gathers and elastic back really make the shirt comfortable and once I correct the gaping bustline issue I think it’ll be a really comfy top to wear.

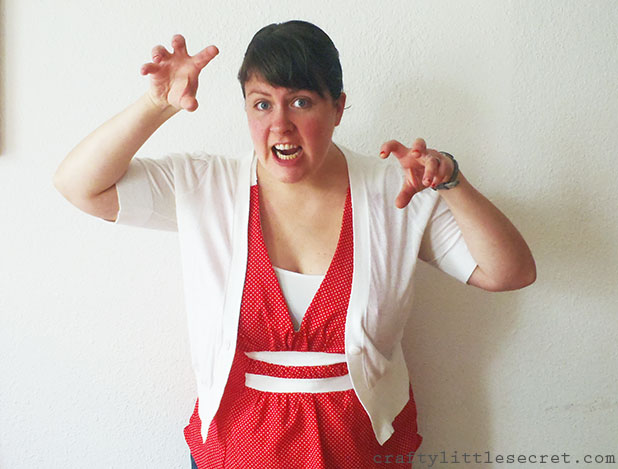
See? It’s so comfy I can do jazz hands in it!
V1152 Wearable MuslinAnd drink tea in it!

V1152 Wearable MuslinAnd just because it’s Jungle January….

V1152 Wearable Muslin


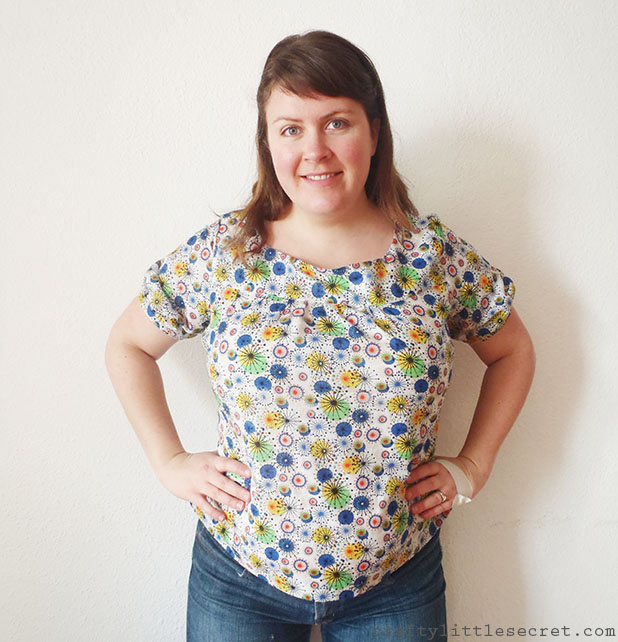
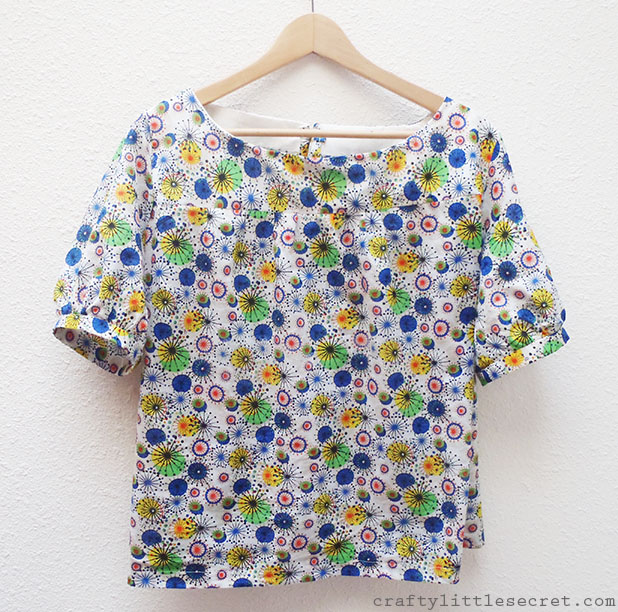
Mathilde Blouse #2!

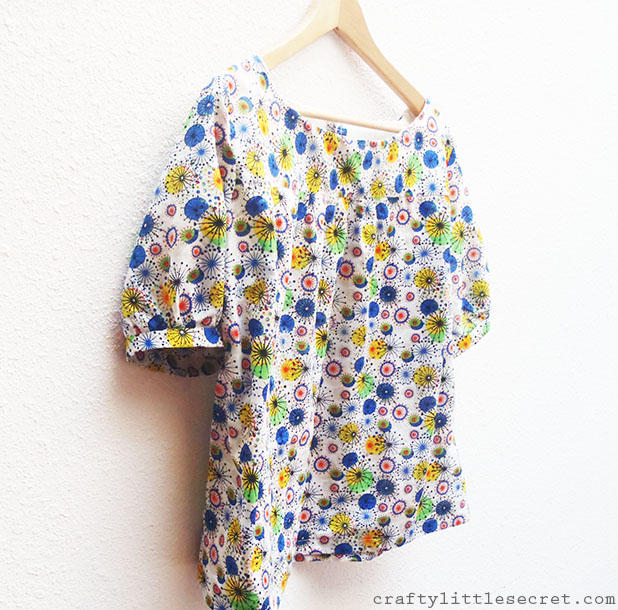
Mathilde blouse front

You may notice my hand is taped up in this photo – earlier in the day when, trying to catch up on some deferred maintenance around the apartment, I stabbed my hand with a screw driver! Owwww!!!

Crazy eyes in a crazy print Mathilde blouse! I could not get a reasonable picture of myself today! Well….I’ve started off 2014 a little behind the ball and have been trying to catch up on promises made and deferred maintenance spilling over from last year. As a consequence it’s been two weeks since I posted last – oops!

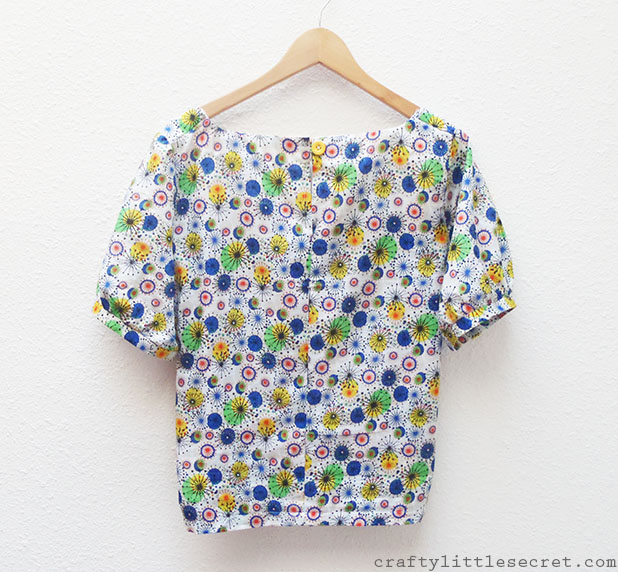
Mathilde blouse back

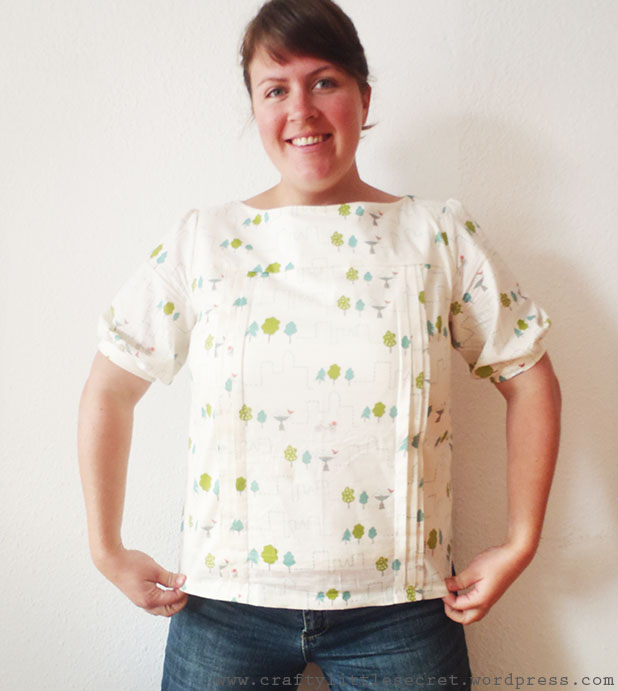
I made my first Mathilde blouse last year, and almost immediately moved onto this one. But some earlier errors and frustrations have kept me from finishing it until now. I LOVE my first version of this blouse and am still completely in love with this pattern. But this version….mmmmm…..maybe not so much.

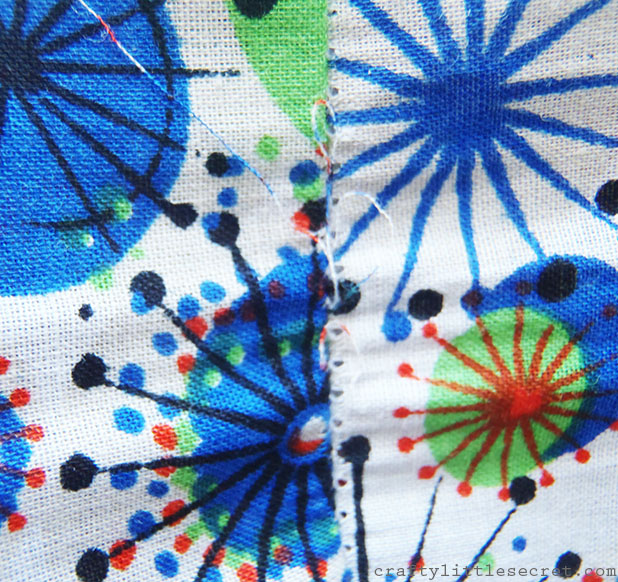
The main problem is that I just chose the wrong fabric, plain and simple. This fabric is a really breezy cotton lawn that I got for about $6/yd at Discount Fabrics. The problem is that the fabric is a little too flimsy and I didn’t know how to deal with the seams properly so just from trying it on during fitting, the back seam is already giving. D’oh!

Lawn seamI’m worried that I’ll be stretching for something one day and will just hear “Riiiiiiiiiiiiip!”. The other thing I don’t like about this fabric is the print. I’m always attracted to loud colors and fun prints but I sometimes fail to consider how they’ll actually look as a garment. This print in the finished top reminds me of a duty shirt that a vet or dental assistant would wear. Sad face.

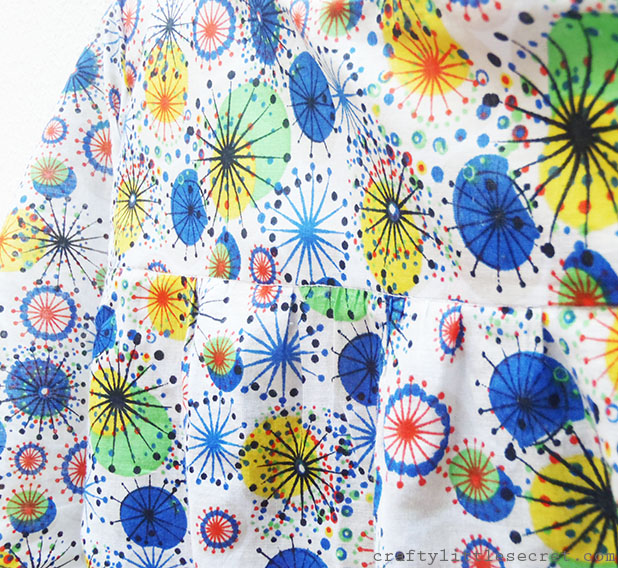
Last time I made this blouse I went with the tucks instead of gathers across the front. Because it was more fitted I added some width to the front bodice to make sure it would fit over my bust. Since this one was gathered I assumed I wouldn’t need to do that. Errrrrrr! Wrong! The front yoke was actually too narrow so after assembling the whole shirt I had to take it all apart, cut a new yoke and reassemble. Lesson learned! I’m glad I didn’t add an extra width to the bodice front though, it is already very loose on me and would’ve looked a little maternity-esque with any more volume.

The other change I made to the front yoke was to lower the neckline by about an inch. I’m not sure that I like that change. I might just leave it alone next time. I do think the gathers look quite nice though.

Mathilde blouse gathered front

Mathilde blouse gathered from

Mathilde blouse gathered front detailI also made the short-sleeved version of this dress, but to add a more structured shape, I added cuffs to the sleeves. I made the same alteration to my last Mathilde and just used the cuff pieces as patterned, but I’ve found the cuffs are a bit tight on my huge guns. So this time I added about an inch when cutting the cuff pieces and they’re definitely more comfortable.

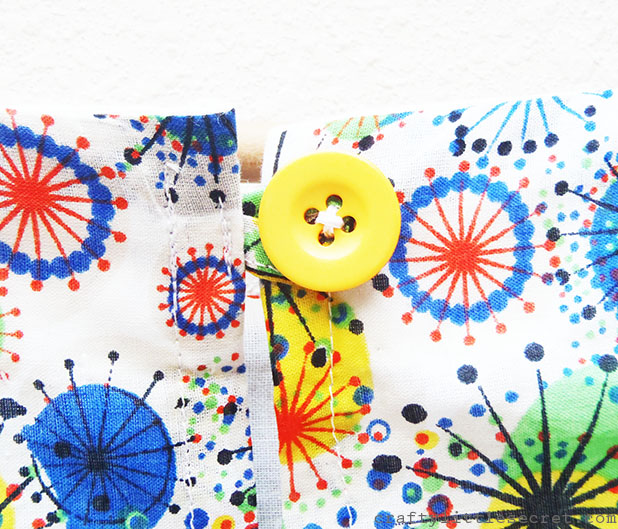
Mathilde blouse cuff detailFinally, I also eliminated the back button placket as I did with the last blouse and for the same reason; I thought it would look too busy to have a button placket with such a busy pattern. I left an opening at the top of the back seam and made a button closure, but especially with the lowered neckline, I definitely could have sewn it all the way to the top and still easily fit my head through. The bright yellow button is a cute detail though!

Mathilde blouse no button back

Yellow buttonHaving made this pattern twice now, one piece of advice I have for tall ladies (I’m 5’10”) is to add lots of length to the bottom. I added a couple inches (and did a double turn hem) and am definitely going to let it out as much as I possibly can to try to get a bit more length. At it’s current length I don’t feel like I could tuck it in if I wanted.

So there we have it. I’m still in love with Tilly’s pattern, but not in love with this version that I’ve made. Thoughts to make it feel less like a pediatric nurse’s scrub top???

A Sewing Tradition

After Thanksgiving Morgan wrote a lovely post over at Crab & Bee about her heirloom button collection and it inspired me to dig through my mother’s button collection while I was home for Christmas this year. Both she and my granny sewed as hobbies but the real seamstress in the family was my great grandmother. Apparently her home was full of stacks of Vogue magazines and she could pretty much sew up anything she found in there!

Button jarAs we sorted through the buttons we found some that my mom remembered from various projects or clothes and some family heirlooms (of course she claimed all the ugly ones were inherited from her mother’s button collection, lol).

Vintage buttons

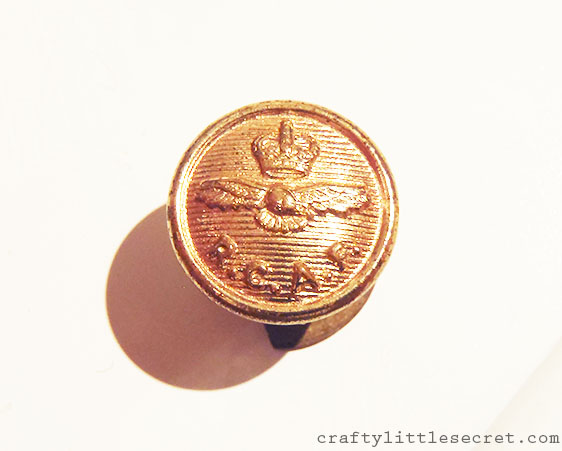
Nautical buttons from a dress my mom had made herself, a button off her brownie uniform (or maybe mine?), a button from a maternity shirt, and a button off her father’s RCAF uniform

One of the cute fabric covered buttons I found she remembered from a maternity top she wore when pregnant with me and we were even able to find a photo of her wearing it!

maternity button

The print just didn’t show up in a picture of an old picture, but the button is from the shirt she’s wearing in this picture.

It was fun to dig through the jar and find little bits of history like this button off her Brownie uniform when she was a little girl. (Are the Brownies a thing in the US? It’s part of the Girl Guide system.) Apparently when learning to darn her Brownie leader told her that she’d never find a husband if she kept darning so poorly. She didn’t stay in Brownies for long.

vintage brownie button

She was pretty sure that somewhere in the big jar o’ buttons was a little gold button off her dad’s Royal Canadian Air Force uniform in the 50’s. So I dug and dug and eventually found it! How cool to be able to go through the buttons with my mom. I probably wouldn’t have given any of them a second look if she hadn’t been there to tell me about their history.

RCAF vintage buttonThe button trip down memory lane inspired us to go digging through her cedar chest for some other gems. In addition to the scarf that went with the button above on her Brownie uniform, we also found a plaid scarf that my grandmother had sewn.

homemade scarf

Inspecting the seams I realized that my impatience with finishing sewing projects isn’t my fault….it’s genetic! See? My granny ran out of the navy thread halfway through the scarf and switched to a light blue instead of waiting until she got more navy thread! God forbid anyone inspect the seams of anything I’ve sewn, lol!

homemade scarf

We found this adorable little jacket that her mother had sewn her as a baby. I remember using it as dress-up doll clothes when I was a little girl!

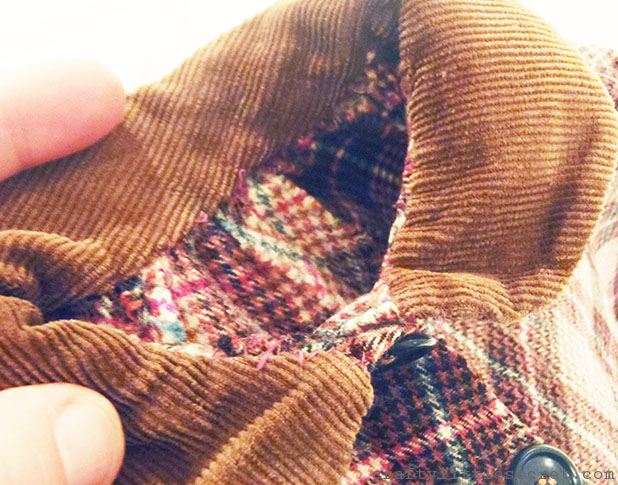
handmade baby jacketInspecting the details on this project revealed all the care and love put into the jacket with a hand-stitched collar, button placket and hem.

handmade baby jacketWhat a great way to spend a morning digging through my family’s sewing tradition! Thanks to Morgan of Crab & Bee for inspiring me!


2014 Re-SEW-lutions

First, because everyone else is doing it….

Top 5 of 20132013 was a big crafting/sewing year for me, mostly because I’ve been out of full time work since July while waiting for my Green Card (arrived in October! Woot!). I finally had the time I wanted to put into making things and working on this blog. Thinking about my Top 5 Hits of the year, many of them are more about what stop the project represents along my handmade journey rather than the finished product (though I love the finished products too!) So. Without further ado, my Top 5 Hits of 2013!

5. Elbow Patch Appliques

DIY Elbow Patch AppliqueMy husband’s favorite sweater finally got a hole in the elbow this year and, inspired by some street fashion he saw in NYC, I made some plaid elbow patches to repair his sweater (tutorial here). This makes the Hit List firstly because he loves the sweater even more now than he did before! But secondly, it represents the emphasis I put on repair and reuse this year. I’m always tempted by wanting shiny new things but I recognize that it’s more important to me to exercise responsible consumption and to save our money for experiences and our future. I get a certain pride from knowing that I’ve extended the life of something, saved it from the landfill and saved some money.

4. The Eva Dress

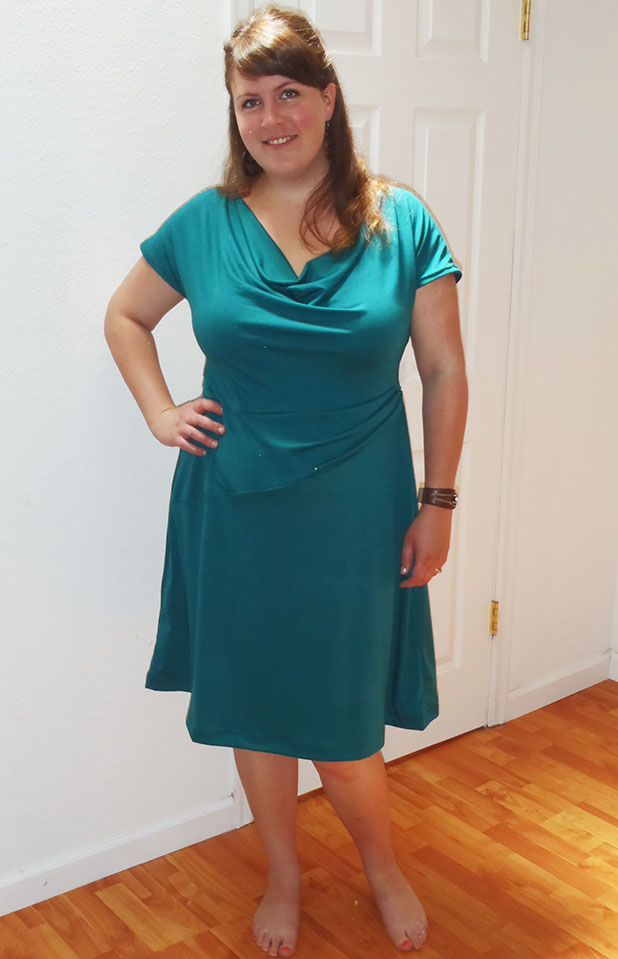
Eva DressI made my version of the Eva dress (free pattern from Your Style Rocks) back in August and I think I’ve worn it twice (which is actually a lot for me to wear a dress in 5 months!). Inspired by many of the blogs I follow, this dress represents one of my first steps toward making things that I actually wear. I thought about my wardrobe, what was missing and what I thought I could use more of (casual but pretty jersey dresses) and decided on this pattern. This thought process will hopefully lead to me actually wearing the clothes I wear rather than leaving them hanging in the closet when I just see a pretty pattern or fabric without really thinking about how it will work with my existing wardrobe or how I’d wear it.

3. Striped Tank

Striped TankDespite my wonky hair in this photo, my st

riped tanktop had to make it onto my Hit List. The shirt itself has some fit issues – the straps are a bit too wide and it’s pretty baggy – and I encountered some technical issues while sewing (a messed up tension resulted in a really ugly hemline) but I’m proud of it for 3 reasons. 1) I wear it a TON, so it clearly filled a void in my wardrobe, something I want my sewing to focus more on in the New Year. 2) It was a self-drafted pattern and while one of the major lessons it taught me was that I have a lot to learn, it’s fun to know that it’s my tank through and through. 3) This project had some major issues with it and while it definitely sat in the WIP basket for months, I’m really proud that I didn’t give up on it. I thought carefully about possible solutions, decided on (a remarkably easy) one and finished it up!

2. Scoop Neck Tee

Scoop Neck TeeIn September I made a simple Scoop Neck Tee and it was a bit of a thought revelation for me. I’ve always thought of sewing as being for making special occasion dresses, costumes and occasional wear. Many of the other sewist bloggers out there really inspired me this year. As Me-Made May passed I really wished that I had more me-made garments incorporated into my wardrobe. This T-shirt represents my decision to sew more wearable garments for myself and to not sew exclusively “fancy” garments.

1. Mathilde Blouse

Mathilde BlouseMy #1 for this Hit List was an easy choice: my first Mathilde blouse (I say “first” because I’ve already got another in the works and may make even more after that). I’m so proud of this blouse because I chose a pattern that I would be excited to wear, in a cute fabric that worked great with the pattern and I took the time to sew it well. Fully lined with French seams and double turned hems, I just love knowing that I’m wearing a well made shirt when I wear this.

Of course, with all this looking back, it’s a great time to look forward and think about what goals I’d like to set for 2014. When I look at the project I chose for my 2013 Hit List, they’re ALL garment sewing projects. Which tells me I should focus on those in the coming year.

2014 Re-SEW-lutions:

1. Sew a jacket! I’m thinking Mini-ru like Crab & Bee but I’m open to suggestions! Has anyone sewn a Minoru? Is it an easy pattern for a first time outerwear project?

2. Participate in Me Made May! I just discovered Me Made May this year as I got more into blogging and I found it so inspiring! The idea that I could make myself a wardrobe that I could wear with pride on a daily basis is so exciting! I’d love to work hard over the next few months to make a few more garments (many of which I already have fabric for in my stash) so  that I have enough items to participate in Me Made May (to whatever extent I choose).

3. Learn to Draft a Pattern! I bought a pattern drafting book in 2012 and read a couple chapters right away but never started working on any projects. I want to better understand how patterns come together so that I can understand what alterations to make to purchased patterns and how to draft a pattern when I’ve got a clear picture in mind of what I want.

What are your 2014 Re-SEW-lutions???