Happy New Year! #sewingtop5

Top 5 2014

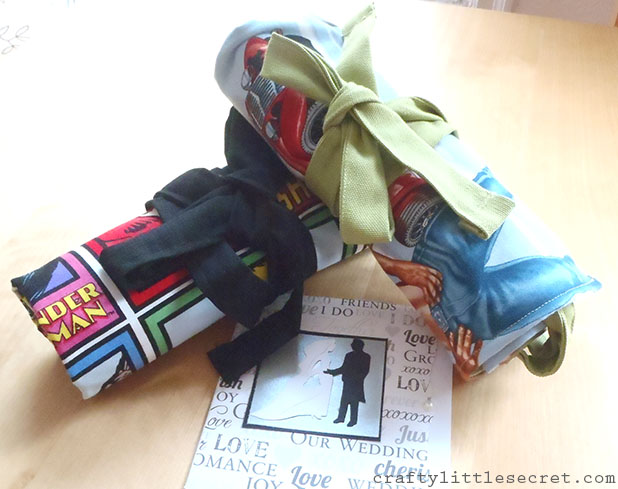
Last year I loved using Gillian’s Top 5 List as an excuse to look back at all I’d accomplished over the year, so I knew I wanted to do it again this year. I’ve loved the reflections I’ve seen on other sewing blogs and am amazed and some of the gorgeous things people have made in 2014, especially when you see them all lined up in a row! (I mean, how does Oona even find the time for this much awesome?)

I’m not going to make any hard and fast goals for next year because I’m still trying to figure out how to keep finding the time to sew regularly now that I’m back to work. I think you can probably expect to see simpler sewing from me. I’ve got a half-made pair of pants on my sewing table that I’ll finish up, but I’ve found I’m just not that interested in complicated projects when I have less time to sew overall. That being said, I still wanted to take this opportunity to look back on the year and to share with you my Top 5 Misses and Hits of 2014.

MISSES:

5? Just kidding! What a nice feeling to look back on what I’ve made in 2014 and realized that I couldn’t quite fill the “misses” column! Here’s my Top four misses of the year:

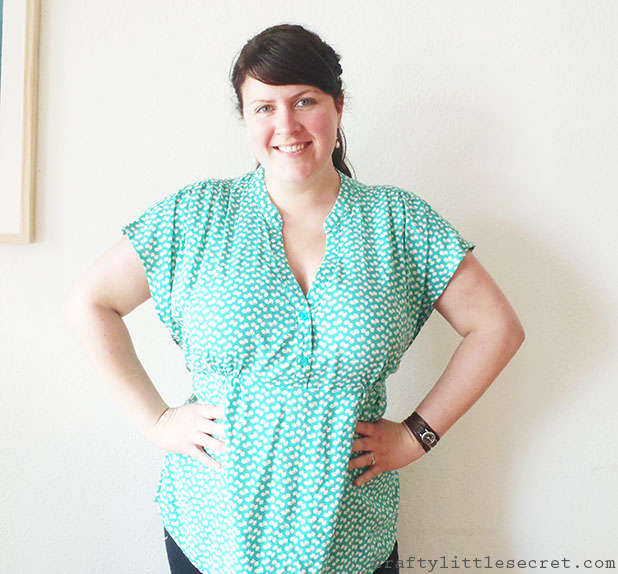
4. Vogue 1152 Blouse
v1152 sewing pattern front
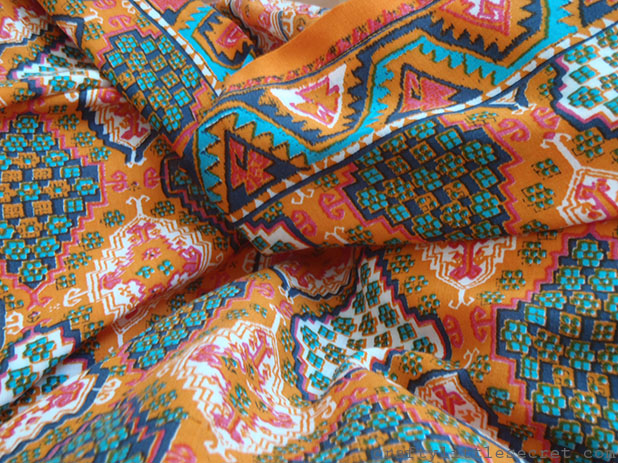
I’m a little sad to see this one on my Misses List. I fell in love with this fabric at Britex when I saw someone else buying some, and I bought it for myself on a whim. I researched and planned and came up with what I thought would be the perfect use for it as a flouncy blouse. But for some reason I just don’t wear this blouse. I don’t quite know what it is. Could be that it’s colors I don’t usually wear; could be that despite raising the neckline by a couple inches my cleavage still manages to peak out; could be that I don’t have a sweater that fits over the sleeves. Whatever it is, this poor much-anticipated blouse doesn’t get pulled out of the closet too often.

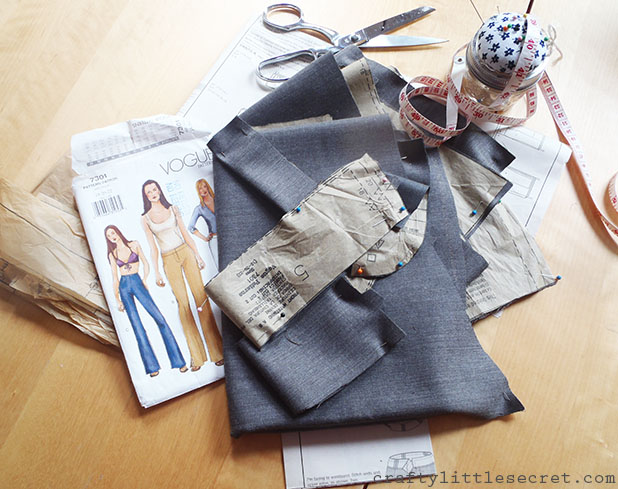
3. Blue Afternoon Skirt
Crafty Little Secret - Blue Afternoon SkirtI think this skirt can be saved, but it’s on the list for now. Unfortunately, I tried to do a yoga pant waistband without doing any research about how to do that or what type of fabric to use. This jersey was nice and stable, but it just doesn’t have enough recovery so after I’ve worn it for an afternoon, it’s stretched out and the skirt starts falling down. But, even as is, it’s a nice around-the- neighborhood alternative to jeans or yoga pants and like I say, I think I can fix it. I just need to come up with a new waist band that won’t add bulk…..
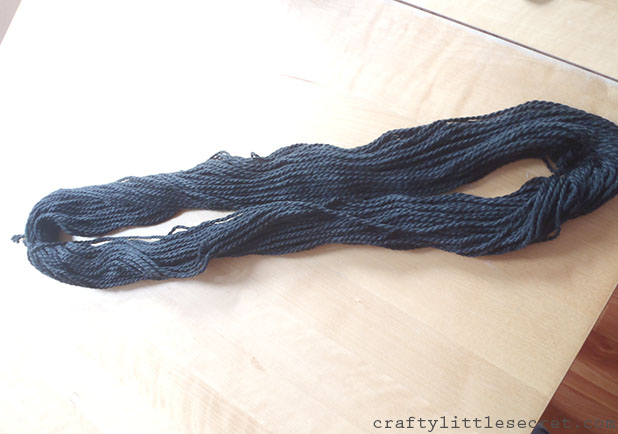
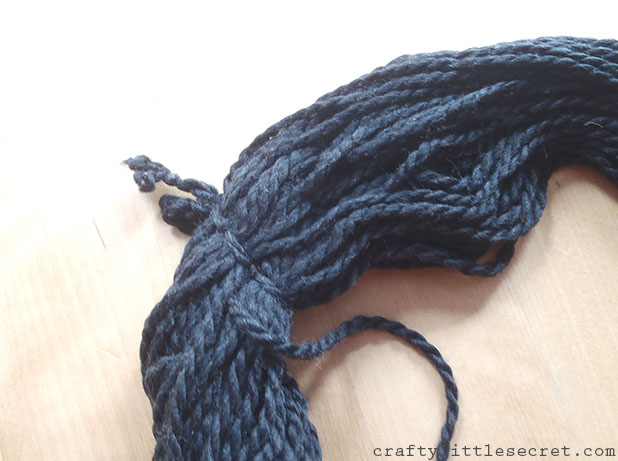
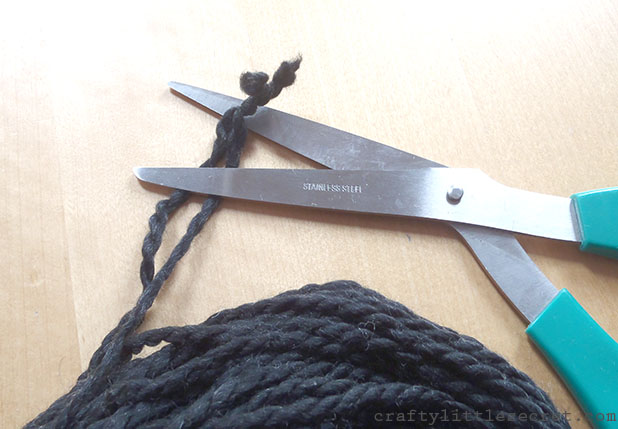
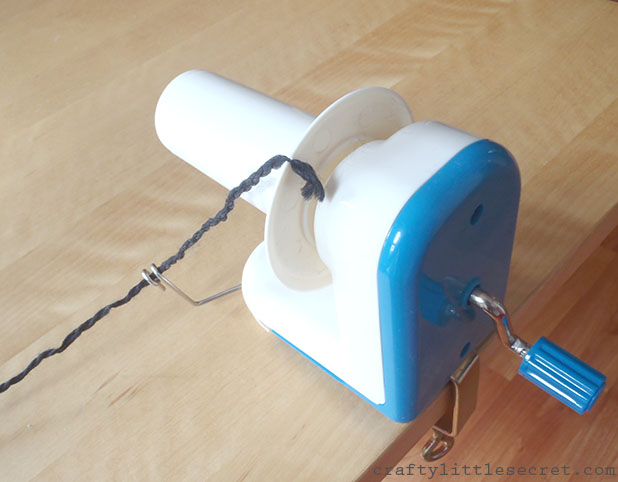
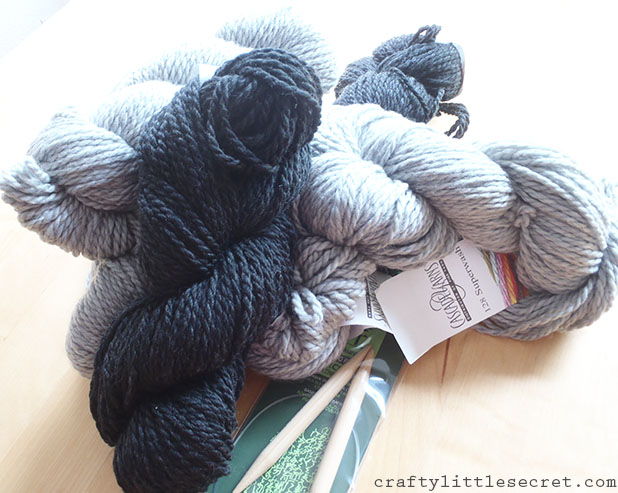
2. Borneo Beret
Crafty Little Secret - Borneo Beret - craftylittlesecret.com
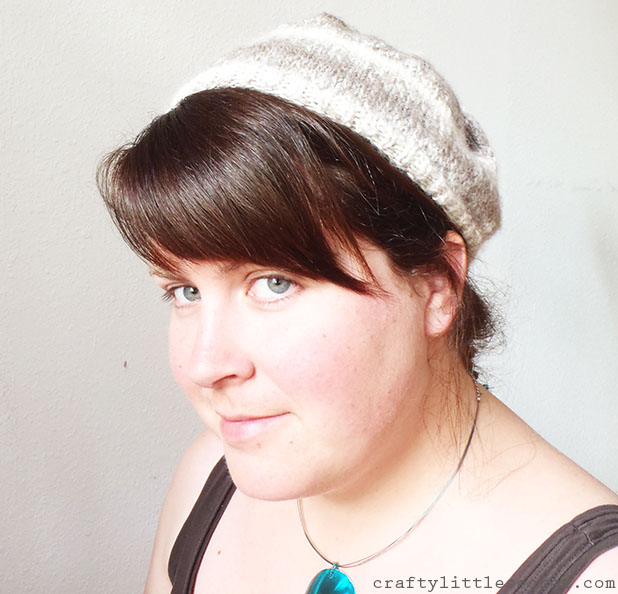
This beret was not long for this world, but it served its purpose. It kept my hands busy on the flights to and from Borneo (hence the name). This just fit my head so strangely, I never even wore it out of the house and unwound it shortly after taking these photos. I haven’t gotten around to knitting another hat out of it but just shrunk my previous knit hat, so that’s good incentive to get knitting!

1.  Mathilde blouse #2

Mathilde blouse front

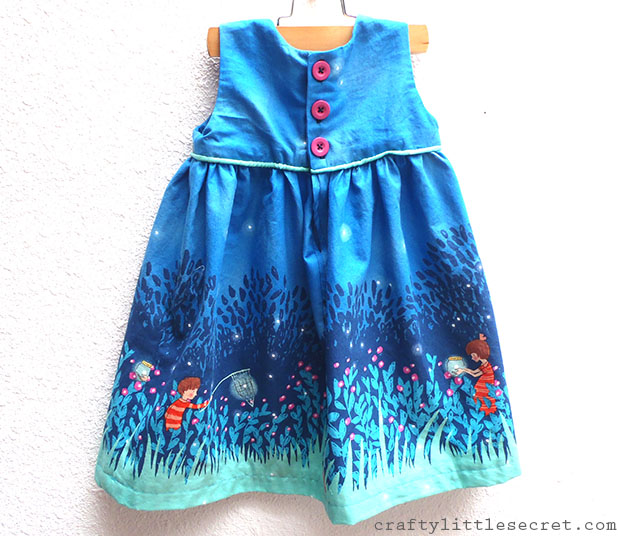
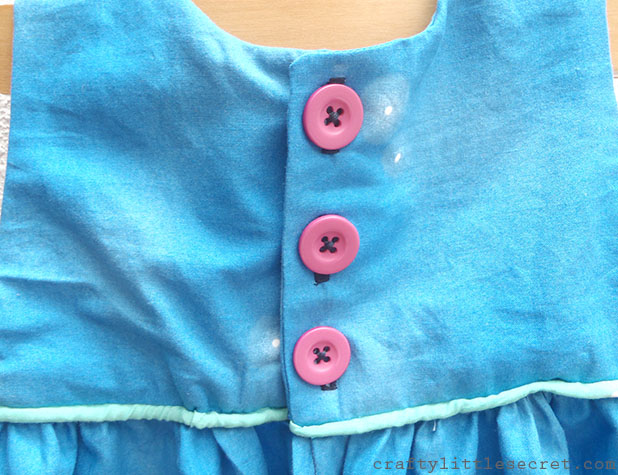
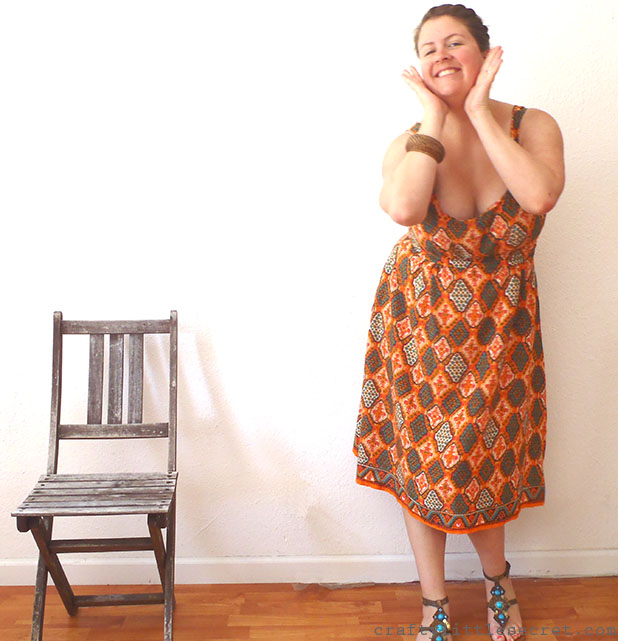
It is not a good sign when *this* is the face you make when wearing a shirt you made. I look like I’m being held at gunpoint and trying to mouth “Call 9-1-1” without my captors noticing.

I hate this shirt. I wore it once to fill in my Me Made May wardrobe, then never wore it again. I truly don’t understand how a pattern that easily made the 2013 Hits List can so decidedly claim the 2014 Miss List top spot. Oh wait, yes I can. It’s a little thing I like to call “tragic fabric selection”. This is going in the Goodwill pile in the hopes that there’s a pediatric nurse out there needs some new scrubs.

HITS:

5. Tie-Dye Maxi – Vogue 8469

Vogue 8469

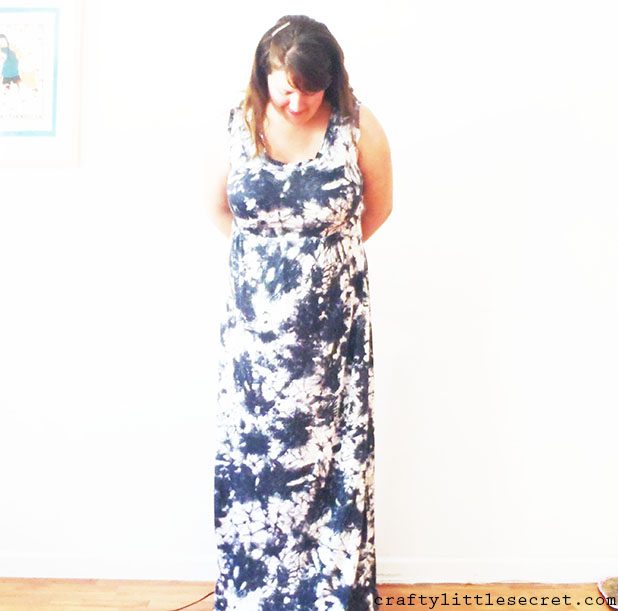
This dress was exactly what I wanted this summer. Ok, well not exactly. What I was really obsessed with was indigo shibori dying (which I still haven’t gotten around to trying out despite having a friend who did a ton of it a few months ago and offered to share his dye batch with me), but this dress scratched the itch and made me happy. And the fabric doesn’t wrinkle. So clutch.

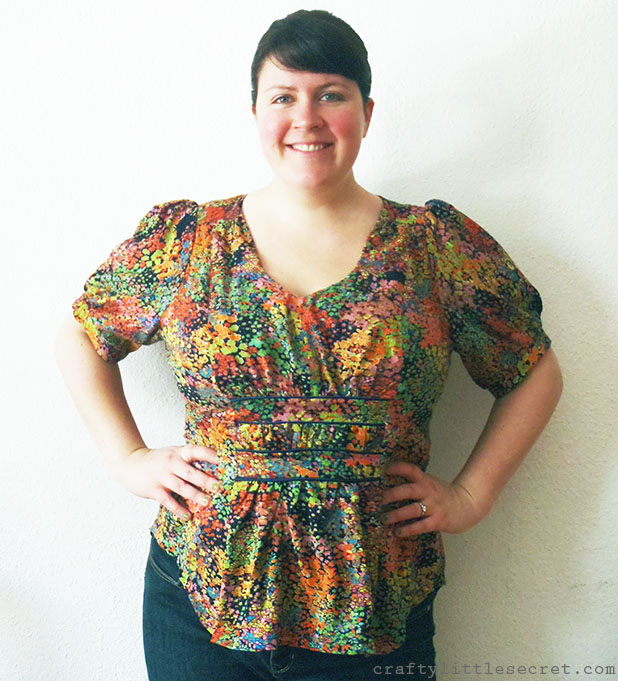
4. The Ele-Fun Refashion
Elephant shirt refashion
I was pretty pleased with how this turned out. This is the third iteration of this fabric and it’s definitely the one I’ve worn the most. The only reason this didn’t land higher on the list is because it’s *still* a little difficult for me to wear. San Francisco is such a cardigan climate and I just don’t have one in my current wardrobe that goes with this top. But I’ve worn it under a navy blue blazer a couple times and looked pretty cute. And let’s not forget that this shirt was featured on the Refashionista blog, so that was pretty fun!

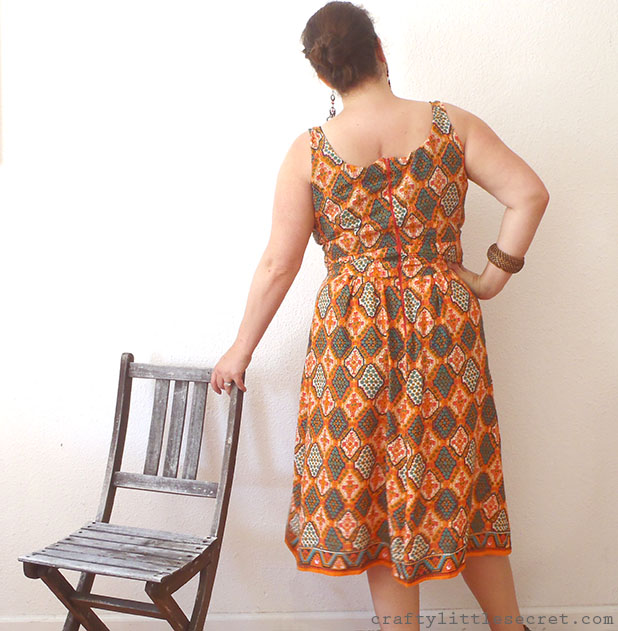
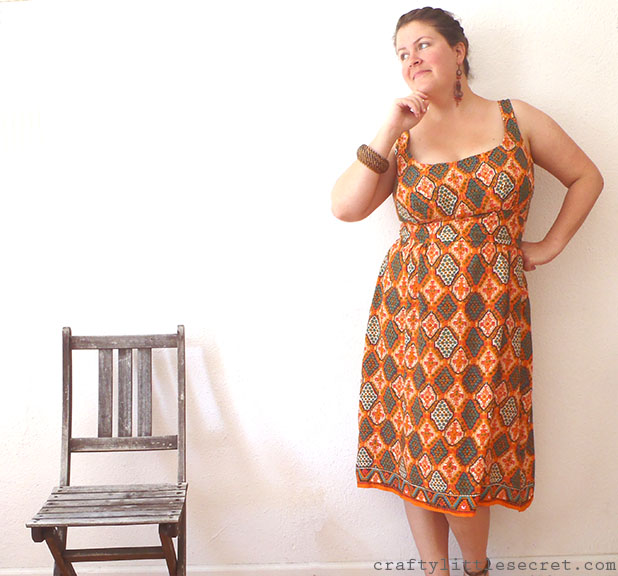
3. Oonapalooza: Tangerine Dream
Oonapalooza Sew Along
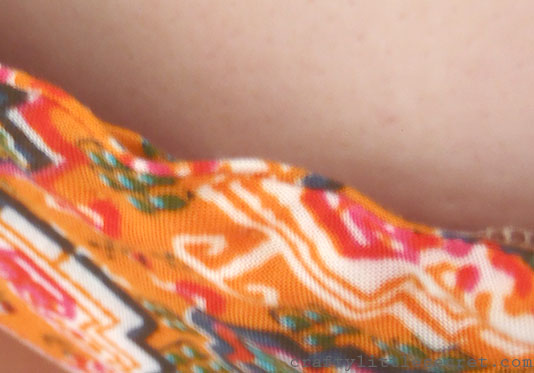
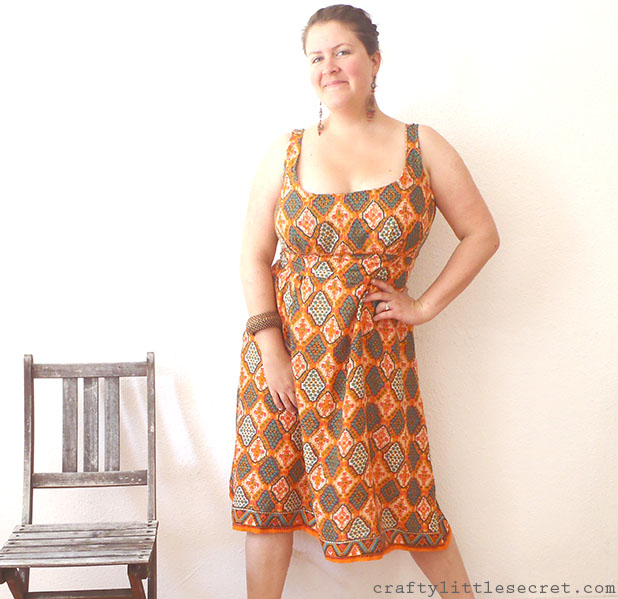
Thank you again, Oona, for the inspiration! I stitched this one up as my contribution to Oonapalooza. This is not a color I normally wear but this dress was a resounding success! It’s a nice light and soft cotton and so comfortable to wear. I’m proud of this dress because it was my first real attempt to alter a pattern and do some fitting. I did a full bust adjustment and lowered the neckline at the back and front. The only thing keeping this dress from being higher on the list are some construction mistakes. I used a frustratingly slippery fabric for the lining that caused for a bit of strange fitting at the front, and did a poor job of sewing the zipper in.

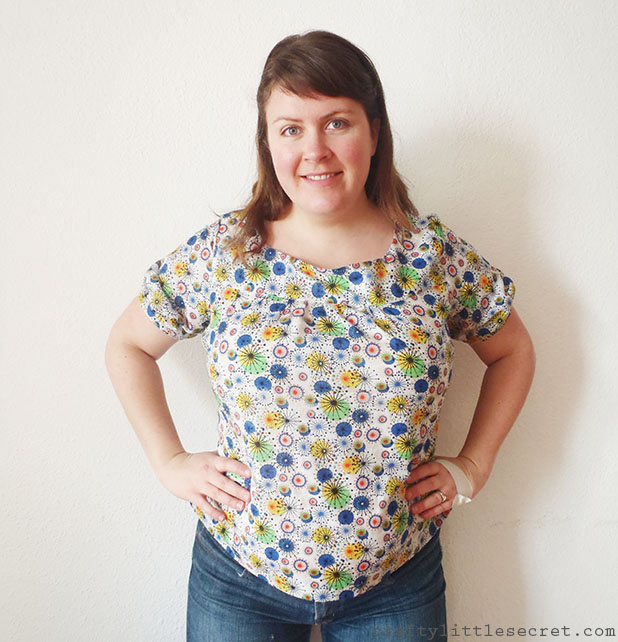
2. Aqua Goodwill Refashion
refashion after frontThis top was definitely a surprise hit. I made it on a bit of a whim, just kinda winging it, and to be honest I didn’t love it when I first finished it. But I wear it SO MUCH. It filled a hole in my wardrobe that I didn’t know existed. It is a comfy, easy-to-throw-on, weekend shirt that just makes me look a wee bit more pulled together than a t-shirt would. It’s currently sitting in my repairs pile as I tore a little hole in it but I’ll definitely be pulling this one out to wear in 2015.

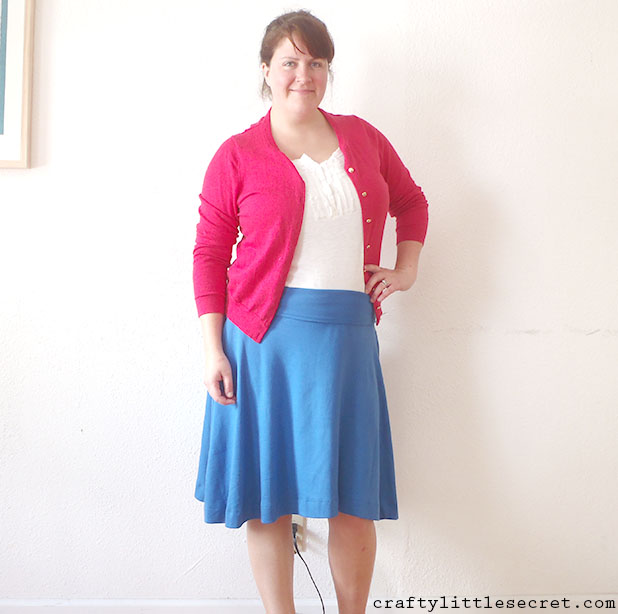
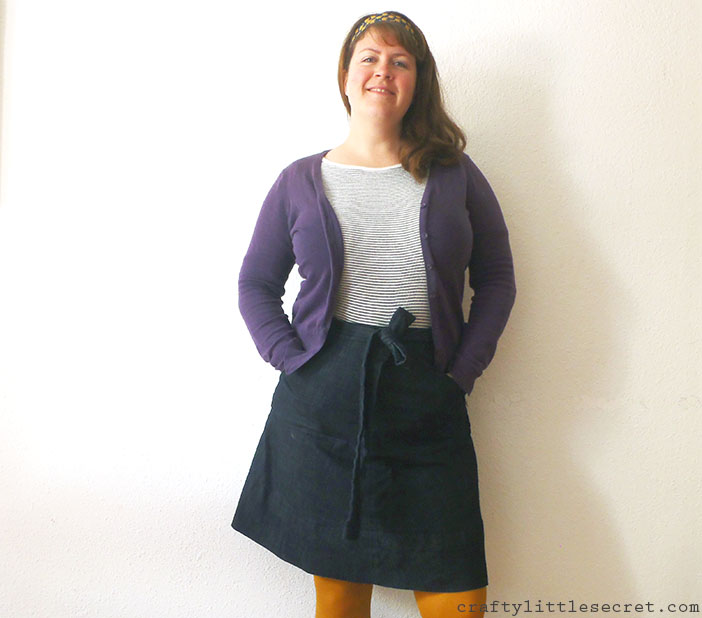
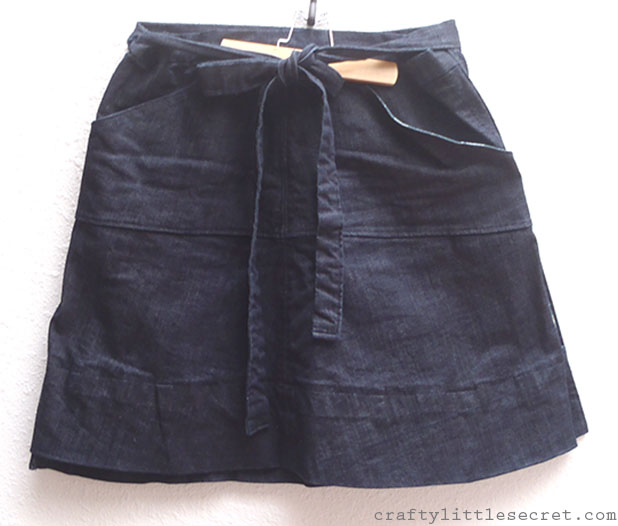
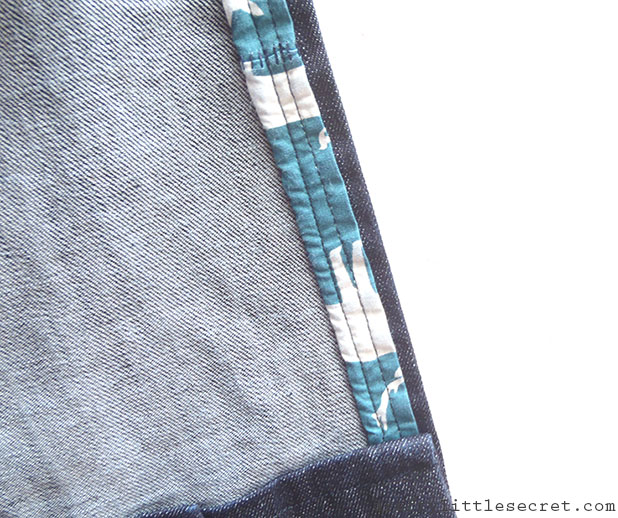
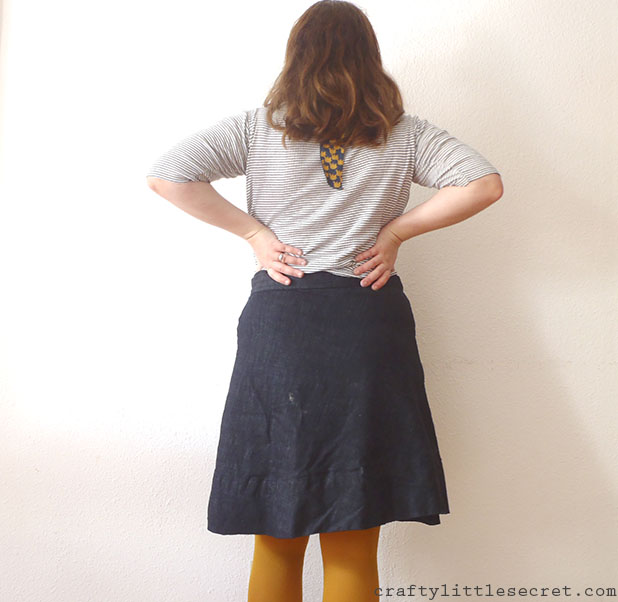
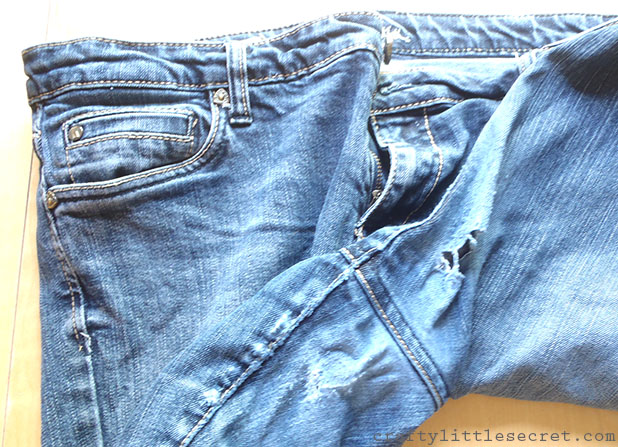
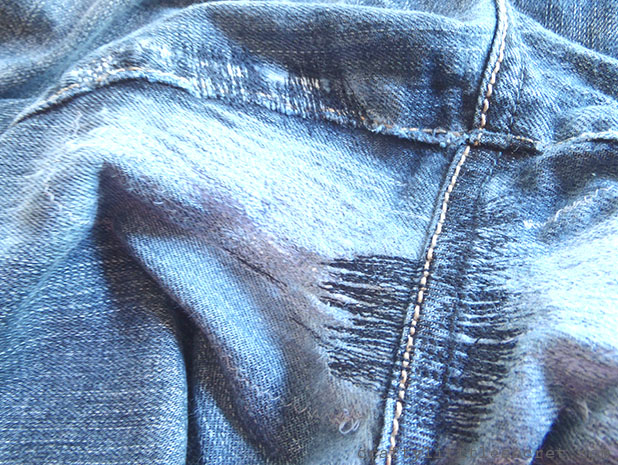
1. Denim Miette Skirt
Crafty Little Secret - Denim Miette Skirt - www.craftylittlesecret.comThis skirt is a newbie to my wardrobe but earned top billing by fulfilling exactly the role in my wardrobe that I wanted it to! I wear this skirt to work at least once a week and it’s a super cute and super comfy alternative to jeans. It’s bound to get a ton more wear in 2015….especially since I got three new pairs of brightly colored tights for Christmas!


Advertisement

Denim Miette Skirt

Crafty Little Secret - Denim Miette Skirt, a Tilly and the Buttons pattern - www.craftylittlesecret.com

I’m not normally much of a ‘skirt person’. For some reason I can never figure out how to strike the happy balance between business and casual. But when I saw some denim Miette’s popping up I thought it would be the perfect solution (just in time for fall in San Francisco)!

And gosh darn it, I think I was right!

Crafty Little Secret - Denim Miette Skirt, a Tilly and the Buttons pattern - www.craftylittlesecret.comI wore this skirt around for two days before I took the pictures, so please excuse the wrinkles.

The pattern is the Miette Skirt from Tilly and the Buttons. The skirt came together incredibly easily. Except for the part where I figured that since the Mathilde blouse, which is also a Tilly pattern, is always too short so I added 5 inches to the pattern length.

I then promptly sewed a 5 inch hem. Tee hee! Oh well, I actually prefer the look of a tall hem on this skirt.

Oh. Before I get too far into this I guess I should mention the fabric. I bought this in-store and whenever that happens I never have the full information. But I can tell you that it’s a lightweight stretch denim and boy oh boy does the dye ever rub off! I washed it once before sewing and it turned my finger tips thoroughly blue every time I worked on it. I washed it again before wearing and turned my hands blue every time I put them in those big comfy pockets. Then I washed it again and I think I might have finally got it to a point where it’s not rubbing off on things.

But I’m still not wearing it on my light blue couch. Oh heck no.

While we’re on the subject of those big comfy pockets, let’s get a closer look, shall we?

Crafty Little Secret - denim Miette skirt - www.craftylittlesecret.com

Although it’s not in the instructions, I decided to top-stitch around the bottom edge of the pockets and all the way down all the skirt seams. I think this does two things: 1) it looks a little more polished and 2) it adds a bit more strength and stability to those pockets.

I also lined the pockets with some super cute scraps that I had used to make my mother-in-law a set of cloth napkins.

Crafty Little Secret - Jay-Cyn Designs for Birch Organics, Elk FarmI forget what the color is called, but it is a Jay-Cyn Designs for Birch Organics fabric from the Elk Grove collection. And while this color seems to be gone, there are still some others available on FabricWorm where I bought this.

I also used the same fabric as seam binding on the back flap of the skirt because I thought it’d be cute. But, I dunno. I could take it or leave it. Sometimes I think I would have preferred just a double fold clean edge there. So that is one thing I would caution people about making this skirt is that that back flap hem will be a bit visible, so it should be finished neatly.

Crafty Little Secret www.craftylittlesecret.comCrafty Little Secret - Denim Miette Skirt - www.craftylittlesecret.comAs you can see in the photo below, the wrap-around skirt also sometimes leads to a bit of wonkiness at the hem, but I’d say that’s a function of wrap skirts in general and not this pattern in particular.

Crafty Little Secret - Denim Miette Skirt - www.craftylittlesecret.com

I would say the only thing I struggled with at all during the construction of this dress was really just the waist tie. I think my fabric choice was a bit heavier in weight than Tilly had intended so I found it really difficult to squeeze my tie through the narrow hole left in the waistband. The bright side of that scenario is that it’s really hard to pull the tie back out too so it stays in there during the wash, so, there’s that.

I gotta tell ya. Overall I am pleasantly surprised with how cute I feel while wearing this! And it’s a great excuse to wear these mustard yellow tights that just don’t normally get thrown into the mix.

I’m not sure I’ll make another for a while, simply because how many wrap skirts does one really need?, but I really liked this pattern. You’re 2 for 2 so far Tilly, good job!

Crafty Little Secret - Denim Miette Skirt - www.craftylittlesecret.com

And just as a little side note to all you bloggers out there with a desk job, I don’t know how you do it! The only thing I’m more behind in than my sewing projects right now is blogging about them! I mean, I didn’t even blog our Mr and Mrs Potatohead Halloween costumes from this year! [checks forehead for evidence of fever] And these short days aren’t helping. God help ya if you need to take some photos and you don’t take advantage of some weekend daylight….. That said, hopefully I’ll be posting a little more regularly after the Holiday Season.

Winding Yarn at Home

Winding yarn at homeWith fall in the air and my sewing machine on the fritz, I’ve been picking up my knitting needles more lately.  The other day I was basking in the happiness that is a pile of neatly wound balls of yarn, when I thought I’d share the yarn winder I used at home.

Crafty Little Secret - Winding yarn at home - www.craftylittlesecret.comMy mom bought me this yarn winder (I think the skein holder might come separately) a couple years ago and it has changed my life! Ok. That might be an exaggeration. But it’s definitely nice to not have to loop my yarn around the back of a chair to wind it, or make someone sit there with their hands in the air (especially since my knitting buddy moved back to NYC).

Crafty Little Secret - Winding Yarn at Home - www.craftylittlesecret.comIt’s simple to wind your own yarn. Lay out the skein of yarn and find the knotted parts at either end.

Crafty Little Secret - Winding Yarn at Home - www.craftylittlesecret.comAnd snip those knots off to free up the yarn ends.

Crafty Little Secret - Winding Yarn at Home - www.craftylittlesecret.com

Snag one end of the yarn securely into the yarn winder and thread it through the little metal loop at the bottom (this makes sure it feeds properly as it builds the yarn ball).

Crafty Little Secret - Winding Yarn at Home - www.craftylittlesecret.com

The rest of the skein loops around the skein holder. Then it’s just a matter of the turning the crank and building your ball of yarn.

Crafty Little Secret - Winding Yarn at Home - www.craftylittlesecret.comI’ve found that it’s best to wind slowly as turning the crank too quickly can cause the yarn to slip off the rest of the ball and you end up with this kinda spaghetti mess hanging out the middle of your yarn ball.

To keep track of exactly what each yarn and color lot is, I like to fold up the label from the yarn skein and tuck it inside the ball.

Crafty Little Secret - Winding Yarn at Home - www.craftylittlesecret.comThen I tuck all my newly would balls of yarn into one of those bags that sets of sheets come in.

Crafty Little Secret - Winding Yarn at Home - www.craftylittlesecret.comThis has the added advantage of limiting the expansion of my yarn collection before it gets too crazy. If it doesn’t fit in here, I can’t get more yarn. (Except of course for that yarn my mom gave me that lives in another container…..).

Let’s all look at this pile of perfectly wound balls of yarn for a moment, shall we?

Crafty Little Secret - Winding Yarn at Home - www.craftylittlesecret.comSigh. Isn’t it a beautiful sight?


WIPs and WIIs

Works in progress and works in imagination. Or maybe they count as in progress if you’ve purchased the materials????

Crafty Little Secret - WIPs - www.craftylittlesecret.comThe furthest along project first. I’m working on my first pair of dress pants! Well, okay, not my first ever, but my first since I started sewing seriously again and am trying to do things properly. I’m using some fabric I picked up in the NYC fabric district and an old sewing pattern (Vogue 7301). I’m going to have to improvise some pockets because pants without pockets shouldn’t be allowed to exist, but I’m not worried about that.

Crafty Little Secret - WIPs - www.craftylittlesecret.comAnd next….a sweater for my nephew. I’ve kinda started making him a sweater a year for Christmas or his birthday (whenever I finish it). Since it’s only been two years I guess that’s not much of a streak but I’m gonna try to keep it going. Can’t give away too much though because I think he’s parents read this blog and I don’t want to give away the surprise. I just hope they appreciate that I made sure to buy washable wool for a toddler sweater (hand washable still counts, right?)….

Crafty Little Secret - WIPs - www.craftylittlesecret.com

This final one is still very much in my imagination and still needs to go through its “experimental” phase. I’ve been turning an idea for a quilt over in my head (you can check out my Pinterest board here) that would be some sort of shibori-inspired blue and white quilt with embroidery. So when I was at Walgreen’s and saw some Rit dye calling to me, I remembered I had some old sheets at home that I could practice shibori dying! Yay mess!

And that’s all the projects I’ve got going these days, hopefully I’ll be sharing the finished pants with you sooner than later but I’m finding them oddly intimidating right now…..

Contact Me

I’ve received the feedback on more than one occassion lately that I’m not the easiest lady to get a hold of through this blog.

I thought, Oh well, Gee. I don’t want to put my personal email up for spammers to see, and I already have multiple email accounts to balance so I don’t want to add another for the blog. And, well, golly. It just seems like it would be so darn hard to add a contact form for people to use.

But guess what??? It isn’t! It’s sooooooooooo easy! Now I feel like a bit of a dunce for not even having investigated it before now.

All I had to do was;
1) Click on Pages, then select Add New on my WordPress dashboard.
2) Click Add Contact Form at the top of the new page entry.
3) Click Ok.

All done! A link automatically appeared at the top of my home page with the most basic and too the point contact page possible. My point to all this??? Now you can contact me if you’ve got something you’d like to share or ask about outside of the blog post. Just click the new ‘Contact Me’ link at the top of my home page!

DIY Grill Apron: Tutorial

Crafty Little Secret Tutorial: DIY Grill Apron - www.craftylittlesecret.comWow. Kudos to all you out there who post detailed tutorials regularly. I always forget how long I take to edit all the photos and get the posts up! This one has been in the making for a month….which I guess isn’t so bad.

What you’ll need for this project…..
– 1 yard of fun fabric (quilting cotton)***
– 1 yard of backing fabric (like a duck or light denim weight)
– 16/100 denim needle
– matching thread
– chalk
– ruler/measuring tape
– scissors

**** You could actually get away with less depending on which way the pattern runs, but for most patterned quilting cottons, you’ll need the full yard.

Crafty Little Secret - DIY Apron Tutorial - www.craftylittlesecret.comCut the following pattern pieces:

A (Apron) – 20″x36″
– Cut one of fashion fabric, cut one of backing fabric

P (Pocket) – 14″ x 9″
– Cut one of fashion fabric, cut one of backing fabric (or two backing fabrics if you want a solid pocket)

W (Waist Tie) – 36″ x 3.5″
– Cut two of backing OR fashion fabric

N (Neck Tie) – 24″ x 3.5″
– Cut one of backing OR fashionfabric

Crafty Little Secret - DIY Apron Tutorial - www.craftylittlesecret.comUsing chalk, make a tick mark on the apron pattern pieces 15″ down from the corner on the long side, and 6″ from the corner on the short side. Draw a line connecting the two pieces and cut the corners off.

Crafty Little Secret - DIY Apron Tutorial - www.craftylittlesecret.com

To make the waist and neck ties, fold and iron fabric as when making bias tape. Fold the tape in half lengthwise and sew it up as close as you can to the open edge (I kept my seam allowance about 1/8″).

Crafty Little Secret - DIY Apron Tutorial - www.craftylittlesecret.comCrafty Little Secret - DIY Apron Tutorial - www.craftylittlesecret.comThis is where it’s very important to have that 16/100 denim needle. Once you start sewing through multiple layers of the heavy duck (or similar weight) fabric, needle shards go flyin’ if you’re not using the right size.

Crafty Little Secret - DIY Apron Tutorial - www.craftylittlesecret.comTo finish the ties I just double overed the ends a couple times and sewed through the bulk of it….carefully. Watch for breaking needles and take it slow. No one likes a needle shard in their eyeball.

[ASIDE: The alternative method for making the waist ties is to fold the fabric in half lengthwise with right sides together, sew all the way up the open edge then turn the tie inside out. I find this technique annoying enough on lighter weight fabrics that I didn’t even entertain the though on these heavy ones. But if you opted for a quilting cotton for your ties, it could be an option if you don’t like the futzing with folding and ironing.]

Crafty Little Secret - DIY Apron Tutorial - www.craftylittlesecret.comAttach the ties by sewing them into the side seams (I attached them at the point where the angled front of the apron meets the straight sides). Since the ties are so long I found it helpful to keep them contained by pinning them into a coil to keep myself from sewing them into the seams at wonky places.

Crafty Little Secret - DIY Apron Tutorial - www.craftylittlesecret.comTo attach the apron front to the apron backing, place right sides together and sew with a 5/8″ seam allowance. Sew all five bottom edges together (I went back and forth over the spot where the waist tie joined to add a little extra strength) but leave the top open. This allows you to turn the apron right-side-out again. Which you should do now. Flatten the apron and adjust the seams so that the corners are nice and neat (you can use a pencil to help turn them) then iron all the seams so they’re nice and crisp.

Crafty Little Secret - DIY Apron Tutorial - www.craftylittlesecret.com

Sew the neck tie the same as the waist ties, but leave the ends open and unfinished. Fold the top edges of the apron pieces toward the inside about a half inch.

Crafty Little Secret - DIY Apron Tutorial - www.craftylittlesecret.comPin the neck tie in place with about an inch of each end tucked between the apron layers. Top stitch the neck closed and all the way around the apron with a 1/4-1/8″ seam allowance. The top stitch adds a little extra strength and gives a nice finished look to the apron.

You can stop here now if you want to….but we’re having so much fun! Let’s keep going and add some pockets.

Crafty Little Secret - DIY Apron Tutorial - www.craftylittlesecret.comWith right sides facing, sew the two pocket pieces together with a 5/8″ seam allowance and leaving a 6″ opening at the bottom.

Crafty Little Secret - DIY Apron Tutorial - www.craftylittlesecret.comTo help get nice crisp corners on the pockets, or any time you’re sewing right angles, it helps to trim some of the seam allowance off the corner. But be careful not to snip your stitches!

Crafty Little Secret - DIY Apron Tutorial - www.craftylittlesecret.comFold the edges of the opening that you left inward and iron in place.

Crafty Little Secret - DIY Apron Tutorial - www.craftylittlesecret.comTop-stitch a decorative border along the top edge of the pocket piece. Again, this is just adding another of those little finishing touches that will help make your apron look a little more pro.

Crafty Little Secret - DIY Apron Tutorial - www.craftylittlesecret.com[ASIDE: This was a great project to practice my print matching skills. When I was cutting the pattern pieces I realized I didn’t want to cover this awesome print with a big solid colored pocket and it would look odd if the pocket print didn’t line up perfectly with the apron print underneath. So I took care to cut the pocket piece so that the prints on the two pieces would align.]

Center the pocket piece in the apron about 8″ from the bottom of the apron, or at whatever height feels comfortable for you. Top stitch around the bottom and two side edges leaving the top of the pocket open.

Crafty Little Secret - DIY Apron Tutorial - www.craftylittlesecret.com

The final step is to divide the pocket into small sub-pockets if you want. I found it easiest to draw a chalk line first as a guide to follow since my stitching has a tendency to get pretty wonky if I don’t have an edge to use as a guide.

Crafty Little Secret - DIY Apron Tutorial - www.craftylittlesecret.comAnd……………..done!!!


Hunk-A-Hunk-A-Burnin’-Apron Love

I made these aprons about a month ago but am just getting around to posting them now because I’ve been working on a tutorial to go along with them. [ASIDE: Kudos to those of you who regularly post tutorials, I always forget how long they take to write up with all the photo editing!] But then of course once I started writing the tutorial I decided to break it up into two posts anyway because I have some announcements I want to make that I thought would be best to leave outta the tutorial.

Crafty Little Secret - DIY Handmade Apron - www.craftylittlesecret.comOne of my dearest friends got married last month (congratulations Sharon and Colin!) and I was fortunate to be able to travel all the way back to Nova Scotia on her big day. But what to get the girl who has everything (….everything in my price range that is…LOL)? I asked her if she’d be into some homemade napkins or oven mitts or anything like that, and she said her man was wanting a nice stout grillin’ apron. So a project was born!

Crafty Little Secret - Hunky Pinup Apron - www.craftylittlesecret.comThis is one of the funniest couples you’ll ever meet so I knew their aprons needed to reflect that. What better use for this aaaaaaaaaaaaaaaaaaaaaaaaaaaaamazeballs Hunky Wrangler Pin-Up fabric???? (And I got the end of the bolt bonus and got an extra half yard of this winner!) This way Sharon can be reminded of her own hunk-a-hunk-a-burnin’ love everytime she puts it on.

And for Colin?

Crafty Little Secret - Comic Book Apron - www.craftylittlesecret.comHe loves all things comic book and even has a replica of the Green Lantern’s ring as his wedding ring! Obviously as soon as I saw this DC comics fabric I clicked ‘buy’ (sorry, looks like fabric.com is sold out right now).

In my chosen career as an academic I’ve often found myself in a situation where I am traveling for a friends wedding and end up not being able to afford the type of present I would really love to give. That’s when I love to think up something personalized like this that I can make. For a total cost of about $20, I ended up with a totally personal and totally memorable present that I can guarantee no one else got them!

Oh but hey there, my career comment reminds me. I mentioned I had a bit of news didn’t I?

Announcement #1: I GOT A JOB!!!!!!!!!!!!!!!!!!!!!!! Wheeeeeeeeeeeeeeeeeeeeee! [Imagines dancing around fabric store throwing around dollar bills, draping herself in all the fabrics she’s been pining for over the last year of unemployment]. And it’s a bit of a career change into the communications side of science, which I’m super excited about! But it’s been a steep learning curve that’s left me exhausted at the end of the day and, combine that with a 10 day trip back home to Canada, and I haven’t gotten much sewing or blog writing done in the past month. Hopefully as I get used to my new schedule and things calm down I’ll pick up my sewing more regularly again. In the meantime, I’d love to hear from all you gainfully employed sewists out there – how do you find the time to sew???

Announcement #2: I got a surprise when I idly looked at my blog stats the other day and found that I’d received well over 1,000 hits that day (that’s like 10x what I usually get). Whaaaaa????? After a little clicking around I realized that my DIY bed o’ nails thread organizer project had been included in a list on Buzzfeed’s Community page! What a lovely surprise. Check it out if you’re interested, there are lots of other great organizational ideas on there: 45 Organization Hacks to Transform Your Craft Room.

Announcement #3: This one is definitely late, but better late than never, right?? A couple months ago I received another lovely surprise, this time in the form of a comment on one of my blog posts. The lovely Elle from Erratic Project Junkie had left the following comment for me:

Very Inspiring Blogger Award

Originally I thought it would be fantastic to incorporate this into last month’s Sewcialist-hosted Tribute Month Sew-Along (check out a great roundup of the amazing projects here) because I could pass the award along to all the sewists that I would love to pay tribute to. But, errrr…..it’s September already! Anyway, Elle’s got all the rules of the award posted on her blog here, but I can never come up with facts about myself. And really, nearly this whole dang post has been about myself! (Where’s the crafting?!?! Ammiright?!?!). I’m supposed to nominate some other bloggers that I find inspiring and post a button here that people can grab but, I’m gonna be honest, I don’t know how to do that (but the ladies in the following list should grab the button from Elle’s post if they so desire). So I’m just gonna link to a few ladies that I’m sure you all know, but who I find particularly inspiring and would like to present with The Very Inspiring Blogger Award:

Oona Balloona – Ummm…..hello?! Her amazing use of color, texture and pattern is a constant inspiration and source of wonder.
Ginger Makes – What’s not to love about that big smile of hers! Her willingness to sew up whatever her heart desires always inspires me to make something just for the fun of it.
Gillian (Crafting a Rainbow) – Gillian is so inspiring to me because she’s just such a dang good Sewcialist! Always coming up with thoughtful discussions and new ways to engage the online sewing community I also look to Gillian for knit inspiration!
Checkout Girl – I don’t think she’s blogging too much these days but Checkout Girl’s beautiful felt art embroidery hoops have inspired me to try my own versions a couple times
Chrix Design – I can’t remember how I found her blog, but Chrix Design’s cosplay is outta this world. I don’t do cosplay but costume making definitely holds a special place in my heart and I love reading about her creative (and often inexpensive) solutions to bring her characters to life.
Cloth Habit – It had literally never occurred to me that one could make their own lingerie until I saw this blog. Of course, I’ve still never made any but Cloth Habit has inspired the kernel of an idea that keeps growing and growing in the back of my mind.
Nicole at Home – I think I found Nicole’s blog through Britex and I’m so glad I did. Her technical expertise is a constant source of inspiration and I aspire to have half as much talent one day!
Amy of Sew Well – Amy constantly inspires me to try to be more diligent in making the effort to improve my craft and technical skills.
Seamstress Erin – Erin isn’t shy about sharing some of her personal struggles on her blog and hearing about her PhD, relationship with sewing and ultimate decision to go her own way reminds me how important passion is.
Cassie Stephens – I think I found Cassie through Seamstress Erin’s Rambo project, and she’s been putting a smile on my face ever since. Her obvious passion for art and teaching comes through in every post and every crazy dress and I love it all.
CathGrace – Catherine makes it look easy, but her amazing Anthropologie knockoffs (and other awesome projects) are always a testament to the art of sewing.
Curvy Sewing Collective – And last but not least, how could I forget the fairly newly formed Curvy Sewing Collective. While many beautiful ladies post here, each one inspires me to embrace my body explore sewing as a way to show it off.

Phew! See? That was a lot. I’m off to finish up the tutorial so you can make your own version of these awesome aprons, and hopefully I’ll have that up by Monday….Tuesday??? Sometime next week….

Mending Torn Jeans

Oops, I guess I kind of disappeared there didn’t I? I was off enjoying friends and family in Eastern Canada and having so much fun that I never got around to putting up any blog posts like I’d intended. Oh well!

Before I left for my trip I realized I didn’t have a single pair of jeans with an intact crotch. I’ve worn a hole in every. single. pair. So I thought I’d share a link to a great tutorial for how to mend torn/worn jeans by Suzzanah over at Create/Enjoy.

Here are my jeans before the fix:
How to  mend jeans crotch holeAnd after:
How to  mend jeans crotch holeThe only thing I would stress is that I found I need to extend my stitching well beyond the actual tear or it will quickly rip again because the area around the actual hole is usually very worn as well and can’t handle much pull or pressure.

So check out Suzannah’s tutorial and save your favorite jeans! I’ll be back later this week with my own tutorial showing you how to sew a BBQ apron.

Oonapalooza: Tangerine Dream

Oonapalooza Sew AlongI’ve been on a really tight crafting budget lately and am trying soooooo hard to stick to it. When Oonapalooza came around I had just spent a chunk of change on some other projects. Looking at my stash full of solid knits I was bummed out and uninspired.

Then one magical day the San Francisco fog parted, the sky cleared and a beautiful ray of sunlight shone down on me illuminating a forgotten card in my wallet. What’s this?! A full Britex rewards card?! Worth $37 in free fabric?! How could I have forgotten such a thing?!!!!!

Oonapalooza Sew Along

This is the smug smile of a lady who made it work!

Obviously, I had some shopping to do.

I first had it in my mind that I would do a 70’s inspired denim skirt, maybe a Miette or something similar. But for some reason Britex had next to nothing in stock in their denim collection and time was of the essence. And heck, this was my excuse to experiment with color and prints! I kept searching the shelves and kept landing on the same fabric over and over.

Oonapalooza FabricOrange? Oh no, Eileen. You don’t do orange.

So I would go up and down the stairs, exploring the four floors at Britex, messing up the fabric bolts and sighing heavily. Then I’d come back to my tangerine dream.

Orange? Oh no, Eileen. You don’t do orange………but wait, what was Gillian’s advice again? Oh yes, to imagine Oona’s voice urging us on. So when I said “I don’t do orange” I heard a whisper from across the continent….”Oh yes you do!!!”

OonapaloozaI got it home and fretted about what to make. I was shocked that my husband approved of the print but when I told him my ideas of either a skirt or a dress his hat was thrown mightily into the skirt ring. “That would be a little too much on a dress”, he suggested.

Oh. Would it now? Are you sure it wouldn’t be just bold enough for Oonapalooza?!!! And so, a dress was born.

Oonapalooza
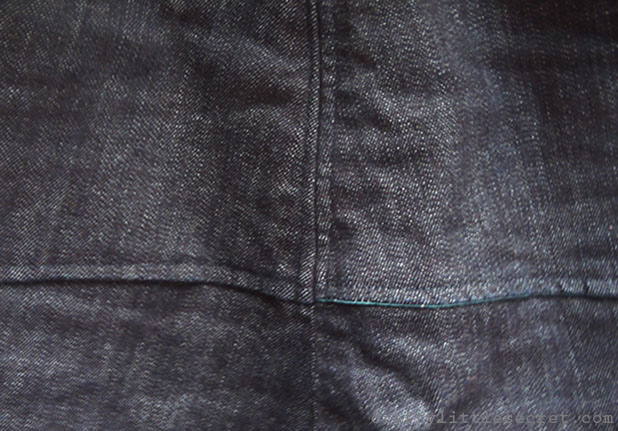
Believe it or not, this is actual the same pattern as my tie-dye maxi (a dress that Oona herself had emphatically supported), Vogue 8469. But in the spirit of fearlessness I decided to tackle my first ever major pattern alterations.

I did a full bust adjustment adding 2″ total, then altered the back piece to meet up with the now lengthened front bodice. Since I had the bare minimum amount of fabric to squeak this dress out I made a muslin first and found that the neckline and shoulder straps were a bit heavier than I’d wanted so I narrowed the straps and dropped the neckline by about an inch. I also added a random dart to close up the gaping armscye.

Oonapalooza: Tangerine DreamAnd for some strange reason I decided to lower the back neckline to that exact point on the back that you Just. Can’t. Reach. This dress is nigh impossible for me to zip on and off by myself, folks. Also, it’s not totally evident in this photo but there’s a bit of weird sagging happening on either side of the zipper. I’m thinking about dropping this into a V and lowering it by a couple inches. Especially since I already perfectly placed the neckline so that my big ugly back scar is visible anyway.

Oonapalooza: Tangerine DreamAnd I glossed over it a bit there, kids, but can we just pause for a moment and focus on how proud of myself I am for the bodice alterations! Baby fits like a glove now! As a busty lady, it can be tough to find clothes that fit over the girls but still hug your rib cage where it should and if one isn’t careful, one turns into a bit of a tube. With this dress, there is no mistaking the clear distinction between bust and waist. Heck, with the gathered skirt it even gives me a wee bit o’ hip!

My only regret with the dress that I will have to figure out some way to fix is that I managed to botch attaching the lining on one side of the bodice front, resulting in some serious twisty gapage.

Oonapalooza: Tangerine DreamI hand stitched it down which helped a little but there’s still definitely something wonky happening there. I just don’t, at this moment, have the energy to rip so much out. Especially since I chose the worst ever most slippery scrap bits for the lining.

Oonapalooza: Tangerine DreamSo there you have it kids. My answer to the question; What would Oona do?

Summer Night Lights Geranium Dress

Geranium numero deux.

Crafty Little Secret - Summer Night Lights, Geranium Dress - craftylittlesecret.comThis one is a surprise gift for a friend’s little girl. I’ll be visiting next month and staying with them for a few days so I thought it would be a nice way to say ‘Thanks’. I went pretty simple on this one: simple neckline, no sleeves. Though I did add some piping to give a little separation to the bodice. 

Crafty Little Secret - Summer Night Lights, Geranium Dress - craftylittlesecret.comI actually made the piping myself and it was my first time doing so! I figured it would be too much of a pain in the butt to find matching piping so I just went ahead and cut about an inch and a half off the bottom of some leftover fabric and sewed up my own. It did end up getting a little wrinkled and bunched up in spots, I think either because I didn’t stitch tightly enough against the piping innards or because I improvised the innards (some of it was actually piping cord and some of it was just some elastic cord I had lying around that was about the same diameter). I probably should have exercised a little patience and watched a tutorial or two, but all in all I think it turned out pretty well.

Crafty Little Secret - Summer Night Lights, Geranium Dress - craftylittlesecret.comI was taking forever trying to decide which fabric to buy (seriously consider this Fantasy Forest print from Michael Miller) and when I showed my husband the options he was like, “Pfft. No contest.” So I went with this Summer Night Lights print by Michael Miller. The fabric was a double-edged panel which was great because I only had to buy 1 yard of fabric total to sew this dress up in size 2T.

Crafty Little Secret - Summer Night Lights, Geranium Dress - craftylittlesecret.comAs with the last time I made the Geranium dress, since this was for a gift I wanted to finish it nicely. I also wanted to keep it a nice, cool summer dress and didn’t want to line it. Instead, I opted to finish the seam allowances with ribbon, a first for me!Crafty Little Secret - Summer Night Lights, Geranium Dress - craftylittlesecret.comI’ve always admired how lovely finished seams look on other people’s projects and I gotta tell ya, I think it’s looking pretty slick here too. Maybe I’ll start finishing more of my projects this way.

Crafty Little Secret - Summer Night Lights, Geranium Dress - craftylittlesecret.comI opted to use pink buttons on the back closure because I thought it would nicely highlight the pink flowers in the bottom border print. Originally I wanted the buttons to be little pink flowers but they were all sold out of the ones I wanted at the fabric store and I’m far too impatient to look elsewhere!

Crafty Little Secret - Summer Night Lights, Geranium Dress - craftylittlesecret.com

Fabric: Michael Miller’s Wee Wander Summer Night Lights, Double Border Twilight
S
ource: Fabric.com
Yardage: 1 yard
Pattern: Made By Rae, Geranium Dress