Author Archives: missphd

Upcoming: Trip to NYC

I’ve just booked a last minute trip to visit some friends in NYC in a couple weeks! I’ll have a couple days to entertain myself and was just wondering if anyone out there is familiar with NYC fabric stores and can recommend a shop or two to check out?

I know of Mood and found an article online that also recommended B&J Fabrics, Rosen & Chaddick Fabrics, Brooklyn General and Zarin Fabrics. Anyone been to these shops or have any hidden gem ideas? I’m not 100% sure what parts of the city I’ll be getting to but likely only Manhattan and Brooklyn. While in Manhattan I know that I’ll be staying a couple days in Soho and a couple days on the Upper East Side (around Rockefeller University).

Any other non-fabric related “must see” suggestions for me to check out while I’m there? I’ve been to New York twice before so I’ve done some big tourist things like go to the Park, the Natural History Museum and Times Square. Maybe a cool flea market or something?

I’m so excited to have a little last minute trip to look forward to! I’m just hoping the East Coast is finally done with all the weather they’ve been having. I was always a wimp about the cold but living in California has absolutely ruined me now and I no longer have any cute winter wear. Just dumpy ski jackets and…..functional….winter boots.

Yay! Spring (I hope) in New York!!!

Hot Air Balloon Themed Baby Shower Gifts

For someone who doesn’t have kids I sure spend a lot of time sewing for ’em! I actually really enjoy it. The projects are so small they are easy to finish before I got bored. Most of my friends who’ve had kids live back home in Canada so I usually just make my felt embroidered onesies that are easy to mail back home. But now some of my city friends are pregnant and I’ve gone a little crazy sewing up a hot air balloon themed baby shower gift! Hot air balloon DIY baby shower gift The hot air balloons are a totally random theme and I hadn’t meant to go crazy with them, but I just kept sewing! See, it started with the quilt. I was hunting around for a cute gender neutral fabric bundle and fell in love with the Blown Away collection by Josephine Kimberling. blown away fabric bundle I thought the hot air balloon print was the cutest and used that as the backing for the quilt I made, then had a bunch left over. So then I made a onesie to match. And then I thought how perfectly the green matched some left over flannel from my Halloween costume and decided to make some burp cloths. hot air balloon baby onesieTo make the hot air balloon applique I used the same technique I used when I made plaid elbow patches for my husband’s sweater. It looked a little plain so I embroidered some happy puffy clouds around the balloon to add a some interest. hot air balloon baby onesie detailThe burp cloths are just ~18″x25″ pieces of flannel with a strip of the balloon fabric sewn across the end for some detail. From what I’ve read, people seem to like flannel for burp cloths because it stays in place and is more absorbent than something like quilting cotton. hot air balloon DIY burp cloth I caught myself getting a bit carried away with these. As I was thinking about making some binding to go all the way around the cloth I remembered; I am sewing something whose sole purpose is to be barfed on. So I reined it in a little and contented myself instead with a nice neat double turned hem all the way around. Hot air balloon baby quilt frontIn my humble opinion, the quilt is the star of this baby bundle! It is my second quilt but my first was a t-shirt quilt. Sewing quilts with actual quilting fabric is soooooo much easier than with knits! I knew I didn’t want a pattern that was too finnicky so I chose this pattern from Two Little Banshees and it came together in two days – one day to cut and sew and one day to bind and quilt! To do the binding I pieced together leftover bits from the quilt front and followed this tutorial for making an invisible joint and mitered corners. It was a really helpful video! hot air balloon baby quilt detail I opted for super simple quilting and only had to unpick one extremely wonky row of stitches that was over two inches off from one side of the quilt to the other! I think you can see the quilting better on the back; hot air balloon baby quilt backI hope my friends like hot air balloons!!!!!!!!!

Tutorial: Twin Needle Sewing

Tutorial: Twin Needle SewingEver wonder how that perfect double row of stitching at the bottom of t-shirts is achieved? Well….it’s probably done with some automated industrial machine. But you can achieve that look yourself with just one special tool……a twin needle!

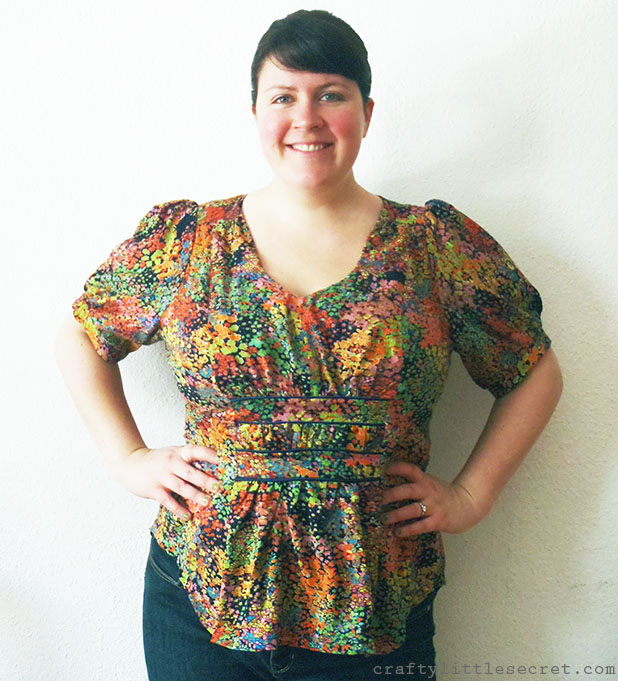
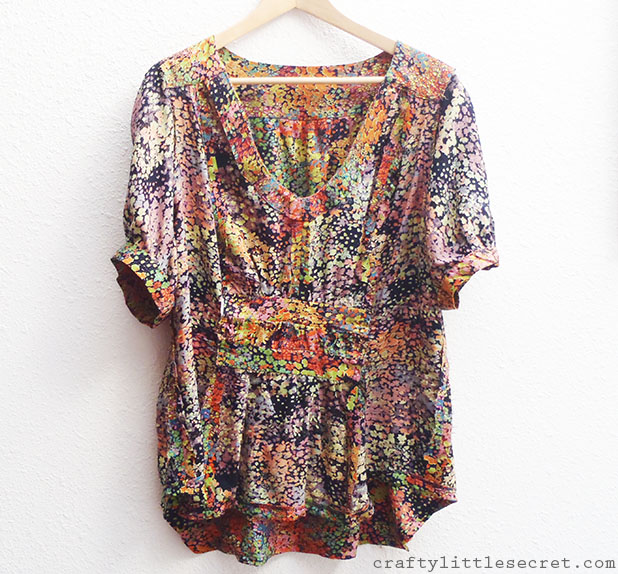
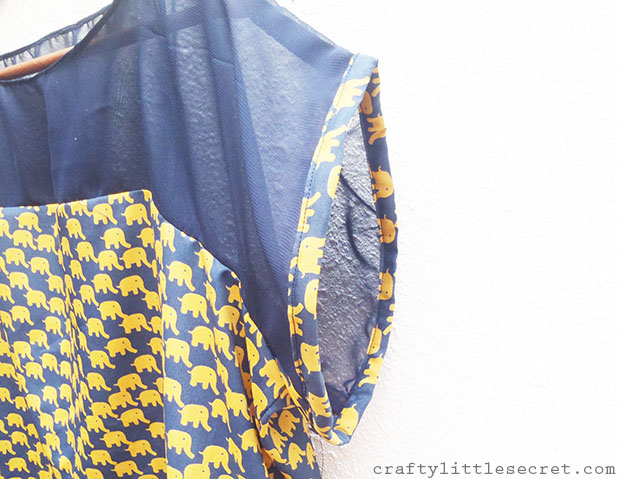
I was a little bit intimidated to try sewing with a twin needle but with a grand total investment of $3.49, I figured it was worth giving it a go. The first time I tried it out was on the hem for the Vogue shirt in my last post and, uh-oh folks, I’m addicted!

Twin needles can fit pretty much any machine and are threaded up exactly how you’d thread a single needle. Some machines actually have a second spool holder and I suspect that fancy machines with tons of embroidery and decorative stitch options are designed to accommodate them. My machine is neither of these things. 

twin needle thread setup
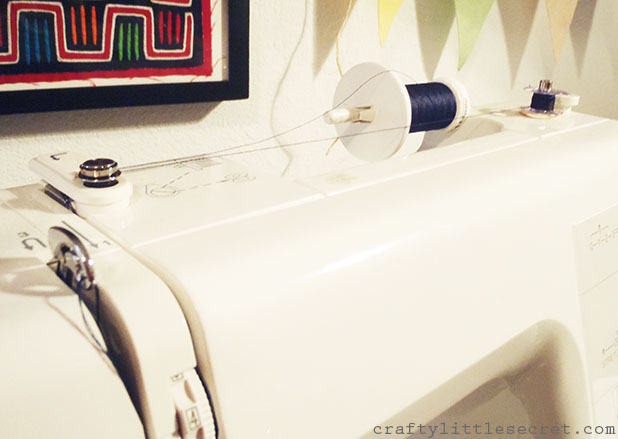
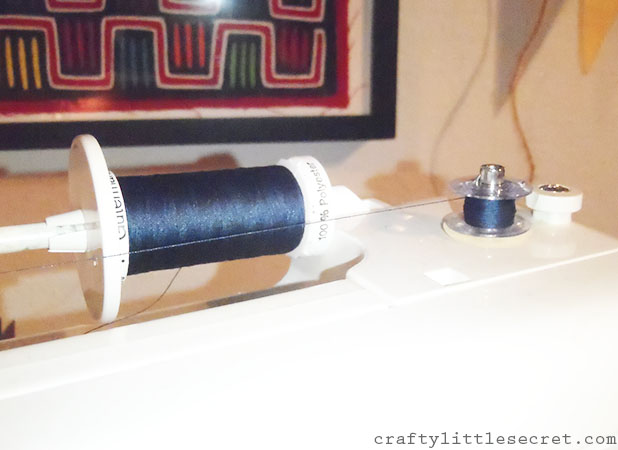
If, like me, your machine isn’t setup with two spool holders, just make a bobbin and thread your machine from the spool holder and the bobbin holder. 

twin needle threadingRun the thread from your main spool and your bobbin together, exactly the same as you would for a single needle just with two threads instead of one!

twin needle sewing

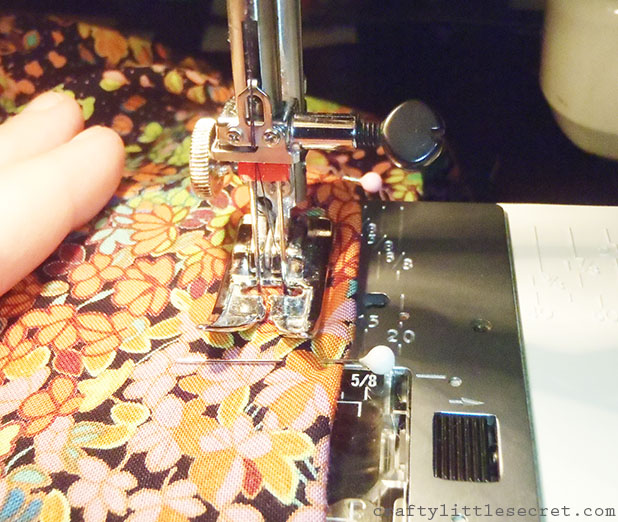
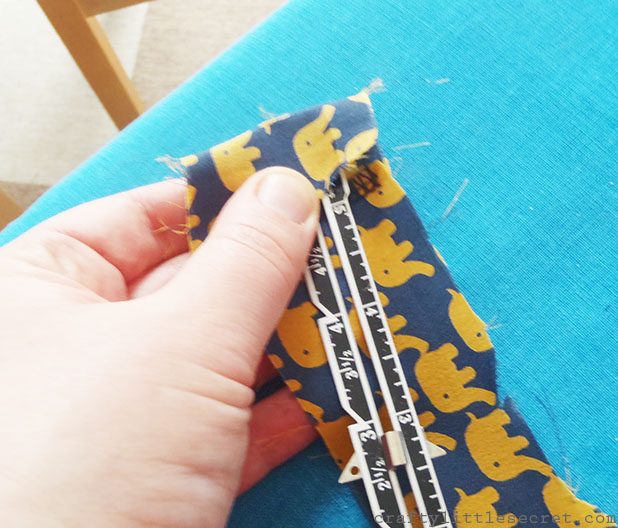
It’s a little hard to see the two threads here, but if you look at the red at the top of the needle, you can see the two threads coming through the machine together then diverging and each threading a separate needle.

Separate the threads when you get to the needle and thread each needle with a single thread. The bobbin will pick up both threads, just sew as you normally would!!

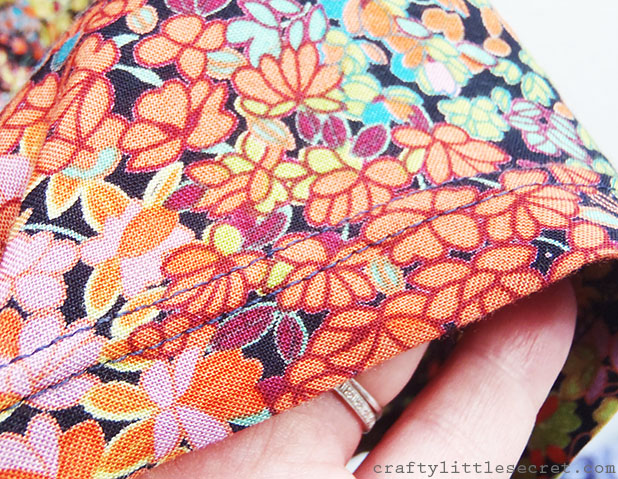
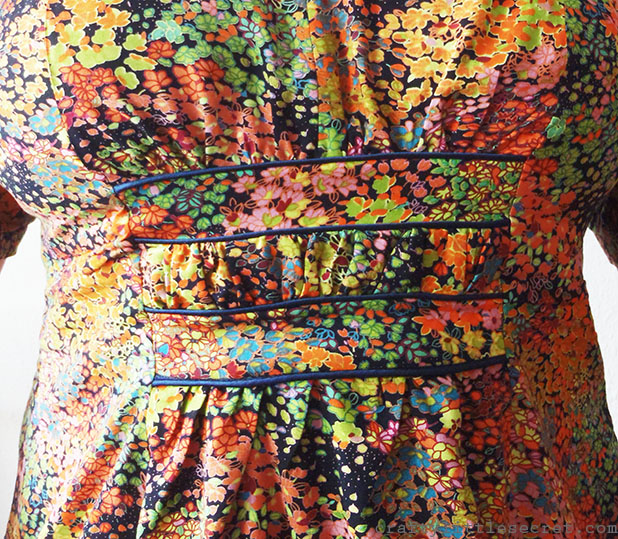
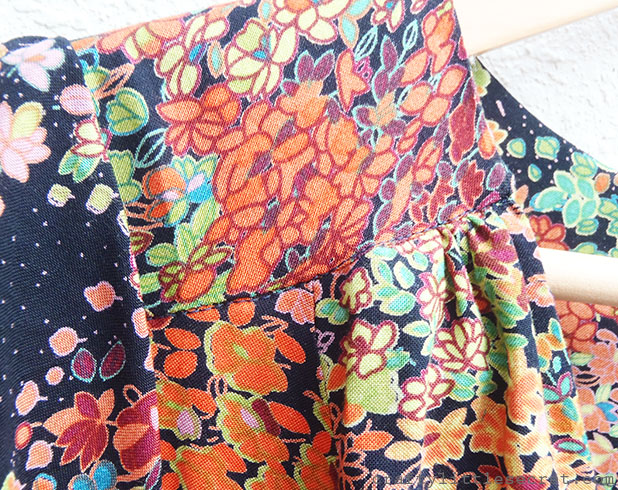
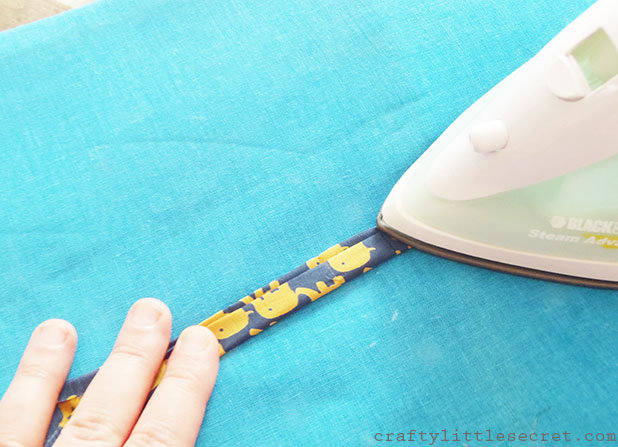
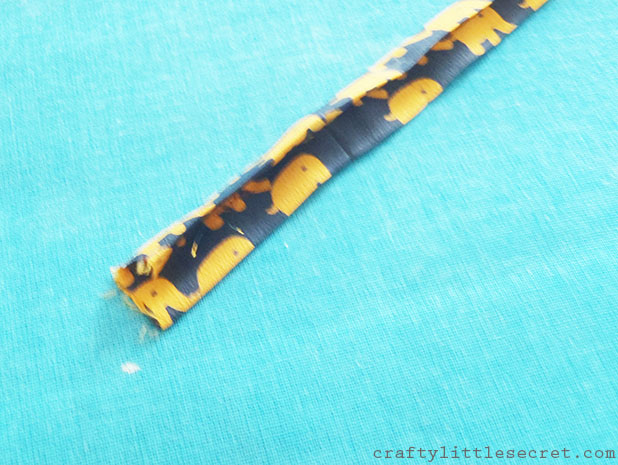
And just that simply, friends, you too can have a pro-looking hem on your garments!

Twin needle hem

Look at those two perfectly parallel stitched lines! Ooooooh! Aaaaaaaah!

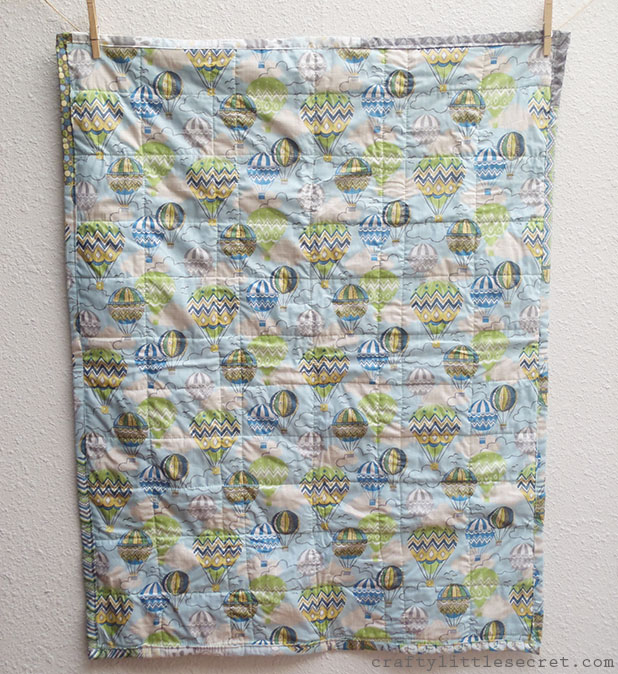
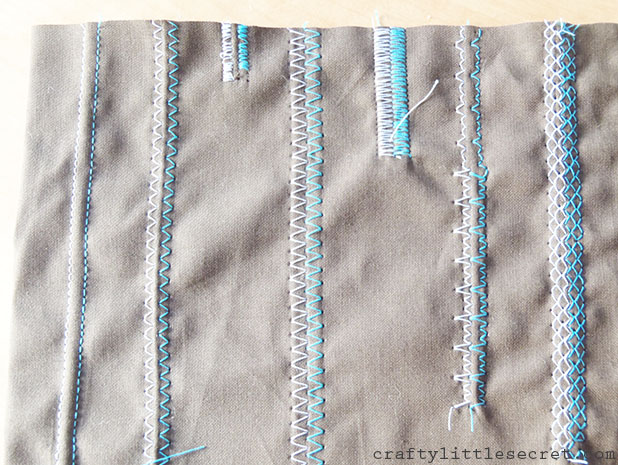
But as I said at the beginning, I’m addicted! So of course I didn’t stop with a hem. I played around with different thread colors and made a little quilt sampler.

Twin needle quilting
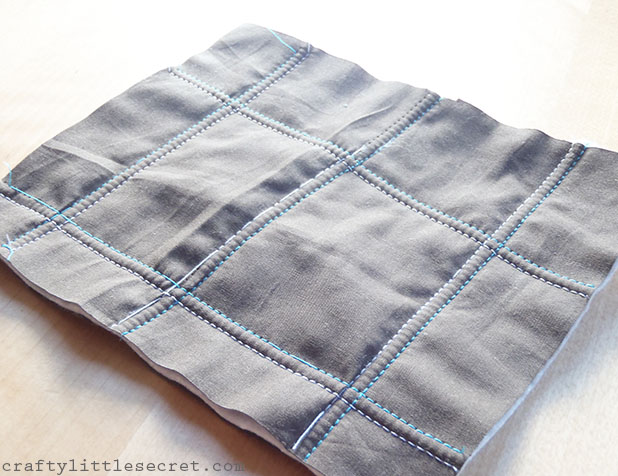
How cute would this quilting be on a pillow sham? One little side note here. See the white thread in the middle row of stitches? How it breaks off and skips stitches all over the place? Yeah. That’s what happens when you use really cheap thread, so buy nice thread people! I also found with my machine, maybe because it’s not meant for the twin needle, that it would occasionally skip stitches when I sewed too quickly (that’s what happened to the blue stitches in the foreground). Slow and steady wins the race folks…..or at least sews the neater line.

The straight stitches looked so cute I was inspired to play around with all my machine’s decorative stitch options (which are pretty limited, I have a very basic machine) and sewed up a sampler.

Twin needle sampler 1

Twin needle sampler 2
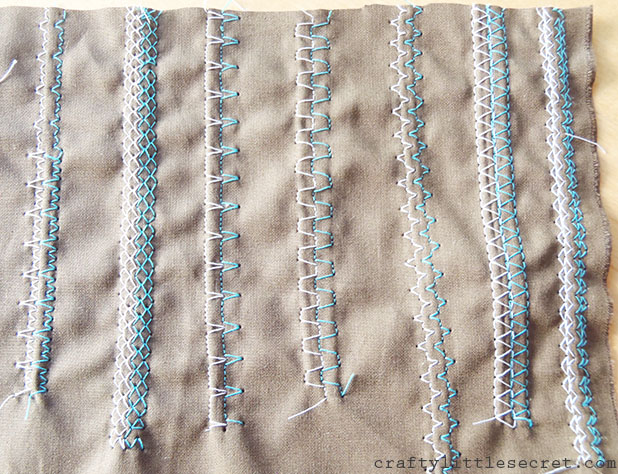
You can play around with stitch widths and lengths to get the pattern and spacing you want!

One thing I want to point out here is to watch your width when sewing with a twin needle. Your machine’s width settings are designed for a single needle, if you’re using a double you won’t be able to stitch as wide as when you use a single. For instance, my machine normally goes to a width of 6.5, but with the twin needle the highest I could go on the zigzag stitches was 5. 

The twin needles also come in different widths; 2, 4 or 6. The numbers correspond to how far apart the needles are from each other. Keep in mind when choosing needles that the widest needle size you can choose corresponds to the widest width setting on your machine. Since my machine goes up to 6.5 I can go up to a 6 in the twin needles, but if your machine doesn’t go up to a width of 6 you’d better stick with a 4 in the twin needles. Also bear in mind that the more separation you go with in your twin needles, the less you’ll be able to play with zigzag and decorative stitches. The needles need space to go side-to-side with a zigzag stitch so if you max out on your needle size, you won’t have any space left to move side-to-side.

And lastly, the backside. This is the one place where the twin needle is a little less than spectacular on my machine. 

Twin needle back
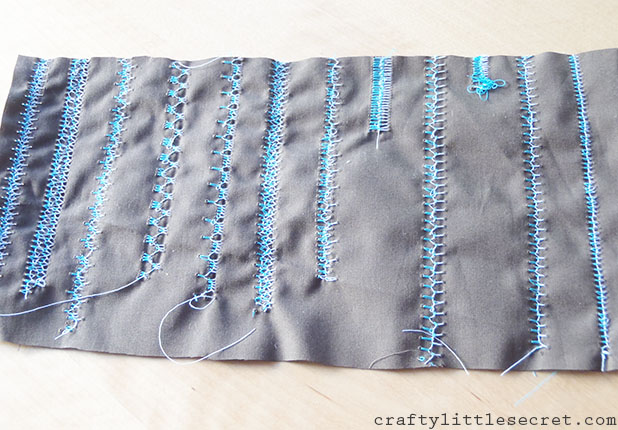
Try as I might, I could not find a tension adjustment that made a nice neat back. Maybe this is as good as it gets for everyone? I dunno. I read that sometimes making a minor adjustment to the bobbin tension can help a lot but I’m not about to starting messing around with that. Especially on my old machine that hasn’t been tuned up in….oh…..ever.

So there you have it. Twin needle sewing. Try it! You’ll like it.


Vogue Pattern V1152

I made another shirt! Some of you might remember when I made this red and white wearable muslin, and now I’ve finally finished the real deal shirt.

v1152 sewing pattern frontThis blouse is a shortened version of the Vogue dress pattern V1152 made in a super soft I dunno what….poly/cotton, probably? I was surprised when I finished this shirt because when I bought the fabric and as it was coming together I was sure that the print was mostly navy blue with some bright flowers splashed across it. Now that it’s finished I can clearly see that the navy blue barely shows at all!!! (And in all the photos it actually looks black. But I swear it’s blue).

After making the muslin I brought the neckline up a full 3.5 inches! It’s definitely way better, but surprisingly I think I’d still need to wear a camisole under it, if only to prevent gaping when I lean over.

v1152 sewing pattern backI also took a bit out of the front side panels along the princess seams. Even with taking it in a few inches though, I still opted to take the side zipper out. The elastic back and enormous sleeves/armholes made it easy enough to pull over my head and my not-so-awesome zipper skills made the zipper look just a little too obvious.

v1152 side hemThe shirt has a curved hemline and I tried really hard to keep it from going all wobbly but I had a little trouble. I got the curve above my hip ok (once I ironed it out), but I feel like the lower point as it transitions into the front ended up too sharp.

v1152 hem detail

I had looked up online the secret to making a curved hem and tried stay-stitching it before I sewed it, but it didn’t help. Oh well!

I’m really pleased with how the front detail worked out though. This was my first time doing piping and I think it turned out lovely! I used my zipper foot to sew as closely in to the piping as possible (it also turned out a lot more even and less wonky than in my muslin).

v1152 front panel detail


I didn’t worry about making pretty seams with this shirt. The fabric doesn’t seem to fray much and it was a more complicated pattern. I thought if I started messing around with French seams I would probably just mess it up.

v1152 insideThe pattern instructions suggested a lot of hand sewing – all around the yoke, the sleeve cuffs and the front panel. I didn’t feel like doing that. So wherever I could I just did some top stitching in the ditch instead.

The front shoulder is, I think, the worst seam and the stitching is still barely noticeable. I’m all for quality sewing but why make life harder than it needs to be?

v1152 front yoke seamv1152 seam detail sleeveI did however, manage a little hand stitching on the front panel and to tack down the neckline facing.

v1152 seam detail front panel

v1152 seam detail facingI’m going to definitely hold onto this pattern, I think it would be great as the dress it is supposed to be. Actually, I wish I had enough of this fabric to make a dress!

v1152 sewing pattern

v1152 pattern frontTa-daaaaaaaaaaaaaaaaaaaaaaaa!!


Upcycled Whale Plushie

I made a whale!

I’m not really sure why. Or what I’m going to do with it. But you can make one too! I followed this fabulous tutorial from Valaan Villapaita. It’s a Finnish blog and when I first saw this whale plushie popping up all over Pinterest the tutorial wasn’t in English (though the pictures are detailed enough that it doesn’t really matter), but now the author has translated it. Pictures and instructions – how could I not sew the whale?!

Jean whale

Jeans whale plushie

jean whale plushie

Tutorial: How to Make Bias Tape

I just want to take a minute to thank Jillian of Refashionista for featuring my Ele-Fun Refashion on her blog today! I love her blog, her creative refashions, and her conscientious approach to fashion and it was so amazing to see my very own re-refashion on Refashionista (that’s a lot of “refashion”)!

I can tell from my stats that many of you are joining me for the first time from her blog – Welcome!!! To help orient you and give you an idea of what I do here, I thought I’d share a link to my “Best of 2013” blog, so you can see some of my favorite projects and what I’m planning to do this year. Check it out here. And this is actually a good day to join me because this is a tutorial based on my elephant skirt refashion.

Ok. On to the tutorial. Bias tape is a folded strip of fabric that’s been cut on the bias and is used to add a decorative trim or to help finish edges like a neckline or armhole. When fabric is cut on the bias, it means that it is cut on an angle across the grain line.

Bias Tape DiagramBias tape can bend with curved shapes (like armholes) and stay smooth, where tape not cut on the bias would go all wonky. Technically, the tape I made for trim on the sleeves of my elephant top isn’t bias tape because I cut it on the grain, not on the bias (I din’t bother because the sleeve wasn’t a curved shape).

Here is a great tutorial on how to cut the strips to make your bias tape using just a 10″ square of fabric.

Once you’ve got your strips, making bias tape is a cinch if you’ve got a bias tape maker. You can find fancy schmancy ones that heat and press the tape as it moves through the machine but in my humble opinion, you don’t need it. All you need is one of these simple bias tape makers;

Bias Tape Maker

I got these for Christmas and they cost less than $10 each! Why spend $50 when you don’t need to??

Feed your strips of fabric into the large open at the back of the bias tape maker. Especially with flimsy fabric like mine, it can be really difficult to get it fed through the machine, so I always use something like a hem ruler to push it through.

bias tape maker rulerbias tape maker loadingAs the tape comes out the other side, the edges will be folded in.

bias tape tutorial

making bias tapeIf you look at bias tape that you’ve bought from the store, you’ll see that the edges aren’t quite folded in evenly. One edge is narrower than the other.

store bought bias tape

Can you see that one side is less thick than the other?

When making your own bias tape, you can adjust the widths of the folded edges by how you feed it through the mechanism. As the folded tape comes out, I press it using my iron and gently pull the bias tape maker.

tutorial bias tapeSee why I say you don’t need the fancy schmancy bias tape maker? It’s so easy to just plop your iron down as you pull it through and your wallet stays about $45 heavier!

Once you’ve got your strip with the two long edges folded and pressed, you just need to fold it in half lengthways and press it again.

bias tape ironEt voila! You’ve got homemade bias tape that perfectly matches your project!!

bias tape doneThere are so many fantastic tutorials online for attaching bias tape, that I decided not to make another and instead to direct to a couple that shows different ways you can use bias tape; either visible, or not, (also these two on knits here and here).

So go ahead, get crazy with your bad bias tape self!


Ele-Fun Refashion (And Blue February Sew Along)!

So I have this skirt that I never wear but won’t throw away because the fabric is just so cute!

Before Refashion Skirt

Look how happy I am to be wearing my skirt!

It’s comfy and a nice length but really, really hard to find tops to pair with it. I have both mustard yellow and navy tights that look quite adorable with it but have never been able to find the right top. And so it sits, languishing in my wardrobe, tiny little elephant eyes forlornly begging to see the light….

ModCloth EleFun in the Sun Dress printWell little elephants, your day has come because I have decided to kill two birds with one stone; make a refashion, and participate in my first ever sew along! This month is Blue February which was the final push I needed to actually get started on this project!

Truth be told though, this skirt is actually already a refashion of a dress I bought a couple years ago that was just nowhere near fitting around my bust. But those darn elephants implored “You can find something to make with us!”. Here’s the original dress from ModCloth;

ModCloth EleFun in the Sun Dress

Truth be told I think the original dress was the cutest variation. Sigh…..if only it had fit!

So I guess this is really a refashion of a refashion!

Anyhoo, I started by ripping out the zipper I had carefully sewn into the skirt and removing the waistband (which I saved to use as bias tape later!).

Stitch RippingI figured that if I made the skirt into a top it would be way easier to wear because it would look great with a pair of jeans. Easy peasy!

The first time I refashioned the dress into the skirt do you think I saved any of that extra fabric? Nope! So I only had what was in the skirt and unfortunately, it wasn’t enough to cover my shoulders and my tummy at the same time (something I consider a minimum criteria for shirts these days). I went out and bought myself a half yard of navy chiffon for $3 to create a sheer detail across the shoulders of the top I was making.

I used the yoke from a pattern with a nice neckline (my favorite Mathilde blouse), altered it (somewhat successfully) to include sleeves, and used that to make the front and back sheer portion of my new top.

Refashion arm detail

Remember that waistband I saved? I used it to make bias tape to add a fun sleeve detail. Well actually, it wasn’t cut on the bias but it was folded and attached like bias tape. So what is it? Just tape? Hem tape? Oh the things I have to learn…

Refashion arm detailThis was my first time working with chiffon and boy oh boy does it fray, so there is a rolled hem under the bias tape to try to keep everything together. Likewise, all the seams are French seams. This also helps keep things looking pretty since the top is sheer. You can sorta see the French shoulder seem in the photo above and here is a picture of the armpit and back seams.

French seamsI toyed with the idea of putting the elephant trim around the neckline too but thought it would be too much. So instead I tried another first – my first rolled hem! Or rather, I watched YouTube videos about how to make a rolled hem and realized I would need to buy a special foot for my machine so then I just kinda did my own thing. But it turned out pretty well and hopefully if I wash it really carefully the fraying will keep to a minimum.

Rolled hem detailI’m pretty proud of myself for all the first with this shirt;
– first Sew Along
– first refashion
– first time sewing chiffon
– first (sorta) rolled hem

Elephant shirt refashionIf you exclude the price of the original dress (which I do because I spent that money like three years ago), I spent a grand total of $3 and a couple of hours to have this completely adorable and completely wearable new shirt. Totally worth it in my book!

Before and after


Crafterall Papercut Map Art

My brother and sister-in-law gave my husband and I some beautiful artwork for our wedding and we’ve finally got it up on the wall so I thought I’d share it here.

Crafterall map artThese beautiful layered papercut maps are from the Crafterall Etsy shop and my family knew that I had been drooling over them for quite some time. Imagine my delight when we got a set of our very own!

The map on the left is the San Francisco Bay Area, where we met and currently live, and the map on the right shows the San Juan Islands off the coast off Washington, where we got married (we had the ceremony on Jones Island).

Map Art San Juan IslandsWe briefly toyed with the idea of hanging this art in our living/dining room to have it out where people can see it, but look how perfectly it goes with the origami swallow mobile I put up in our bedroom! How could we possibly hang it anywhere else??

Crafterall San Francisco map

Also pictured here are the adorable anchor pillow shams a friend gave us for Christmas

Now all I have to do is figure out what to do with the vast expanse of white space above our bed! Living in earthquake territory, we’re nervous about hanging anything heavy or framed in glass. I’ve suggested a big beautiful tapestry but my husband is lukewarm on that idea. I’ve been wanting to make us a big Japanese shibori-inspired quilt in shades of white and indigo, maybe if I ever actually get around to doing that we can hang it on that wall…

You should check out Crafterall, there are tons of other beautiful maps available in all different colors (I love the map of the Great Lakes too)! You can get custom work done too but, according to a bulletin on her shop, she’s got custom work keeping her busy through June of this year! Way to go!


Ben’s Birthday Sweater!

My adorable little nephew had his first birthday this weekend and while I didn’t get his present mailed in time, I at least finished it in time for his birthday!

Paton's Hooded Cardigan knitting patternI really wanted to make him a little hoodie so I chose the free Paton’s Hooded Cardigan pattern in size 12-18 mo. (fingers crossed that it fits him!). Clearly, however,  this sweater does not have a hood. I ran out of yarn.

Paton's Hooded Cardigan knitting pattern size 12-18 moI was commissioned to make a sweater for my nephew by a friend of my brother’s who brought some amazing lamb’s wool back from Australia, so I only had a finite amount of yarn. It was hard to guess how much I’d need since I was altering the suggested color blocking and I think I made the arms too long. Oh well, it’s still pretty darn cute without the hood too.

Paton's Hooded Cardigan no hoodI carried the stripe along the chest and back but didn’t include it in the sleeves. I’d never knit this pattern before (and this is only my second sweater) so I wasn’t totally sure about the construction and how it would all come together. I figured if I did the stripe on the sleeves and it didn’t match up it would make the whole sweater look wonky so it was better to just leave it off.

Baby cardigan knitting patternI used Moda Vera Pure Wool 8 ply, the blue is colorway 47 and the teal is colorway 37. Do you think I would keep track of how much yarn I actually did use in case someone wanted to replicate this? No, of course not. I definitely don’t knit as much as I sew so remembering what details I should be tracking is a bit of a learning experience for me.

The collar was relatively easy to add, which was nice because I’d never made an alteration like that to a knitting pattern before (wipes brow with sigh of relief). I just followed the pattern and cast off the neckline as detailed in the pattern. Instead of adding a hood though, I counted the number of stitches around the neckline (I think I had 62), then I made a K1, P1 [repeat] rib that was 6 rows long and sewed it on.Paton's Hooded Cardigan baby knitting patternIn addition to the collar alteration, another first for me with this project was blocking! I wrapped a bulletin board in a towel to use as my base then spritzed the sweater with a bit of cool water and pinned it in place on the board. I probably should have blocked each piece individually before assembling the sweater, but I didn’t think of it then. So instead I blocked in two stages; the body of the sweater first, then the arms in a second step. The blocking definitely helped keep the collar from folding over and corrected some wonkiness along the button placket.

[ASIDE: All this knitting talk reminds me – you can find me on Ravelry as CraftyLilSecret].

Happy birthday Ben! Sorry your present is late, but something tells me you won’t hold it against me…..